When [Rodrigo Feliciano] realized that the reason his seven-segment LED wall clock wasn’t working was because the original TG1508D5V5 controller was fried, he had a decision to make. He could either chuck the whole thing, or put in the effort to reverse engineer how the displays were driven and replace the dead controller with something a bit more modern. Since you’re reading this post on Hackaday, we bet you can guess which route he decided to take.
If you happen to own the same model of clock as [Rodrigo], then you really lucked out. He’s done a fantastic job documenting how he swapped the original controller out for a Raspberry Pi Pico W, which not only let him bring the clock back to life, but let him add new capabilities such as automatic time setting via Network Time Protocol (NTP).
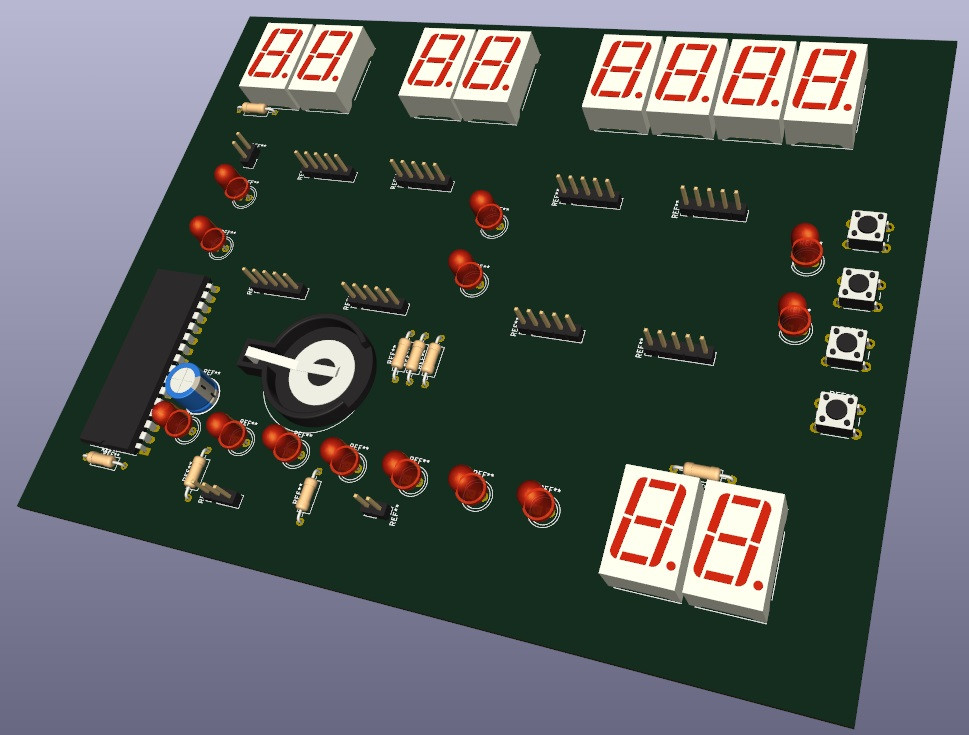 But even if you don’t have this particular clock there’s probably something you can learn from this project, as it’s a great example of practical reverse engineering. By loading a high-resolution image of the back of the PCB into KiCad, [Rodrigo] was able to place all the components into their correct positions and following traces to see what’s connected to what.
Pretty soon he not only had a 3D model of the clock’s PCB, but a schematic he could use to help wire in the Pi Pico. Admittedly this is a pretty straightforward PCB to try and reverse engineer, but hey, you have to start somewhere.
We had high hopes for KiCad’s image import feature when it was introduced, and it’s great to see real-world examples like this trickle in as more folks learn about it.
Continue reading “LED Wall Clock Gets Raspberry Pi Pico Upgrade”