If you are a glass-half-empty person, you’ll view Charter’s announcement that they will shutter their home security and smart home service on February 5th as another reason not to buy into closed-source IoT devices. If you are a glass-half-full person though, you’ll see the cable company’s announcement as a sign that a lot of Zigbee hardware will soon flood the surplus market. Ars Technica reports that after investigation it appears that some of the devices may connect to a standard Zigbee hub after a factory reset, but many others will definitely not.
As you might expect, users were less than thrilled. Especially those that shelled out thousands of dollars on sensors and cameras. This sort of thing might be expected if a company goes out of business, but Charter just doesn’t want to be in the home security business anymore.
When it comes to peer-to-peer file sharing protocols, BitTorrent is probably one of the best known. It requires a client implementing the program and a tracker to list files available to transfer and to find peer users to transfer those files. Developed in 2001, BitTorrent has since acquired more than a quarter billion users according to some estimates.
While most users choose to use existing clients, [Jesse Li] wanted to build one from scratch in Go, a programming language commonly used for its built-in concurrency features and simplicity compared to C.
Client-server versus peer-to-peer architecture
The first step for a client is finding peers to download files from. Trackers, web servers running over HTTP, serve as centralized locations for introducing peers to one another. Due to the centralization, the servers are at risk of being discovered and shut down if they facilitate illegal content exchange. Thus, making peer discovery a distributed process is a necessity for preventing trackers from following in the footsteps of the now-defunct TorrentSpy, Popcorn Time, and KickassTorrents.
The client starts off by reading a .torrent file, which describes the contents of the desired file and how to connect to a tracker. The information in the file includes the URL of the tracker, the creation time, and SHA-1 hashes of each piece, or a chunk of the file. One file can be made up of thousands of pieces – the client will need to download the pieces from peers, check the hashes against the torrent file, and finally assemble the pieces together to finally retrieve the file. For the implementation, [Jesse] chose to keep the structures in the Go program reasonably flat, separating application structs from serialization structs. Pieces are also separated into slices of hashes to more easily access individual hashes.
The bitfield explained as a coffee shop loyalty card.
Next, a GET request to an `announce` URL in the torrent file announces the presence of the client to peers and retrieves a response from the tracker with the list of peers. To start downloading pieces, the client starts a TCP connection with a peer, completes a two-way BitTorrent handshake, and exchanges messages to download pieces.
One interesting data structure exchanged in the messages is a bitfield, which acts as a byte array that checks which pieces a peer has. Bits are flipped when their respective piece’s status changes, acting somewhat like a loyalty card with stamps.
While talking to one peer may be straightforward, managing the concurrency of talking to multiple peers at once requires solving a classically Hard problem. [Jesse] implements this in Go by using channels as thread-safe queues, setting up two channels to assign work and collect downloaded pieces. Requests are later pipelined to increase throughput since network round-trips are expensive and sending blocks individually inefficient.
The full implementation is available on GitHub, and is easy enough to use as an alternative client or as a walkthrough if you’d prefer to build your own.
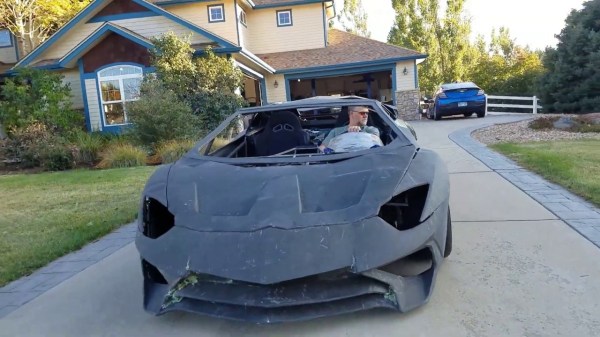
When you start sharing your projects with the world, you never know who might take notice. [Sterling Backus] and his son [Xander] have been building a functional Lamborghini Aventador look alike in their garage, and the real Lamborghini company caught wind of it and decided to turn it into an awesome Christmas ad.
Named the AXAS Interceptor by its creators, the car is built from scratch around a custom tubular space frame chassis. Most of the body panels are 3D printed and then skinned with carbon fibre, with a few sheet metal panels mixed in. The interior is mix of parts from other cars and aftermarket components, with 3D printing to pull everything together. The drivetrain consists of an engine from a Corvette, a transaxle from a Porsche 996, with the rest of the chassis components being either aftermarket or custom-fabricated pieces.
[Sterling] got an unexpectedcall from Lamborghini, and they arranged to secretly sneak a real Aventador into the garage in the dead of night to surprise the rest of the family, and let them borrow it for a few weeks. Lamborghini got some marketing out of it, which most people would probably agree is a pretty good deal. We would admit that we’re quite envious.
The car is driveable, but still many hours from being complete. [Sterling] admits that he is no car building professional, but we’re impressed by what he has been able to achieve so far with this ambitious project, and we’re looking forward to the finished product.
If you want to get your feet wet with your first project car, here’s how you pick one.
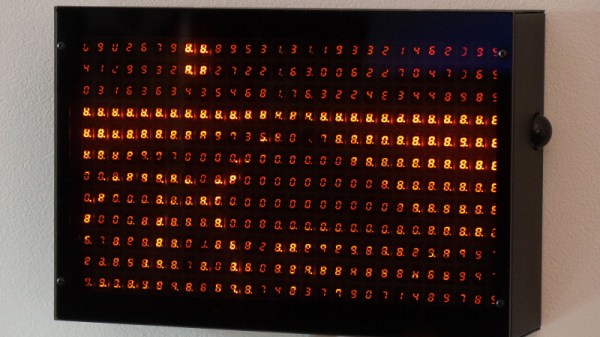
[Chris Combs] recently took the wraps off of an incredible art piece that he calls Road Aheadwhich uses 336 seven segment LED digits to create an absolutely gorgeous display. With a piece of smoked acrylic to slightly diffuse the orange glow of the LEDs, the end result has a distinctively retro look that we’d gladly spend all day staring at.
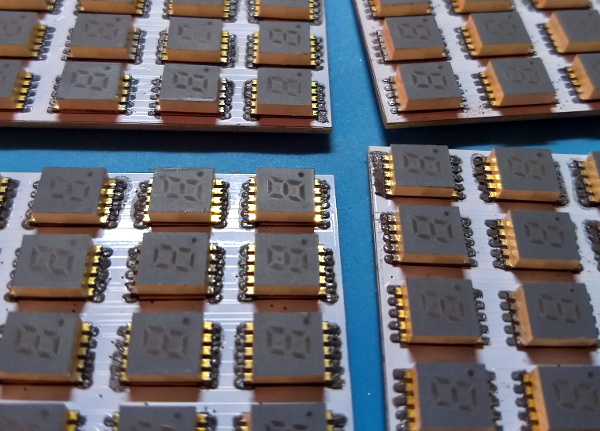
For those looking to dig a bit deeper, [Chris] has put together some very impressive documentation over on Hackaday.io that goes into plenty of detail on how he designed and built this beauty. From the design of the PCBs that carry all of the 0.3″ SMD displays to the custom software running on the Raspberry Pi 3 that powers it, there’s no technical stone left unturned.
According to the build log, this is the second version of the display. The first one was housed in a rather attractive wooden enclosure, but as [Chris] explains, that was precisely the problem. He wanted something that looked cold and unfeeling as the nearly 340 digits flashed away with potentially ominous intent. So he ditched the wooden case for a powder coated steel one that looks more like the front panel of a mainframe than something you’d pick up at the craft store.
Another interesting point explained in the write-up is how the Python software is designed to treat the hardware as a contiguous graphical display rather than just an array of independent digits. Grayscale images can be reproduced on the by using PWM to adjust the brightness of each segment’s corresponding “pixel”; though admittedly it takes a bit of imagination to see the intended image with a resolution this low.
This project reminds us of the incredible LED hexdump display we saw not that long ago, down to the PWM trickery for squeezing “graphics” out of these exceptionally non-graphical elements. With any luck, perhaps these are the opening shots in an arms race to see who can build the largest array of multi-segment LED displays.
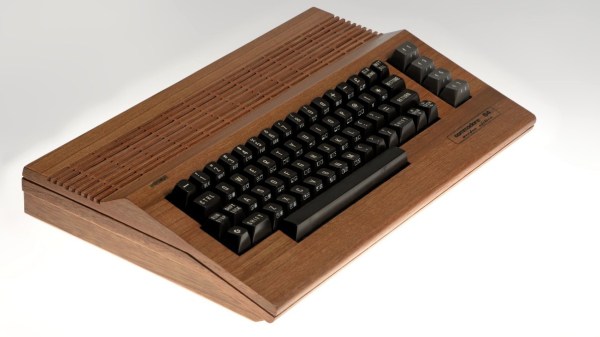
Most computer case modders take certain liberties with their builds, to express their creativity and push the state of the art. Some, however, seek to recreate the original in as detailed a way as possible while still being unique. This faithful reproduction of a Commodore 64C in wood is a great example of the latter approach.
[Atilla Meric]’s experience with model airplane building came into play when he decided to leap into this build. Being used to making small, thin pieces of wood even smaller and thinner proved valuable here, as did working from templates and getting complex shapes cut out cleanly. [Atilla] used a miniature table saw to rough cut his stock; the wood species may have been lost in the translation from Turkish but it appears to be some variety of oak. Detail cuts were done with knives, and everything was held together with glue. The painstaking effort that went into the air vents is amazing, and the fact that they exactly match the vents on the original injection-molded case is truly impressive. We also like the subtle detail of the slightly depressed area around the keyboard opening, just like the original, as well as the smooth curve at the front of the case to comfortably support the wrists. The cutouts for connectors and the labels are top-notch too.
We appreciate the craftsmanship that went into this case mod, and the time and effort [Atilla] put into the build are obvious. We’ve seen wooden computer case mods before, but this one really pushes all our buttons.
Remember those actions movies like The Fast and the Furious where cars are constantly getting smashed by fast flying bullets? What would it have taken to protect the vehicles from AK-47s? In [PrepTech]’s three-partDIY compositevehicle armor tutorial, he shows how he was able to make his own bulletproof armor from scratch. Even if you think the whole complete-collapse-of-civilization thing is a little far-fetched, you’ve got to admit that’s pretty cool.
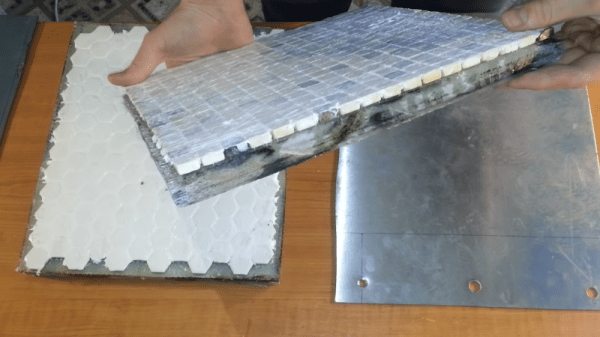
The first part deals with actually building the composite. He uses layers of stainless steel, ceramic mosaic tiles, and fiberglass, as well as epoxy resin in order to build the composite. The resin was chosen for its high three-dimensional cross-linked density, while the fiberglass happened to be the most affordable composite fabric. Given the nature of the tiny shards produced from cutting fiberglass, extreme care must be taken so that the shards don’t end up in your clothes or face afterwards. Wearing a respirator and gloves, as well as a protective outer layer, can help.
After laminating the fabric, it hardens to the point where individual strands become stiff. The next layer – the hard ceramic – works to deform and slow down projectiles, causing it to lose around 40% of its kinetic energy upon impact. He pipes silicone between the tiles to increase the flexibility. Rather than using one large tile, which can only stand one impact, [PrepTech] uses a mosaic of tiles, allowing multiple tiles to be hit without affecting the integrity of surrounding tiles. While industrial armor uses boron or silicon carbide, ceramic is significantly lower cost.
The stainless steel is sourced from a scrap junkyard and cut to fit the dimensions of the other tiles before being epoxied to the rest of the composite. The final result is allowed to sit for a week to allow the epoxy to fully harden before being subject to ballistics tests. The plate was penetrated by a survived shots from a Glock, Škorpion vz. 61, and AK-47, but was penetrated by the Dragunov sniper rifle. Increasing the depth of the stainless steel to at least a centimeter of ballistic grade steel may have helped protect the plate from higher calibers, but [PrepTech] explained that he wasn’t able to obtain the material in his country.
Nevertheless, the lower calibers were still unable to puncture even the steel, so unless you plan on testing out the plate on high caliber weapons, it’s certainly a success for low-cost defense tools.
An off-shoot of the infamous “How to Make (Almost) Anything” course at the Massachusetts Institute of Technology, “How to Grow (Almost) Anything” tackles the core concepts behind designing with biology – prototyping biomolecules, engineering biological computers, and 3D printing biomaterials. The material touches elements of synthetic biology, ethics of biotechnology, protein design, microfluidic fabrication, microbiome sequencing, CRISPR, and gene cloning.
In a similar fashion to the original HTMAA course, HTGAA works by introducing a new concept each week that builds up to a final project. Students learn about designing DNA experiments, using synthesized oligonucleotide primers to amplify a PCR product, testing the impact of genes on the production of lycopene in E coli., protein analysis and folding, isolating a microbiome colony from human skin and confining bacteria to image, printing 3D structures that contain living engineered bacteria, and using expansion microscopy (ExM) to visualize a mouse brain slice. The final projects run the gamut from creating a biocomputer in a cream to isolating yeast from bees.
Growing out from an initiative to create large communities around biotechnology research, the course requires minimal prior exposure to biology. By working directly with hands-on applications to biodesign concepts, students are able to direct apply their knowledge of theoretical biology concepts to real-world applications, making it an ideal springboard for bio-inspired DIY projects. Even though the syllabus isn’t fully available online, there’s a treasure trove of past projects to browse through for your next big inspiration.