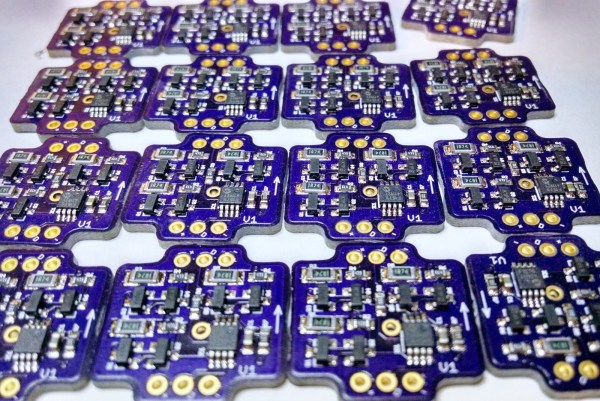
A collection of boards that make up the LED Jacket

A Very Bright LED Jacket

Last year, [Ytai] went to Burning Man for the first time. He was a bit inexperienced, and lacked the lumens to make him visible on the Playa. This year, he made up for it by building an extra bright LED Jacket.

The jacket consists of 48 LEDs, at 150 lumens each. Each RGB LED module was placed on its own PCB, and controlled by the tiny PIC12F1571 microcontroller. This microcontroller was a great fit since it has three PWM channels (one for each color) and costs 50 cents. Firmware on the PIC allows the boards to be daisy-chained together to reduce wiring. This was done by using a protocol similar to the popular WS2811 LEDs.

Assembling 50 of the boards presented a challenge. This was addressed by using surface mount components, a solder stencil from OSH Stencils, an electric skillet, and a good amount of patience. The final cost of each module was about $3.

With 50 of the boards assembled, a two layer jacket was sewn up. The electronics were sandwiched between these two fabric layers, which gave the jacket a clean look. A wrist mounted controller allows the wearer to select different patterns.

For a full rundown of the jacket, check out the video after the break.

Continue reading “A Very Bright LED Jacket”

Sewing Conductive Thread In Parallel Lines

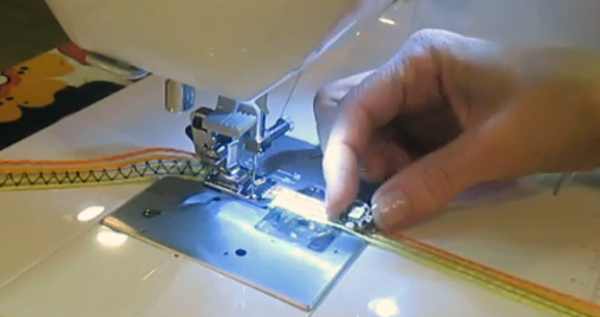
[Cynthia] has shared a great video of  machine sewing parallel lines of conductive thread onto ribbon using a cording foot which usually comes standard with most machines. This technique could be particularly useful when using addressable LEDs like a NeoPixel to get the ground, data, and positive lined up fairly accurately. Sewing the conductive thread onto ribbon also makes it a hell of a lot easier to attach to many garments or textiles,  and also makes it easier to replace or reuse.

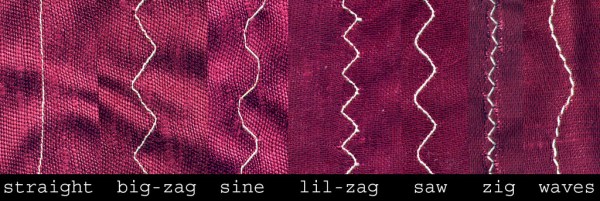
The method is pretty easy, essentially using the grooves in the cording foot to guide the conductive treads and ensuring even spacing. Two of the lines are sewn down approximately 3 mm apart using a zigzag stitch. The third line is sewn separately making sure the stitching doesn’t break the first two lines. In the video, a striped ribbon is used which has slight troughs that additionally helps the threads stay in place and the sewer to stay on target.

[Cynthia] of Cynthia Designs Studio has been experimenting with embedding electronics in textiles and has quite a few great videos that you can check out on the Cynthia Designs Studio YouTube channel.

We have seen a machine embroidered LED matrix and a hand sewn LED quilt here on Hackaday, but those who have tried know that conductive thread can be very tricky to work with and keep conductivity.  Do you have any tips or tricks for hand or machine sewing conductive thread? If so, please share in the comments below.

Continue reading “Sewing Conductive Thread In Parallel Lines”

Building A Better Sewing Machine

sewing

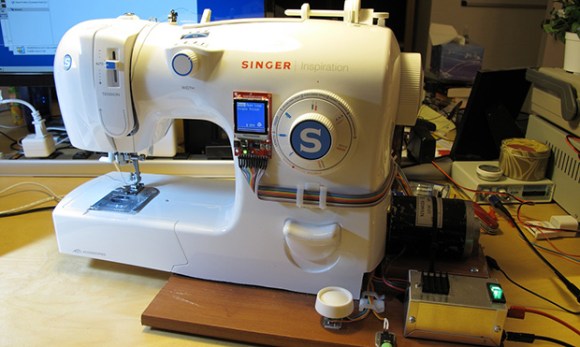
After making a few fabric RFID tags, [Micah] had a sewing machine sitting in her workshop completely unused. This was due at least in part to how crappy this entry-level sewing machine was; it stalled easily, unusable at low speeds, and noises like a robot with bronchitis. The solution, of course, was to replace the motor and add electronic control, turning a terrible sewing machine into one that should cost several hundred dollars more.

After some experimentations with an AC motor, [Micah] came upon a small DC motor. This, combined with an LMD18200 H-bridge, Propeller microcontroller, and a beefy power supply gave [Micah] enough torque to run the sewing machine without mechanical wheezing and grinding.

The new update to the motor allowed [Micah] several control modes for the machine, all controlled by the foot pedal: an open-loop mode is pretty much the same as the stock machine, a closed-loop mode keeps a constant RPM on the motor regardless of resistance. There are a few more interesting modes that moves the needle down when the pedal is released, perfect for detailed work.

A small addition to this project was an LCD attached to the front of the machine, allowing [Micah] to toggle modes without the microcontroller being connected to the computer.

Continue reading “Building A Better Sewing Machine”

A Custom Cooler, Sewing Not Required

soduh

When you go to the beach or on a camping trip this summer, notice how you pack your cooler. Your beverages already come in a box, yet you remove them and put them in a larger, insulated box. [Jason] thought it would be a great idea to just add insulation to a case of soda (or other beverages, we assume) and ended up making a custom soda cooler.

The fabrication of this cooler is actually pretty simple. A layer of flexible foam is sandwiched between two layers of waterproof vinyl with spray glue. After tracing out a pattern, [Jason] then cut this fabric into panels and glued them together into a soda box-sized cooler. Simple, elegant, and something even hackers that didn’t take home ec can put together in a few hours.

As an aside, we at Hackaday seem to forget the ‘softer’ builds of fabric, foam, and paper far too often. That doesn’t mean we eschew these projects; I have a barely post-war Singer 15 sewing machine right above my workbench. Send us a tip if you have one of these soft hacks. We’d love to see it.

Video of the build below.

Continue reading “A Custom Cooler, Sewing Not Required”

Fabricating Your Own Backpack Straps For Unorthodox Uses

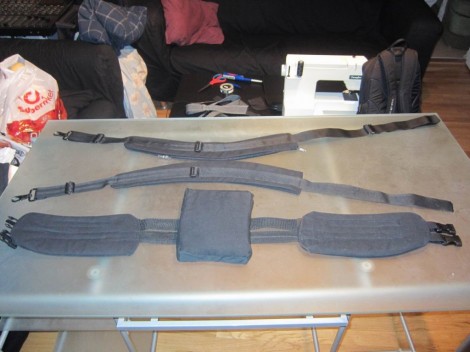
Back in the 1980’s there was a movie cliché that the person with the largest boombox on their shoulder was always the coolest. It’s obvious to us that [Tim Gremalm] thinks that’s silly. Why be uncomfortable carrying something like that on your shoulder when you can strap a much larger object to your back? He’s working on a mammoth speaker enclosure which can be carried around, but he needed a set of backpack straps to make it happen.

This thing is going to be adding some serious weight to his body, so he also whipped up the padded waist belt seen above. For fabric he reused an Ikea couch cover. The material is made to survive a lot of pulling and stretching. For padding he used what he calls ‘floor mop’. It looks like it might be microfiber mop cloth be we can’t really be sure. With ten layers of the mop encased in the couch cover he finish off each strap by sewing it to some nylon webbing.

After the break you can see a picture of [Tim] modelling the huge polycarbonate speaker enclosure for which these backpack and waist straps were made. This project has many posts associated with it so if you’re interested in seeing more you can use this project tag link.

Continue reading “Fabricating Your Own Backpack Straps For Unorthodox Uses”

Hackaday Links: July 25, 2012

Ever wonder what CPU dev boards look like?

In the realm of highly confidential hardware, it doesn’t get much more secret than upcoming CPUs coming out of Intel. Somehow, a few CPU dev boards wound up on eBay, and [Leon] was cool enough to save all the pictures (Polish, Google translation, or translate in the sidebar). There are a few ongoing auctions right now, but we’d settle for this LGA 1156 breakout board. So cool.

No, we’re not linking directly to the free stuff

TI is giving away a brushless motor controller powered by a Stellaris ARM processor. [Chris] says he’s ordering one to figure out how to make a Stellaris dev board out of the giveaway. This controller is designed for e-bikes, so at the very least we see a few ginormous UAVs in someone’s future.

More rocket stuff!

One of [Bill]’s older hacks was taking a CVS disposable digital camera (remember that?) and stuffing it into the nose code of an Estes D-powered rocket. There’s a ton of videos of the flights [Bill] put up on YouTube.

On another note, [CyberPunk] built a half-scale model of a swing-wing rocket launched glider (pics: 1, 2, 3, 4). He’s currently building the full-size version capable of carrying RC and video gear and wants some feedback.

So, CAD on a tablet?

[spuder] caught wind of a tablet-based engineering notebook a few people are working on. They’re looking for some feedback on their demo video. We think it’s cool – especially the ability to share stuff between devices – but CAD on a tablet makes us extremely skeptical. Tell them what you think; we’d love to see this make it to our phone.

Now if they only made one for editing WordPress posts….

Test-driven development just got cooler. Here’s a Tamagotchi for Eclipse that you ‘feed’ by going from red to green and refactoring your code. Be careful, because having the same code test as red twice will kill your little code ninja.

And now I’ll rant about you.

A few days ago, I posted [Becky Stern]’s light-up handlebars project, and one comment surprised me. Who says guys can’t sew? It’s time to confront the gender roles that show up whenever sewing is used in a project. I’m doing a tutorial on how to sew a parachute, but I need your help. It’ll be a two-parter: one on how to actually use a sewing machine, and another for how to make a ‘chute. Is there anything else you’d like to see?

Key-covered Textiles

[Karolina] has been hard at work adding a little flair to her bag. Well, a lot of flair actually. She rolled several keyboards worth of keys into one of the panels for this bag. She had seen the idea in a magazine and decided to give it a try. The secret is to use staples.

The first issues is gather enough keys, so if you give this a try make sure to let your friends know you’re looking for old keyboards. Next she wanted each of the keys to lay flat on the fabric panel, which meant cutting away the plastic pegs that extend past the edges of the key. From there [Karolina] laid out her design with each key face down. Notice how careful she was to make sure there were no gaps between them. Now it was time to link them all together. She used heavy-duty staples as connecting brackets. They were bent to provide a large gluing surface on the underside of the face of each key. With the staples in place, each can be sewn to the fabric with a loop of thread. Although she started the project in the fall she’s just now showing off the finished bag.