USB first hit the scene in the 1990s, and was intended to simplify connecting peripherals to PCs and eliminate the proliferation of various legacy interfaces. Over 20 years later, it’s not only achieved its initial goals, but become a de facto standard for charging and power supply for all manner of personal electronic gadgets. If you asked someone back in 1995 whether or not you could build a USB-powered soldering iron, they’d have politely asked you to leave the USB Implementers Forum. But times change, and Solder Ninja is just that!
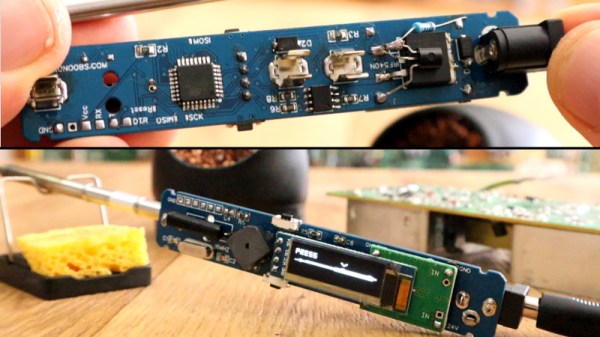
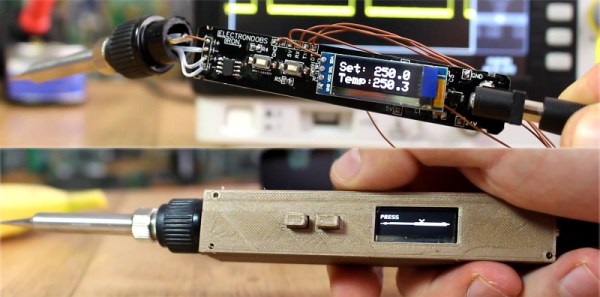
With a maximum power draw of 40 W, the Solder Ninja required careful design to ensure practicality. It supports a variety of USB power standards, including USB-BC 1.2, USB Quick Charge, and USB Power Delivery. This enables it to draw the large amounts of current required for the heating element. To make it easy to use with a variety of chargers out in the wild, it displays the current negotiated voltage and maximum current draw. This enables the user to understand the varying performance of the device, depending on the charger it’s plugged into.
Given the multitude of different USB power standards, we imagine [Nicolas] has the patience of a saint to perfect a project like this. We’ve seen similar builds before, too. Video after the break.