The bottom of the sea is a mysterious and inaccessible place, and anything unfortunate enough to slip beneath the waves and into the briny depths might as well be on the Moon. But the bottom of the sea really isn’t all that far away. The average depth of the ocean is only about 3,600 meters, and even at its deepest, the bottom is only about 10 kilometers away, a distance almost anyone could walk in a couple of hours.
Of course, the problem is that the walk would be straight down into one of the most inhospitable environments our planet has to offer. Despite its harshness, that environment is home to hundreds of undersea cables, all of which are subject to wear and tear through accidents and natural causes. Fixing broken undersea cables quickly and efficiently is a highly specialized field, one that takes a lot of interesting engineering and some clever hacks to pull off.
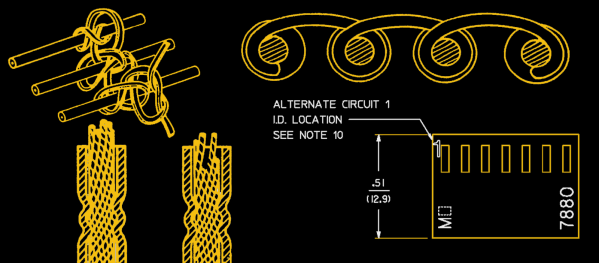
For those of us who started experimenting with electricity when we were very young, one of the essential first skills was learning how to twist wires together. It seems like there’s not much to learn, but after a few failed attempts with nothing but your fingers, you learned a few tricks that are probably still with you to this day. It’s not surprising, then, that there’s an official US Army way to twist wires together, as this Signal Corps training film from 1941 shows.
Considering that the Signal Corps had nearly 80 years of experience with wiring battlefield communications at the outbreak of World War II, their methods were pretty solid, as were their materials. The film mainly concerns the splicing together of rolls of type W110-B field wire, used by the Signal Corps to connect command posts to forward positions, observation posts, and the rear echelons. More often than not laid directly upon the ground, the wire had to be tough, waterproof, and conductive enough that field telephone gear would still work over long loop lengths. As such, the steel-reinforced, rubber-and-fabric clad cable was not the easiest stuff to splice. Where we might cringe at the stresses introduced by literally tying a conductor in knots, it was all part of the job for the wire-laying teams that did the job as quickly as possible, often while taking enemy fire.
The film also has a section on splicing a new line into an existing, in-service circuit, using a T-splice and paying careful attention to the topology of the knots used, lest they come undone under stress. It’s fascinating how much thought was put into something as mundane as twisting wires, but given the stakes, we can appreciate the attention to detail.
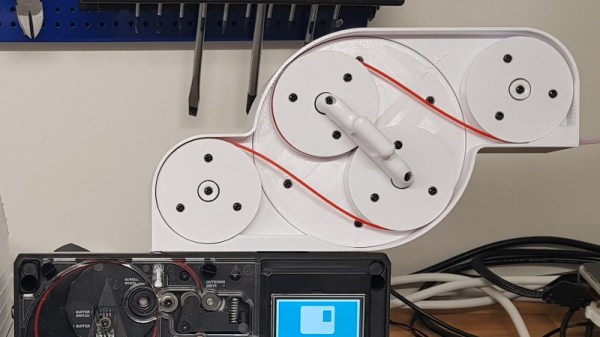
There was a time when most of us thought the next logical step for desktop 3D printing was to add additional extruders and hotends, allowing the machine to print in multiple colors or materials. Unfortunately such arrangements quickly become ungainly, and even with just two extruders, calibration can be a nightmare. Because of this, development has been trending towards systems that use just one hotend and simply alternate the filament being fed into it. But such systems have their own problems.
Arguably the biggest issue is how long it takes to switch filaments. The Palette 2 uses a physical buffer of spliced filament to try and keep ahead of the printer, but as [Kurt Skauen] demonstrates, there are considerable performance gains to be had by building a bigger buffer. He says there’s still some calibration issues to contend with, but judging by the video after the break, we’d say he is certainly on the right track.
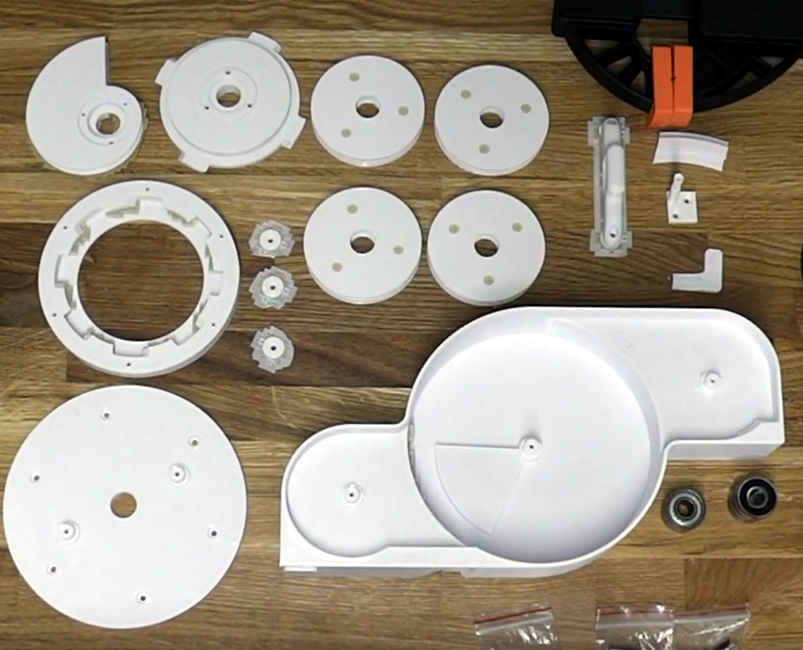
The buffer is necessary to give the spliced filament time to cool and bond before being fed into the printer, but as currently designed, the machine simply can’t store enough of it to keep up with high print speeds. The stock buffer area holds 125mm worth of spliced filament, but the modification [Kurt] has designed adds a whopping 280mm on top of that to reach more than three times the stock capacity.
He’s successfully tested printing at speeds as high as 200mm/s with his upgraded buffer, a big improvement over what he was seeing with the original buffer area. This despite the fact that Mosaic (the company that produces the Palette) claim the original buffer size was already more than sufficient. It seems we’ve found ourselves in the middle of a debate between Mosaic and some very vocal members of the community, and while we don’t want to take sides, it’s hard to ignore [Kurt]’s findings.
Want to make your own? [Kurt] has released all the information necessary for others to duplicate his work, including the STLs for all printed parts and a list of the bearings, springs, and fasteners you’ll need to put it together. It looks like a fairly large undertaking, but with the potential for such a considerable speed boost, we don’t doubt others will be willing to take the plunge. One person who printed and assembled an earlier version of the buffer upgrade reports their print speeds with a 0.8 mm nozzle have more than doubled.
Wiring — as in plugging wires together and crimping connectors, not the Arduino IDE thingy — is an incredibly deep subject. We all know the lineman’s splice is the best way to solder two wires together, and NASA’s guide to cables and connectors is required reading around these parts. However, there’s a lot that can be said about connectors and cabling, and one of the best people to explain it all is Bradley Gawthrop. He spent the last ten years building pipe organs, and with that comes tens of thousands of relays, solenoids, switches, and valves. All of these parts are connected by thousands of miles of wire, and are arguably as complex as an old-school telephone exchange. If there’s someone you need to talk to about connecting hundreds of thousands of parts together, Bradley is your guy.
Bradley starts his Hackaday Superconference talk with a discussion of the modern prototyping process. We’re pretty far away from dozens of chips sitting around a breadboard with data and address lines these days, and now any sort of prototype is basically a development board with a constellation of modules studded around the perimeter. The best solution for connectors is right angle headers, not only for the reason that the wires stay flat, but also because right angle connectors allow you to probe each and every wire coming out of a board.
Of course, when it comes to wiring, it’s helpful to talk about the wire itself. Instead of having an entire warehouse of wire in every color, gauge, and insulation material hanging above his workshop, Bradley only needs a few options. Right now, he’s only dealing with three gauges of wire — small, medium, and large, or 24, 18, and 12 AWG. That’s one wire for small signals, one wire for a bit of current, and one wire for supply amounts of current. Not only does this cut down on workshop inventory, it also means Bradley only needs three sizes of crimpers and connectors. When it comes to strand count, solid core wire is highly underrated. Not only is it easier to strip and crimp, it can also support its own weight. That’s important, because it means connectors don’t have to bear the weight of the entire cable run.
If you’re looking for the minimal required toolset for running cables and crimping connectors, Bradley has a great little shopping list on his website. The best strippers he’s ever found come from Wiha, but they’ve been EOL’d by the manufacturer. Knipex makes some good strippers, though. You don’t need to spend big money on ferrule crimpers, and some cheapies from BangGood are good enough. Bradley has standardized on Molex SL and Molex KK interconnects, and wire can be sourced easily if you have Amazon Prime.
While the subject matter for Bradley’s talk sounds easy to overlook, connecting parts together in an assembly is a critical skill in itself. We’re glad Bradley could share his experience with us at the Hackaday Superconference.