Home Decorating With Tiny Arcade Cabinets

Thanks to the general miniaturization of electronics, the wide availability of cheap color LCD screens, and the fact that licensing decades old arcade games is something of a free-for-all, we can now purchase miniature clones of classic arcade cabinets for about $20 USD. In theory you could play these things, but given they’re less than 4 inches in height they end up being more of a desk novelty than anything. Especially since it seems like most of the effort went into making the cabinet itself; a classic example of “form over function”.

Unfortunately, if you want to buy these little arcade cabinets to use as decoration for your office or game room, they aren’t particularly well suited to the task. The “demo” mode where the game plays itself doesn’t last for very long, and even if it did, the game would chew through batteries at an alarming rate. [Travis] decided to tackle both issues head on by powering his Tiny Arcades over USB and locking them into demo mode.
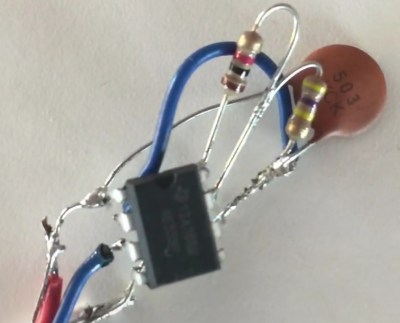
The stock power for the Tiny Arcade comes from three AAA batteries, or 4.5 V. This made it easy enough to run over  5 V USB, and a four port USB charger is used to provide power to multiple machines at once. Forcing the game to stay in demo mode wasn’t much harder: a 555 timer was used to “push” the demo button with a frequency of every 10 seconds or so to keep the game up and running. A simple timer circuit was put together in the classic “dead bug” style, and sealed up with liquid rubber so it would play nice with the insides of the Tiny Arcade.

Since his little machines wouldn’t need their stock power switches anymore, [Travis] rewired the speaker lead through it. So now the machine stays on and in demo mode as long as it’s plugged into USB power, and you can flip the switch on the back to turn off the sounds. Perfect for sitting up on a shelf or the corner of your desk.

Usability issues not withstanding, there’s a pretty big (no pun intended) following for micro sized arcade cabinets. We’ve seen projects ranging from modding a Game Boy Advance to even tinier scratch builds.

Continue reading “Home Decorating With Tiny Arcade Cabinets”

Warhammer 40K Model Rocket Launcher

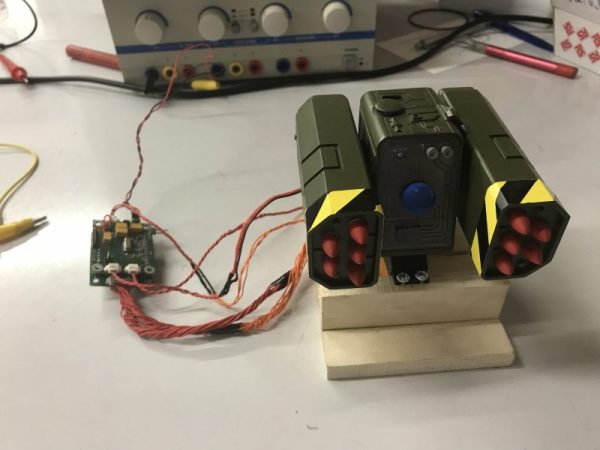
[Daniel L]’s friend has a passion for Warhammer 40K. [Daniel] himself has a similar zeal for perfection in details. When he remembered a long-forgotten request to build a working rocket launcher for one of his friend’s Warhammer 40K models — well — the result was inevitably awesome.

The MicroMaxx motors — one of the smallest commercial rocket motors on the market — he had on hand seemed to fit the model of the Hyperios Whirlwind anti-air rocket tank. Modeling and 3D printing all the parts proved to be easier than assembling the incredibly detailed model — on top of sanding and filling gaps, a perfect paint job was no simple matter.

The launcher has two main circuit boards: a STM32F407 microcontroller brain, a low-power A20737A Bluetooth module, and a voltage regulator. The second has the constant current source and MOSFET output stages for the rocket igniters. Pitch and yaw handled by a pair of RC servo motors. [Daniel L] has also gone the extra mile by creating an accompanying iPhone app using the Anaren Atmosphere IDE — it’s simple but it works!

Continue reading “Warhammer 40K Model Rocket Launcher”

Rolling Robot With Two Motors, But None Are On The Wheels

This unusual 3D printed Rolling Robot by [ebaera] uses two tiny hobby servos for locomotion in an unexpected way. The motors drive the front wheel only indirectly, by moving two articulated arms in a reach-and-retract motion similar to a breaststroke. The arms are joined together at the front, where a ratcheting wheel rests underneath. When the arms extend, the wheel rolls forward freely. When the arms retract, the wheel’s ratchet locks and the rest of the body is pulled forward. It looks as though extending one arm more than the other provides for rudimentary steering.

The parts are all 3D printed but some of them look as though they might be a challenge to print well due to the number of small pieces and overhangs. A short video (embedded below) demonstrates how it all works together; the action starts about 25 seconds in.

Continue reading “Rolling Robot With Two Motors, But None Are On The Wheels”

Reverse Engineering A Pirate Nintendo Arcade Board

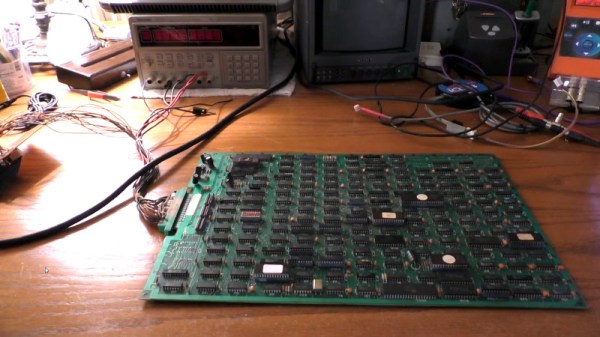
The Nintendo VS. System was a coin-op arcade system based on the Nintendo Entertainment System (NES) hardware. By being so closely related to the home console, it made it easy to port games back and forth between the two. Being an arcade system, there was significant financial incentive to pirate the boards and games, and many years later such a pirate board landed on the desk of [kevtris], who decided to reverse engineer it for our viewing pleasure.

The board in question runs Super Mario Brothers, and rather than using actual Nintendo hardware it instead relies on a standard MOS 6502 to recreate all the functions of the of the original CPU. A Z80 is pressed into service to emulate the original audio hardware, too. With much of the functionality recreated in TTL logic chips, the board is power hungry, drawing a ridiculous 3 amps when powered up. We wonder as to the fire safety of such machines all crammed into a hot, sweaty arcade of yesteryear.

[kevtris] does a great job of reverse engineering the system, even providing a full PDF schematic for the bootleg board. An old SEGA controller is hand-wired into the board to provide both game controls and act as a coin switch to allow the game to be played.

We’d love to hear the story of how these machines actually came to be, and the design process involved, but for now that may remain one for the ages. Arcade piracy was something the big companies fought against for years, with varying success – and we’ve seen arcade DRM hacked before.

[Thanks to Jero32 for the tip!]

Continue reading “Reverse Engineering A Pirate Nintendo Arcade Board”

Bradley Gawthrop: What You Need To Know About Wiring

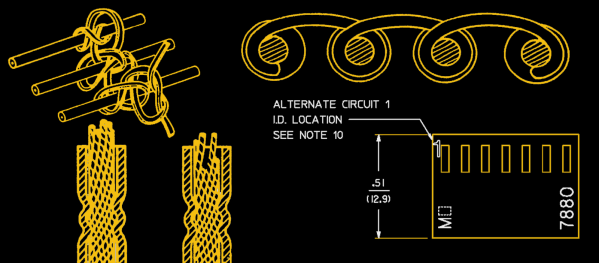
Wiring — as in plugging wires together and crimping connectors, not the Arduino IDE thingy — is an incredibly deep subject. We all know the lineman’s splice is the best way to solder two wires together, and NASA’s guide to cables and connectors is required reading around these parts. However, there’s a lot that can be said about connectors and cabling, and one of the best people to explain it all is Bradley Gawthrop. He spent the last ten years building pipe organs, and with that comes tens of thousands of relays, solenoids, switches, and valves. All of these parts are connected by thousands of miles of wire, and are arguably as complex as an old-school telephone exchange. If there’s someone you need to talk to about connecting hundreds of thousands of parts together, Bradley is your guy.

Bradley starts his Hackaday Superconference talk with a discussion of the modern prototyping process. We’re pretty far away from dozens of chips sitting around a breadboard with data and address lines these days, and now any sort of prototype is basically a development board with a constellation of modules studded around the perimeter. The best solution for connectors is right angle headers, not only for the reason that the wires stay flat, but also because right angle connectors allow you to probe each and every wire coming out of a board.

Of course, when it comes to wiring, it’s helpful to talk about the wire itself. Instead of having an entire warehouse of wire in every color, gauge, and insulation material hanging above his workshop, Bradley only needs a few options. Right now, he’s only dealing with three gauges of wire — small, medium, and large, or 24, 18, and 12 AWG. That’s one wire for small signals, one wire for a bit of current, and one wire for supply amounts of current. Not only does this cut down on workshop inventory, it also means Bradley only needs three sizes of crimpers and connectors. When it comes to strand count, solid core wire is highly underrated. Not only is it easier to strip and crimp, it can also support its own weight. That’s important, because it means connectors don’t have to bear the weight of the entire cable run.

If you’re looking for the minimal required toolset for running cables and crimping connectors, Bradley has a great little shopping list on his website. The best strippers he’s ever found come from Wiha, but they’ve been EOL’d by the manufacturer. Knipex makes some good strippers, though. You don’t need to spend big money on ferrule crimpers, and some cheapies from BangGood are good enough. Bradley has standardized on Molex SL and Molex KK interconnects, and wire can be sourced easily if you have Amazon Prime.

While the subject matter for Bradley’s talk sounds easy to overlook, connecting parts together in an assembly is a critical skill in itself. We’re glad Bradley could share his experience with us at the Hackaday Superconference.

Dust Off Those AM Radios, There’s Something Good On!

If you are into vintage electronics or restoring antique radio equipment you may be very disappointed with the content offerings on AM broadcast radio these days. Fortunately there is a way to get around this: build your own short-range AM broadcast station and transmit curated content to your radios (and possibly your neighbors). There are several options for creating your own short-range AM broadcast station, and this gives you something fun to tune into with your vintage radio gear.

Continue reading “Dust Off Those AM Radios, There’s Something Good On!”

Printed PC Speakers Are Way Cooler Than Yours

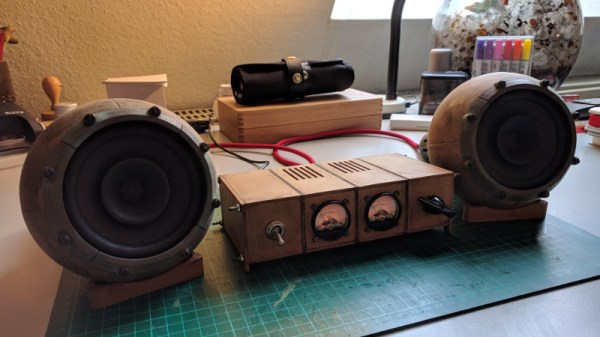
On the off chance you’re reading these words on an actual desktop computer (rather than a phone, tablet, smart mirror, game console…), stop and look at the speakers you have on either side of your monitor. Are you back now? OK, now look at the PC speakers and amplifier [Kris Slyka] recently built and realize you’ve been bested. Don’t feel bad, she’s got us beat as well.

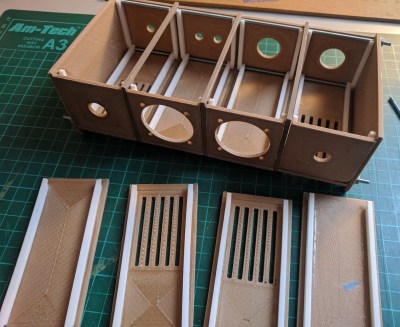
The speaker and amplifier enclosures were painstakingly printed and assembled over the course of three months, and each piece was designed to be small enough to fit onto the roughly 4 in x 4 in bed of her PrintrBot Play. While limited print volume made the design considerably trickier, it did force [Kris] to adopt a modular design approach with arguably made assembly (and potential future repairs or improvements) easier.

The amplifier is made up of rectangular “cells” which are connected to each other via 3 mm threaded rods. For now the amplifier only has 4 cells, but this could easily be expanded in the future without having to design and print a whole new case. Internally the amplifier is using two TDA8932 digital amplifier modules, and some VU meters scored off of eBay.

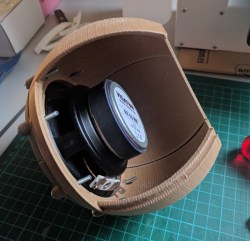
Each speaker enclosure is made up of 10 individual printed parts that are then glued and screwed together to make the final shape, which [Kris] mentions was inspired by an audio installation at the Los Angeles County Museum of Art. They house 4″ Visaton FR 10 HM drivers, and are stuffed with insulation.

It’s a bit difficult to nail down the style that [Kris] has gone for here. You see the chunky controls and analog VU meters and want to call it retro, but it’s also a brass cog and sprocket away from being Steampunk. On the other hand, the shape of the speakers combined with the bamboo-filled PLA used to print them almost gives it an organic look: as if there’s a tree somewhere that grows these things. That’s actually a kind of terrifying thought, but you get the idea.

If your computer speakers were assembled by mere mortals, never fear. We’ve covered a number of interesting hacks and mods for more run-of-the-mill desktop audio setups which should hold you over until it’s time to harvest the speaker trees.

[via /r/3Dprinting]