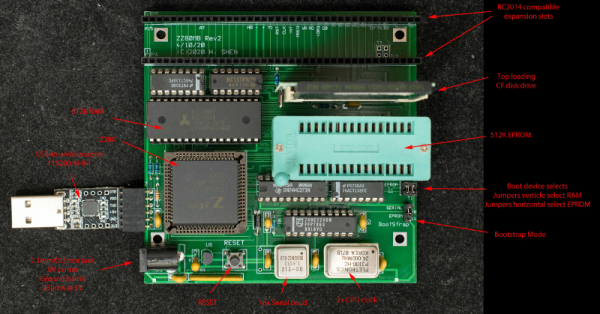
[Plasmode] has created several Z80-compatible board designs, at least four of them using the oddball Z280. The Z280 was a special variant of a Z80 that could bootstrap itself with no external PROM, making it ideal for anyone trying to build a system on a breadboard. According to his post, the cost to build the board is about $35.
Although the 8080 CPU got a lot of glory, it was much harder to use than the Zilog Z80. The Z80 only required a single clock and power supply, so it was much easier to build a system, even on a breadboard. On top of that, the bus wasn’t multiplexed and it could refresh DRAM memory by itself. Maybe that’s why you can still get Z80-derived chips readily. There was one thing, though, you needed an EPROM or some other way to run some initial code to bootstrap your system. Zilog knew this was a problem. In those days, you had to use a special tool to burn a PROM and, unless it was erasable and you had the special UV light to erase it, any mistakes cost you a chip.
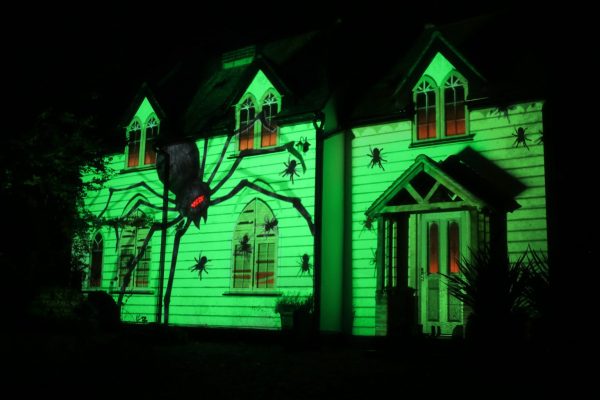
Every holiday has a few, dedicated individuals committed to “going all out.” Whether they’re trying to show up the neighbors, love the look, or just want to put a smile on the faces of those passing by; the results are often spectacular. A recent trend in decorations has been away from analog lights and ornaments and towards digital light shows via a projector. [Georgia Clegg] and [Luma Bakery] have written up a fantastic guide detailing the involved process of house projection for those feeling the holiday spirit.
There is more to the effect than simply pointing a projector at a home and running a video clip. The good displays make use of the geometry of the home and the various depths of the walls don’t distort the picture. The house itself is mapped into the image being displayed.
There are generally two approaches to mapping: point of view mapping and neutral/orthographic mapping. The first is just setting the projector in a fixed position and designing the graphics in such a way that they will look correct. The downside is that if there are multiple projectors, each projector will need to be separately designed for and they cannot be moved or adjusted. The second maps the house in an actual 3d sense and figures out how to display the content according to the viewpoint that the projector is currently at. This means you can create one source content and simply export it for the various projectors.
As you can imagine, the second is much more involved and this is where [Georgia Clegg] has stepped in. There’s a whole series that covers creating your house in MeshRoom, cleaning it up in Blender, creating the videos in After Effects, and setting up your projector to keep it running through the season.
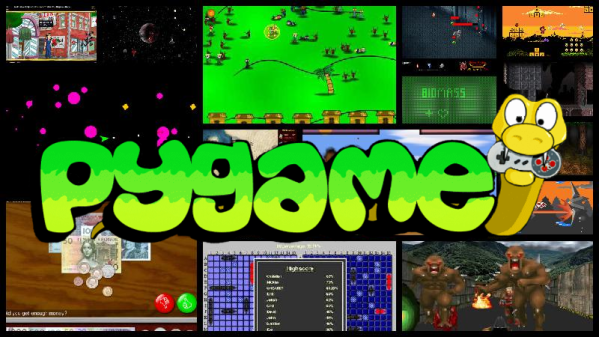
Python is an absolutely fantastic language for tossing bits of data around and gluing different software components together. But eventually you may find yourself looking to make a program with an output a bit more advanced than the print() statement. Once you’ve crossed into the land of graphical Python programming, you’ll quickly find that the PyGame library is often recommended as a great way to start pushing pixels even if you’re not strictly making a game.
Today, the project is celebrating an incredible milestone: 20 years of helping Python developers turn their ideas into reality. Started by [Pete Shinners] in 2000 as a way to interface with Simple DirectMedia Layer (SDL), the project was quickly picked up by the community and morphed into a portable 2D/3D graphics library that lets developers deploy their code on everything from Android phones to desktop computers.
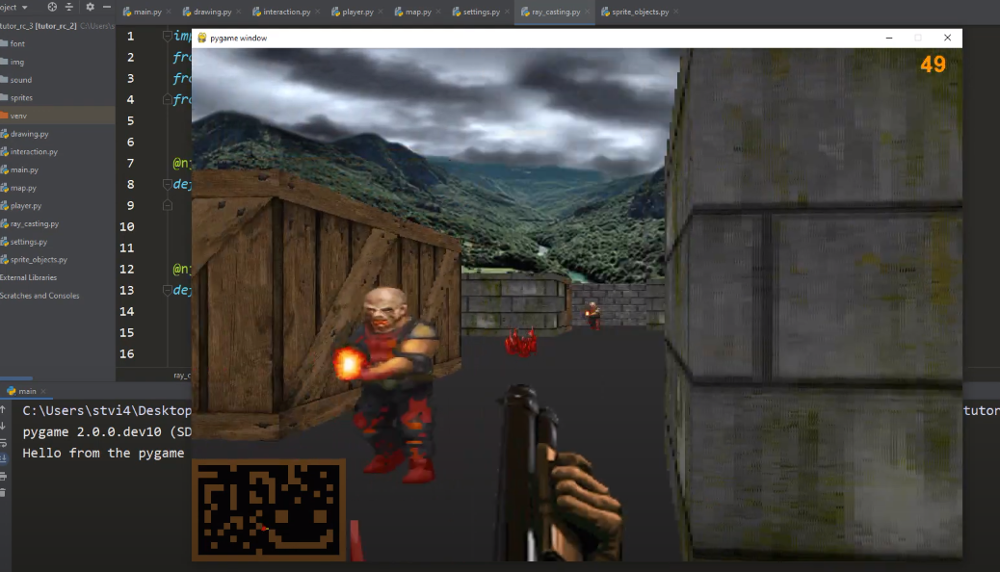
Things haven’t always gone smoothly for the open source library, and for awhile development had stalled out. But the current team has been making great progress, and decided today’s anniversary was the perfect time to officially roll out PyGame 2.0. With more than 3,300 changes committed since the team started working on their 2.0 branch in July of 2018, it’s a bit tough to summarize what’s new. Suffice to say, the library is more capable than ever and is ready to tackle everything from simple 2D art up to 4K GPU-accelerated applications.
If you haven’t given PyGame a try in awhile, don’t worry. The team has put special effort into making the library as backwards compatible as possible, so if you’ve got an old project kicking around that you haven’t touched in a decade, it should still run against the latest and greatest version. If you’ve never used it before, the team says they’ll soon be releasing new tutorials that show you how to get the most out of this new release.
We’d love to say that all of our projects worked perfectly on the first try, but the average Hackaday reader is a bit too experienced to buy a fib like that. The reality is, DIY projects rarely get everything right out of the gate. It takes some time to identify issues and work out all the kinks. But of course, that’s half the fun.
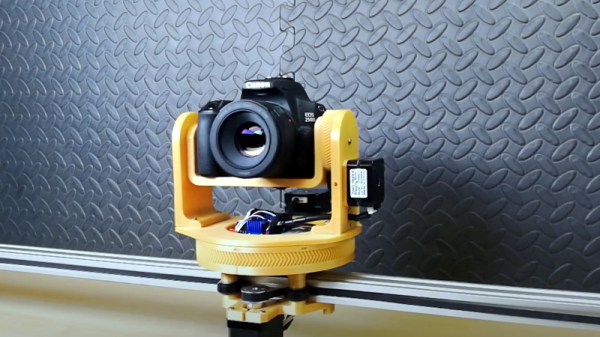
For a perfect example of this process, check out the latest update on the 3D printed DSLR camera mount that [isaac879] has been working on. When we last checked in with this project over the summer the mount was already impressive, but with the latest improvements and the addition of a whole new axis of movement, this homebrew camera motion system is an extremely compelling project for anyone who wants to take their project videos to the next level.
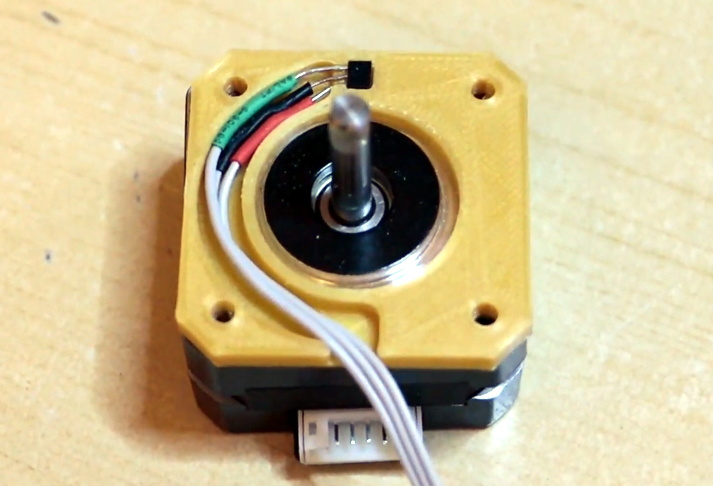
The new Hall effect sensor mounts are a very nice touch.
Back in June, the mount [isaac879] showed off was only capable of pan and tilt. But as you can see in the video after the break, he’s since mounted that to a track made of 20×40 aluminum extrusion and added another stepper motor. This allows the pan/tilt mount to move itself back and forth on the track to get those slick panning shots that all the cool kids use in their videos nowadays.
But even if you’re not interested in the slider aspect, the core pan/tilt mount has also received a number of refinements over the last few months. Perhaps the most obvious is the switch over to thinner and lighter stepper motors. Reducing mass is always an improvement with a moving system like this, and in the case of the pan motor, the shorter can prevents a potential collision with the camera itself. Obviously the smaller motors are weaker, but [isaac879] considers that a feature; the mini motors will just start skipping steps if things get bound up instead of potentially damaging your expensive camera.
He’s switched to flange bearings to help hold the frame together, improved wire routing, added a mounting point for the electronics, reprinted the pinion gears in a flexible filament to help absorb some vibrations, and switched over to TMC2208 stepper drivers. The new drivers may actually be one of the biggest usability upgrades, as they allow the entire mount to move faster and more accurately. Critically, [isaac879] also reports the new drivers have solved a troublesome vibration issue he was seeing when the camera was moving slowly.
If you have any kind of business, chances are it involves stickers at some point in the process. More accurately it involves you peeling the backs off of sticker after sticker, slowly wasting time and working your way toward a repetitive stress injury. Why do that to yourself when you could have a machine do it for you?
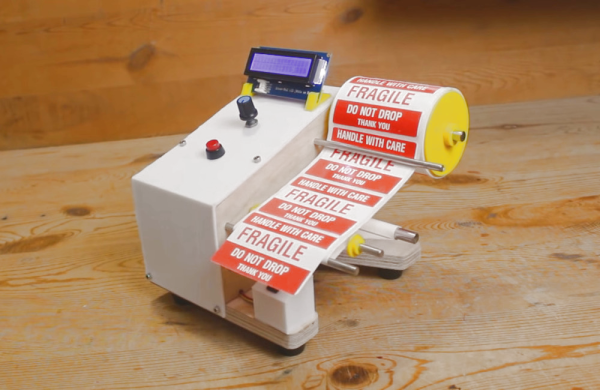
That’s exactly the thinking behind [Mr Innovative]’s automatic label dispensing machine. All he has to do is load up the roll of labels, dial in the length of each label, and away the machine goes, advancing and dispensing and taking up the empty paper all at once. In fact, that’s how it works: the take-up reel is on the shaft of a NEMA-17 stepper motor, which gets its instructions from an Arduino Nano and an A4988 motor driver. Our favorite part is the IR sensor located underneath the sticker that’s ready to take — the machine doesn’t feed another until it senses that you’ve taken the previous sticker. We stuck the demo and build video after the break.
Our other favorite thing about this build is that [Mr Innovative] seems to have used the same PCB as his freaky fast bobbin winder.
You probably know about cron, a program that lets you schedule programs to run at various times. We’ve also talked about incron, which is very similar but instead of time, it reacts to changes in the file system. If you ever wanted to write a program that, say, detects a change in a file and automatically uploads it to a programmer, backs it up, e-mails it somewhere, or anything else, then incron might be for you. Although we’ve talked about it before, incron has some peculiarities that make it very difficult to debug problems, so I thought I’d share some of the tricks I use when working with incron.
I was thinking about this because I wanted to set up a simple system where I have a single document directory under git control. Changing a markdown file in that folder would generate Word document and PDF equivalents. Conversely, changing a Word document would produce a markdown version.
This is easy to do with pandoc — it speaks many different formats. The trick is running it only on changed files and as soon as they change. The task isn’t that hard, but it does take a bit to debug since it’s a bit nontrivial.
While more and more consumer products are rushing to include WiFi and Bluetooth connectivity, the simplicity and reliability of infrared has kept it in the game in the game far longer than many might have thought. Despite being thinner and sleeker, the IR remote control that comes with your brand new smart TV isn’t fundamentally different than what we were using in the 1980s.
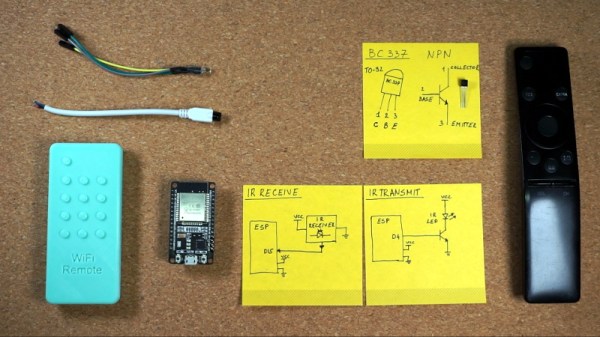
But that doesn’t mean IR devices can’t enjoy some modern conveniences. Sick of misplacing his remote, [Sasa Karanovic] decided to come up with a way he could emulate it to control his TV over the network. Now with nothing more exotic than a web browser on his phone or computer, he can tap away at a visual representation of a remote to control the TV from anywhere in the house. As you might expect, this project could readily be adapted to control whatever IR gadget you might have in mind.
Assembling a simple IR transmitter dongle.
Admittedly, this isn’t exactly breaking any new ground. We’ve seen plenty of people come up with similar IR gateways in the past with varying levels of complexity. But what we really like about this project is that not only has [Sasa] shared the source code that turns an ESP32 into a network-controlled IR transmitter, but he’s put together a concise video that demonstrates how easy it is so spin up your own version. The 3D printed enclosure that looks like a traditional IR remote was a nice touch too.
The hardware for this project is little more than an ESP32 development board and an LED, but if you’re looking for something a bit more built for purpose, we recently saw a very slick open hardware IR gateway that might fit your needs.