Big Noise From A 555 And A Little Embroidery

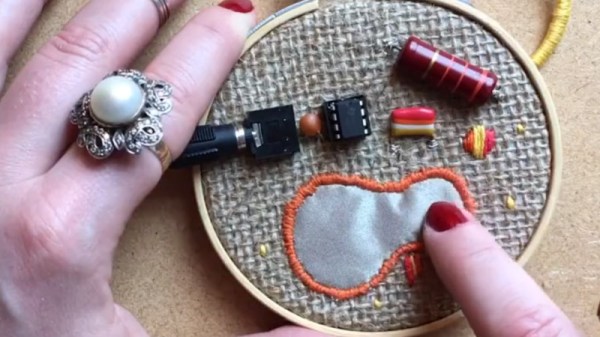
[Sam Topley] specializes in making textile based, electronic instruments and sculptures using embroidery, and this little hoop packs some serious sound (Nitter).

The circuit is a riff on a classic 555 timer circuit, which produces a signal that is modulated by applying pressure conductive textile in different ways. The signal is then piped through a system built in a visual coding interface called MaxMSP, which allows [Sam] to get specific on how to control it. The program shifts the pitch and applies filtering, producing a dynamic dial-up tone-like sound as the user interacts.

To top it off, [Sam] uses vintage resistors  and tropical fish capacitors from the 60s that compliment the visual design and match the embroidery floss, they’re both beautiful and functional! This isn’t the only circuit of this kind [Sam] has made, she also produces tons of e-textile radios using similar techniques. We love how this project spans a ton of areas, analog circuitry, vintage tech, and soft circuits!

While we don’t see too many projects involving them come our way, e-textiles are certainly a fascinating topic. Our coverage of 2018’s “eTextile Spring Break” in New York is a must-read if you’re interested in exploring this technology, and the relatively recent news that MIT has developed a washable LED fabric has us hoping we’ll see more projects like this in the near future.

Stitching Up Custom Belts

If you’ve got a 3D printer, you’re probably familiar with the reinforced belts that are commonly used on the X and Y axis. These belts either come as long lengths that you attach to the machine on either end, or as a pre-sized loop. Traditional wisdom says you can’t just take a long length of belt and make your own custom loops out of it, but [Marcel Varallo] had his doubts about that.

This is a simple tip, but one that could get you out of a bind one day. Through experimentation, [Marcel] has found that you can use a length of so-called GT2 belt and make your own bespoke loop. The trick is, you need to attach the ends with something very strong that won’t hinder the normal operation of the belt. Anything hard or inflexible is right out the window, since the belt would bind up as soon as it had to go around a pulley.

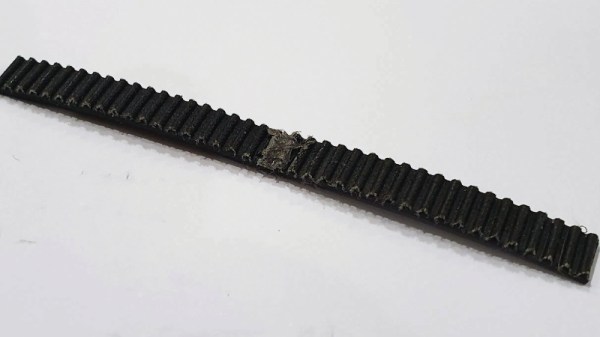
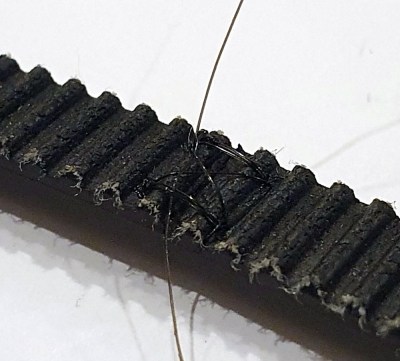
It seems the key is to cut both ends of the belt very flat, making sure the belt pattern matches perfectly. Once they’ve been trimmed and aligned properly, you stitch them together with nylon thread. You want the stitches to be as tight as possible, and the more you do, the stronger the end result will be.

[Marcel] likes to follow this up with a bit of hot glue, being careful to make sure the hardened glue takes the shape of the belt’s teeth. The back side won’t be as important, but a thin layer is still best. The end result is a belt strong enough for most applications in just a few minutes.

Would we build a 3D printer using hand-stitched GT2 belts? Probably not. But during a global pandemic, when shipments of non-essential components are often being delayed, we could certainly see ourselves running some stitched together belts while we wait for the proper replacement to come in. Gotta keep those face shields printing.

CNC Embroidery Machine Punches Out Designs A Stitch At A Time

It’s doubtful that the early pioneers of CNC would have been able to imagine the range of the applications the technology would be used for. Once limited to cutting metal, CNC machines can now lance through materials using lasers and high-pressure jets of water, squirt molten plastic to build up 3D objects, and apparently even use needle and thread to create embroidered designs.

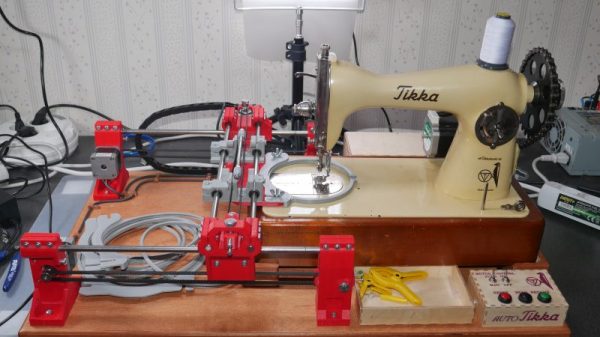
It may not seem like a typical CNC application, but [James Kolme]’s CNC embroidery machine sure looks familiar. Sitting in front of one of the prettiest sewing machines we’ve ever seen is a fairly typical X-Y gantry system. The stepper-controlled gantry moves an embroidery hoop under the needle of the sewing machine, which is actually the Z-axis of the machine. With the material properly positioned, a NEMA 23 stepper attached to the sewing machine through a sprocket and drive chain makes a stitch, slowly building up a design. Translating an embroidery pattern to G-code is done through Inkstitch, and extension to Inkscape. [James]’ write-up is great, and the video below shows it in action.

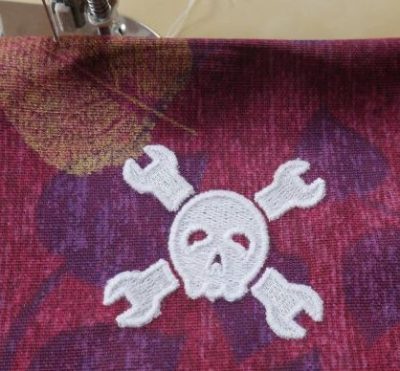
We’ve seen a CNC embroidery machine or two before, but our conspicuously non-embroidered hat is off to [James] on this one for its build quality and documentation. And the embroidered Jolly Wrencher doesn’t hurt either.

Continue reading “CNC Embroidery Machine Punches Out Designs A Stitch At A Time”