Double Sided Surface Mount PCB Population

[youtube=http://www.youtube.com/watch?v=6M3MeADb1dE]

Above is a video detailing one method for populating a two sided surface mount PCB. We covered using a stencil to apply solder paste for a PCB a few weeks ago. In the comments there was a debate about the virtue of using stencils as well as a question about how two sided boards are populated. This was a good question because reflowing a board twice can cause components on the underside to fall off.

[Wim L’s] comment mentions that there are a couple of methods for two sided population. In the video you will see that a stencil is not being used, but instead, paste is applied by a pedal actuated syringe. The paste is applied to the underside of the board first, then a teeny dot of epoxy is added to hold the component in place. Each part is then positioned normally and baked in a reflow oven. This process both reflows the solder, and cures the epoxy. When the board is reflowed a second time, the epoxy holds the bottom components in place as the top solder reaches its melting point.

This method of applying solder paste is slower than using a stencil. But if done correctly, every component can get the amount of solder needed.

Build Your Own Wristwatch

surface-mount-wristwatch

[rgbphil] has done a great job detailing how he built his Microdot wristwatch.This project is a lot more approachable than the pong watch we saw last month. If you’ve made a few printed circuit boards, but haven’t yet tried working with surface mount component, this is a great way to give it a try.

The parts count is pretty low, a few switches, resistors, capacitors, LEDs, a watch crystal, and a PIC 16F88 microcontroller.[rgbphil] is using a charlieplex so that a separate shift register is not needed to drive all of the LEDs. He goes into detail about the process of laying out the circuit. Some of the problems he encounters include how to manage all of the charlieplex connections in a simple way, how to program the chip once it’s on the board, and how to layout the controls for the device.

The display looks great in the video we’ve embedded after the break. We’re going to add these components to our next parts order and make this project part of the plan for getting us through the long cold winter ahead.

Continue reading “Build Your Own Wristwatch”

How To Populate A Surface Mount PCB

Reflow_08

Let’s face it friends, everything is moving toward surface mount components. We’ve seen quite a few features here that cover using stencils to populate boards and using ovens to reflow. [Oleg] has put together a tutorial on the process he uses to populate and reflow his own boards.

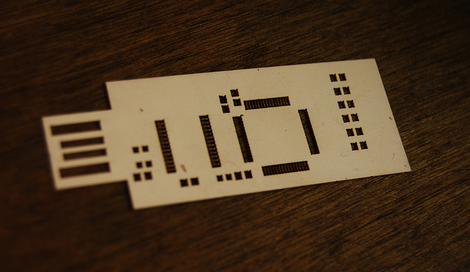
[Oleg] is the creator of the USB Isolator and therefore has a need to frequently populate the same board. He’s using an acrylic frame that fits the PCB perfectly to hold it in place so that paste and be applied right up to the edges of the board. He ordered a laser cut Kapton stencil for applying the solder. The paste is squeegeed into the stencil holes, the stencil is removed, and parts are placed with tweezers and a steady hand. For the final step, the boards go into an old toaster oven for reflow.

[Oleg] uses temperature marker on his boards to monitor the progress of the reflow. This marker is basically a crayon that begins to melt at a specific temperature. When the board has cooled, the melted mark can be scraped away or removed with alcohol.

Of course this is only really useful if you have a bunch of high-quality boards to populate. But with the relatively low cost of getting professionally made boards we think the need for this type of assembly process is on the rise.

Tools: Smart Tweezers

We’re big fans of surface mount parts. SMD components are cheaper, take less board space, and don’t require drilling; all the coolest new parts are only available in SMD packages.

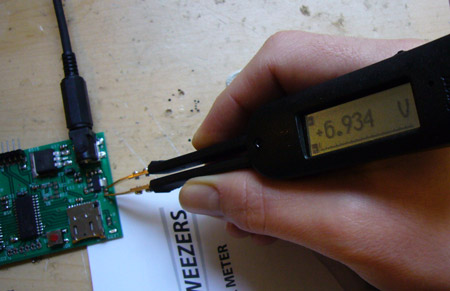
Smart Tweezers are an advanced multimeter tool specifically designed to test and troubleshoot SMD circuits. It automatically identifies resistors, capacitors, and inductors, and displays the relevant measurements. Advanced Devices sent us a pair of Smart Tweezers to review. We used them while building our last few SMD projects, read about our experience with this tool after the break.

Continue reading “Tools: Smart Tweezers”

Surface Mount Soldering In Depth

smd

[doctek] wants to help ease any fear you may have of surface mount design. He has written this extremely in depth explanation of how to design and build an LED driver composed of surface mount parts. While there has been plenty of surface mount instruction floating around for a while, he feels that they skimp on the details, especially when it comes to really tiny parts who’s pads are unreachable with a soldering iron.  The method he uses is the “hot plate” method we’ve seen before. There’s enough information to build your own tiny LED driver with pulse width modulation, as well as tons of references to explain how and why he does things the way he does. Great job [doctek].

If you’re going to be doing a lot of soldering, you should check out our soldering station how to.

Parts: 0.1uF Decoupling Capacitors

Most ICs need to be decoupled from their power supply, usually with a 0.1uF capacitor between each power pin and ground. Decoupling is usually used to remove noise and to smooth power fluctuations. Every project will need a few decoupling capacitors; our mini web server project has three ICs that require a total of 11. This can be an expensive part to buy in singles, so it’s crucial to stock up online. Read more about our favorite bulk through-hole and surface mount decoupling capacitors after the break. Continue reading “Parts: 0.1uF Decoupling Capacitors”

CNC Solder Paste/pick N Place


Just when I thought I’d seen most of the CNC mods out there, [Steve Ciciora] (who happens to be one of the driving forces behind the killacycle) sent in his diy solder paste dispenser *and* his diy pick and place machine. Both are extensions of his CNC taig mill. Hopefully [steve] will put up some more details of his mill mods.