Building A Software Defined Radio With A Teensy

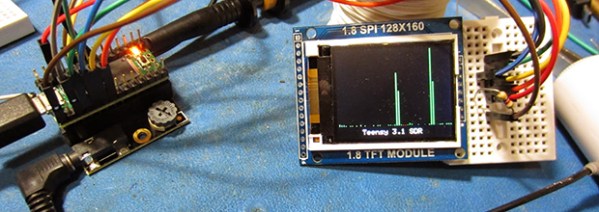
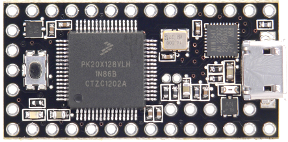
[Rich, VE3MKC] has been wanting to get into Software Defined Radio for a while now, but didn’t want to go the usual PC route. He initially thought the Raspberry Pi would be the best platform for a small, embedded device that could manipulate audio, but after discovering the ARM-powered Teensy 3.0, had an entirely different project in mind.

[Rich] is using a SoftRock SDR to take RF from an antenna and downconvert it into the audio range. Doing DSP for SDR is fairly computationally intensive, but he found a Teensy 3.0 with the audio adapter board was more than up to the task.

So far, [Rich] is running the audio from the SoftRock to the Teensy where the audio is digitized and multiplied with a VFO, sent through a filter and then sent to the output of the headphone jack to a speaker. The volume pot on the audio adapter board is used to tune the VFO, something [Rich] be replacing with a proper encoder sometime in the future.

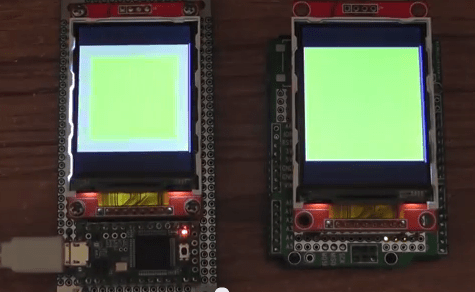
In the videos below, you can see [Rich] listening in on a contest with a tiny TFT display showing everybody on the air. It’s a very cool build, and even though it’s still very early in development, there’s still a whole lot of CPU cycles for the Teensy to do some very cool stuff.

Continue reading “Building A Software Defined Radio With A Teensy”

Bare-metal Programming On The Teensy 3

Teensy

The Teensy 3.x series of boards are amazing pieces of work, with a tiny, breadboard-friendly footprint, an improbable number of IO pins, and a powerful processor, all for under $20. [Karl Lunt] loves nearly all the features of the Teensy 3, except for one: the Arduino IDE. Yes, the most terrible, most popular IDE in existence. To fix this problem, [Karl] set up a bare-metal development environment, and lucky us, he’s chosen to share it with us.

[Karl] is using CodeBench Lite for the compiler, linker, assembler, and all that other GCC fun, but the CodeSourcery suite doesn’t have an IDE. Visual Studio 2008 Express is [Karl]’s environment of choice, but just about every other IDE out there will do the same job. Of course a make utility will be needed, and grabbing the docs for the Freescale K20 microcontroller wouldn’t be a bad idea, either.

The end result is [Karl] being able to develop for the Teensy 3.X with the IDE of his choice. He was able to quickly set up a ‘blink a LED’ program with the new toolchain, although uploading the files to the Teensy does require the Teensy Loader app.

Multijoy_Retro Connects Your ‘Wayback’ To Your ‘Machine’

flight-finished

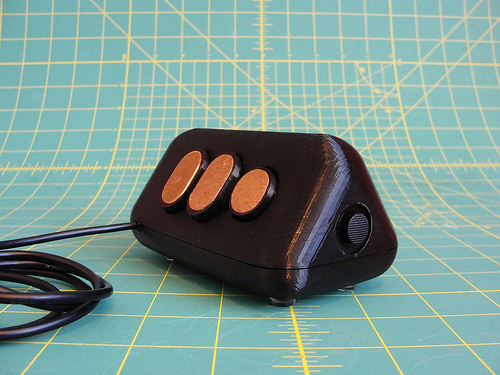
Moore’s law is the observation that, over the history of computing hardware, the number of transistors on integrated circuits doubles approximately every two years. This rapid advancement is certainly great for computing power and the advent of better technology but it does have one drawback; otherwise great working hardware becomes outdated and unusable.  [Dave] likes his flight simulators and his old flight sim equipment. The only problem is that his new-fangled computer doesn’t have DA15 or DE9 inputs to interface with his controllers. Not being one to let something like this get him down, [Dave] set out to build his own microcontroller-based interface module. He calls it the Multijoy_Retro.

Continue reading “Multijoy_Retro Connects Your ‘Wayback’ To Your ‘Machine’”

Blinkenschild, The RGB LED Display For Every Occasion

turd

One morning [overflo] decided to protest the European Parliament’s stance on equine rights of defecation, a cherished liberty dating back to the time of Charlemagne. The best way to do this is, of course, blinking lights. He calls his project Blinkenschild, and it’s one of the best portable LED displays we’ve seen.

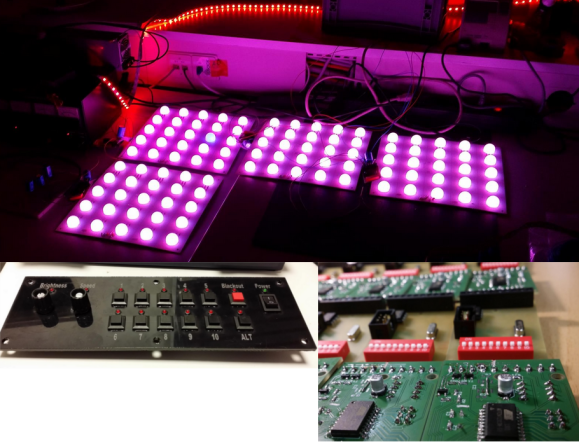
The display is based around fifteen RGB-123 LED panels, each containing an 8×8 matrix of WS2811 LEDs. That’s 960 pixels, all controlled with a Teensy 3.1. Power is supplied by fifteen LiPo cells wired together in parallel giving him 6 Ah of battery life. Clunky, yes, but it’s small enough to fit in a backpack and that’s what [overflo] had sitting around anyway.

The animations for the display are generated by Glediator, an unfortunately not open source control app for LED matrices. Glediator sends data out over a serial port but not over IP or directly into a file. Not wanting to carry a laptop around with him, [overflo] created a virtual serial port and dumped the output of Glediator into a file so it could be played back stored on an SD card and controlled with an Android app. Very clever, and just the thing to raise awareness of horse and Internet concerns.

Video below.

UPDATE: Check out [overflo’s] clarification in the comments below.

Continue reading “Blinkenschild, The RGB LED Display For Every Occasion”

Prophet 600: A Classic Synthesizer Gets Processor Upgrade

proph-600

We love classic synthesizers here at Hackaday. So does [gligli], but he didn’t like the processor limitations of the Prophet 600. That’s why he’s given it a new brain in the form of a Teensy++. The Sequential Circuits Prophet 600 was a big deal when it was released back in 1982/1983. The 600 was the first commercially available synthesizer to include a MIDI interface. The original design of the 600 could be called a hybrid. A Zilog Z80 microprocessor controlled modular analog voice chips. The Z80 was a bit stressed in this configuration though, and a few limitations were evident. An 8 bit processor just wasn’t quite enough for software driven envelopes and a Low Frequency Oscillator (LFO) control. This was further exacerbated by the fact that everything was driven through a 14 bit DAC.

[gligli] discovered most of the limitations in the 600 were due to the processor. By beefing up the processing power he could really unlock the potential within 600. Since he didn’t actually have a Prophet 600, he started with the schematic. [gligli] created a PC based emulator for the digital circuits, learning the whole system as he worked. With that phase complete, [gligli] bought a used Prophet and started hacking. The Teensy++ required a few hardware mods to fill the Z80’s shoes, including cutting off a pin and adding a few jumper wires. We really like the fact that no changes to the Prophet 600 itself are required. Pull out the Teensy++, drop in the Z80, and you’re ready to party like it’s 1982 again.

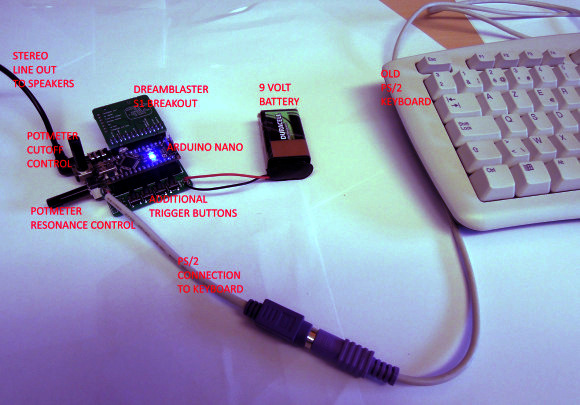
The new processor interfaces directly with the Z80’s 8 bit bus. Since the AVR on the Teensy has built-in RAM and ROM, it simply ignores the ROM and RAM address spaces of the original system. Interfacing a fast micro with older parts like an 8253 timer and a 68B50 UART does have its pitfalls though. The system bus had to run slow enough to not violate timing requirements of the various peripheral chips. To handle this, [gligli] added a number of wait statements in his firmware. Once the system was working, [gligli] was free to start adding new features. He began by smoothing out the stepped envelope and filter generators, as well as adding new exponential modes. From there he added new keyboard polyphony modes as well as pitch and mod wheel changes. The full lineup of new features are listed in the instruction manual (PDF link). Since this is an open source project, adding a feature is as simple as cracking open your favorite editor and writing it up.

Continue reading “Prophet 600: A Classic Synthesizer Gets Processor Upgrade”

Custom Mechanical Keyboards

[Wyager] was shopping around for a mechanical keyboard, and after noticing custom PCB manufacturing had come down in price so much, he decided to build his own. The end result is a keyboard that’s so elegant in its design, that it could, with a little work, become a very interesting Kickstarter project.

The design had three requirements: cheap, mechanical switches, and extremely customizable. The cheap requirement was solved by splitting the keyboard into two parts with a master/slave arrangement. The boards are connected by a 1/8″ TRRS jack conveying an I2C bus. Since both boards are identical except for the code running on the Teensy dev boards, [Wyager] saved a bit of cash by using two of the three PCBs that came with his OSHPark order.

The mechanical switches – Cherry MX Blues – are rather expensive parts for a failed project. For fear of failure, [Wyager] first ordered a PCB containing the footprint of only one key. With the footprint correct, he graduated to a 2×2 matrix. Once that was verified, the 6×5 matrix was ordered. Everything worked perfectly the first time, something we can’t say about many of our projects.

The code, board files, and schematics are available over on the github

Expanded Memory For The Teensy++ 2.0

RAM

Sometimes with a microcontroller project you need to do some very RAM-hungry operations, like image and audio processing. The largish AVR chips are certainly fast enough to do these tasks, but the RAM on these chips is limited. [xxxajk] has come up with a library that allows the use of huge RAM expansions with the Teensy++ 2.0 microcontroller, making these RAM-dependant tasks easy on one of our favorite microcontroller board.

[xxajk]’s work is actually a port of XMEM2, an earlier project of his that added RAM expansion and multitasking to the Arduino Mega. Up to 255 banks of memory are available and with the supported hardware, the Teensy can address up to 512kB of RAM.

XMEM2 also features a preemptive multitasking with up to 16 tasks, the ability to pipe messages between tasks, and all the fun of malloc().

The build is fairly hardware independent, able to work with Rugged Circuits QuadRAM and MegaRAM expansions for the Arduino Mega as well as [Andy Brown]’s 512 SRAM expansion. With the right SRAM chip, etching a board at home for XMEM2 is also a possibility.