Simulate A Better Termination

If you are making certain precision measurements, you know you need to terminate the connections with the right impedance, normally 50 ohms. Proper termination minimizes reflections on the line which can disturb measurements. Some instruments already have 50 ohm terminations, at least optionally. If not, you usually use little connector shells with the right resistor inside. [Joe Smith] decided to see if he could improve on the normal terminations using circuit simulation techniques. You can see a video of the work below.

In the process of testing, he also needs a resistive splitter, and, just like with the terminators, he shows you what’s going on inside. It was easy to compare since he had a scope that could independently set channels to have a 50-ohm termination or a 1 megaohm termination.

Continue reading “Simulate A Better Termination”

Calibrating A VNA The Proper Way

Those of us who have bought cheap TinyVNA devices for our RF experimentation will be used to the calibration procedure involving short-circuit, 50 Ω, and open terminations, followed by a direct connection between ports. We do this with a kit of parts supplied with the device, and it makes it ready for our measurements. What we may not fully appreciate at the level of owning such a basic instrument though, is that the calibration process for much higher-quality instruments requires parts made to a much higher specification than the cheap ones from our TinyVNA. Building a set of these high-quality parts is a path that [James Wilson] has taken, and in doing so he presents a fascinating discussion of VNA calibration and the construction of standard RF transmission line components.

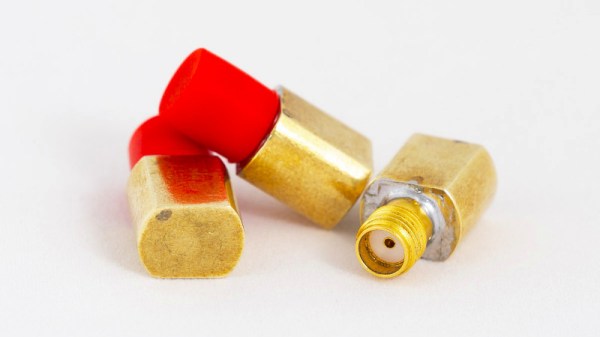
We particularly like the way that after constructing his short, load and open circuit terminations using high-quality SMA sockets, he put a custom brass fitting 3D printed by Shapeways on the end of each to make them easier to handle while preserving their RF integrity. If we’d bought a set of terminations looking like these ones as commercial products we would be happy with their quality, but the real test lay in their performance. Thanks to a friend he was able to get them tested on instruments with much heftier price tags, and found them to be not far short of the simulation and certainly acceptable within his 3 GHz range.

Curious about VNAs at the affordable end of the spectrum? We took a look at the TinyVNA, which while it is something of a toy is still good enough for lower frequency measurements.

Beam Dump Makes Sure Your Laser Path Is Safely Terminated

Between hot things, sharp things, and spinny things, there’s more than enough danger in the average hacker’s shop to maim and mutilate anyone who fails to respect their power. But somehow lasers don’t seem to earn the same healthy fear, which is strange considering permanent blindness can await those who make a mistake lasting mere fractions of a second.

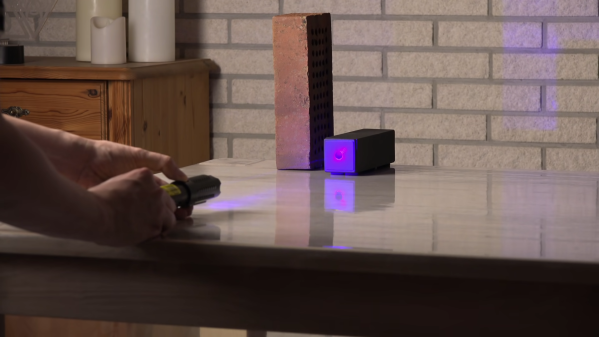
To avoid that painful fate, high-power laser fan [Brainiac75] undertook building a beam dump, which is a safe place to aim a laser beam in an experimental setup. His version has but a few simple parts: a section of extruded aluminum tubing, a couple of plastic end caps, and a conical metal plumb bob. The plumb bob gets mounted to one of the end caps so that its tip points directly at a hole drilled in the center of the other end cap. The inside and the outside of the tube and the plumb bob are painted with high-temperature matte black paint before everything is buttoned up.

In use, laser light entering the hole in the beam dump is reflected off the surface of the plumb bob and absorbed by the aluminum walls. [Brainiac75] tested this with lasers of various powers and wavelengths, and the beam dump did a great job of safely catching the beam. His experiments are now much cleaner with all that scattered laser light contained, and the work area is much safer. Goggles still required, of course.

Hats off to [Brainiac75] for an instructive video and a build that’s cheap and easy enough that nobody using lasers has any excuse for not having a beam dump. Such a thing would be a great addition to the safety tips in [Joshua Vasquez]’s guide to designing a safe laser cutter.

Continue reading “Beam Dump Makes Sure Your Laser Path Is Safely Terminated”

The DIN Rail And How It Got That Way

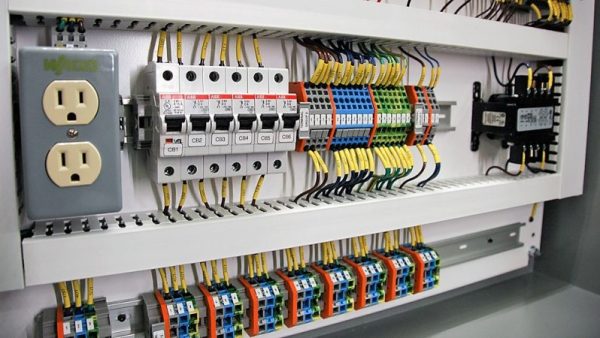
Unless you’ve spent some time in the industrial electrical field, you might be surprised at the degree of integration involved in the various control panels needed to run factories and the like. Look inside any cabinet almost anywhere in the world, and you’ll be greeted by rows of neat plastic terminal blocks, circuit breakers, signal conditioners, and all manner of computing hardware from programmable logic controllers right on to Raspberry Pis and Arduinos.

A well-crafted industrial control panel can truly be a thing of beauty. But behind all the electrical bits in the cabinet, underneath all the neatly routed and clearly labeled wires, there’s a humble strip of metal that stitches it all together: the DIN rail. How did it come to be, and why is it so ubiquitous?

Continue reading “The DIN Rail And How It Got That Way”