Raspberry Pi Counts Down To The Last Bitcoin

Even though it might appear to be pretend Internet money, by design, there are a finite number of Bitcoins available. In the same way that the limited amount of gold on the planet and the effort required to extract it from the ground keeps prices high, the scarcity of Bitcoin is intended to make sure it remains valuable. As of right now, over 80% of all the Bitcoins that will ever exist have already been put into circulation. That sounds like a lot, but it’s expected to take another 100+ years to free up the remaining ones, so we’ve still got a way to go.
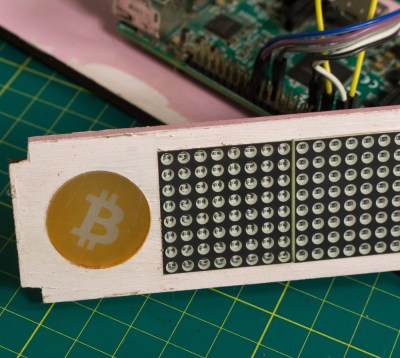
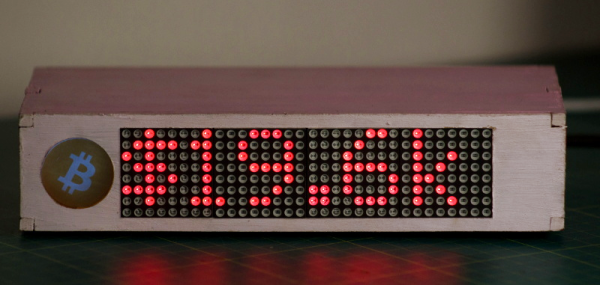
Even though his device will probably no longer exist when the final Bitcoin hits the pool, [Jonty] has built a ticker that will count down as the final coins get mined from the digital ground. The countdown function is of course a bit tongue-in-cheek, but the gadget also shows slightly more pertinent information such as the current Bitcoin value, so you can always remember what a huge mistake it was not to invest while they were still worth pennies.

On the hardware side, this is a pretty simple project. The enclosure is laser cut 5 mm MDF, and it holds a Raspberry Pi 3, a MAX7219 32×8 LED dot matrix display, and a 10 mm white LED with accompanying resistor. The white LED is placed behind an acrylic diffuser to give the Bitcoin logo on the side of the display a soft pleasing glow when the device is powered up. There are no buttons or other controls on the ticker, once the software has been configured it just gets plugged in and away it goes.

As for the software, it takes the form of a Python script [Jonty] has created which uses Requests and Beautiful Soup to scrape the relevant data from bitcoinblockhalf.com. The script supports pulling any of the 19 variables listed on the site and displaying it on the LED matrix, which range from the truly nerdy stats like daily block generation to legitimately useful data points that anyone with some Bitcoin in their digital wallets might like to have ticking away on their desks.

The first decade of Bitcoin has been a pretty wild ride, not only monetarily, but in the wide array of hardware now involved in cryptocurrency mining and trading. From Bitcoin traffic lights to custom-made mining rigs that are today more useful as space heaters, it takes a lot of hardware to support these virtual coins.

Continue reading “Raspberry Pi Counts Down To The Last Bitcoin”

ESP8266 Clock Puts Time In A Jar

Ironically, with the wide availability of modular electronic components today, the hardest part of constructing your latest gadget might just end up being able to find a decent looking enclosure for it. Project boxes will only get you so far, and let’s be honest, they aren’t exactly the most attractive things in the world. But if you’re willing to think outside the box (get it?) there are some unconventional options out there that might fit the bill.

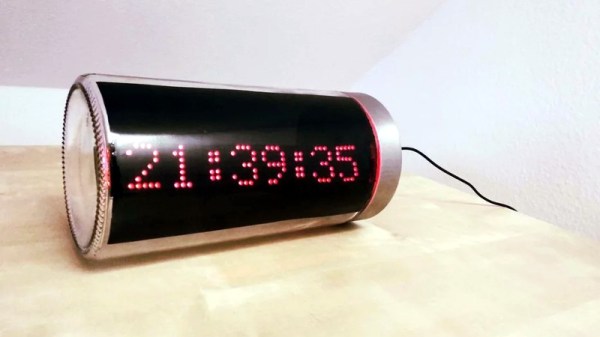
Take for example this ESP8266 clock by [ZaNgAbY] that’s housed in a glass pasta jar. With the addition of some window tint film for the LED display to shine through, the final result could nearly pass as modern art. Even if you don’t need an extra clock around the house, this same general principle could be used to create a slick-looking ticker for all sorts of information, from the weather to server uptime with just some adjustments to the code.

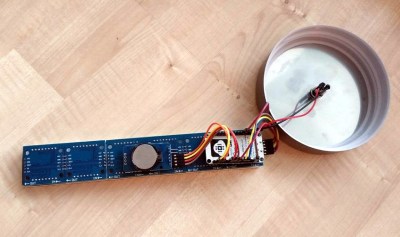
Inside the jar there’s six 8×8 MAX7219 LED matrix modules tacked together to create one long strip, with a NodeMCU board stuck to the back with double-sided tape. There’s also a DS3231 RTC module so the clock can keep halfway decent time, but depending on how aggressively you are willing to pull down the current time from NTP, that may or may not be required. A simple barrel jack is popped through the metal lid of the jar for power, and represents the only physical connection the internals have to the outside world.

For the next iteration [ZaNgAbY] is thinking of adding a temperature and humidity sensor, and a light sensor that can dim the LED display depending on the ambient light. While the environmental sensors will have to go on the outside of the lid if there’s any hope of pulling useful readings from them, the clear glass will allow him to keep the light sensor internal to the clock.

Believe it or not, this isn’t the first time we’ve seen somebody give their electronics the pickle treatment. We’ve previously played host to a server that “preserves” files in a Mason jar, as well as a gorgeous display of an iPod under glass.

Continue reading “ESP8266 Clock Puts Time In A Jar”

Weather Ticker Shows How Easy It Can Be

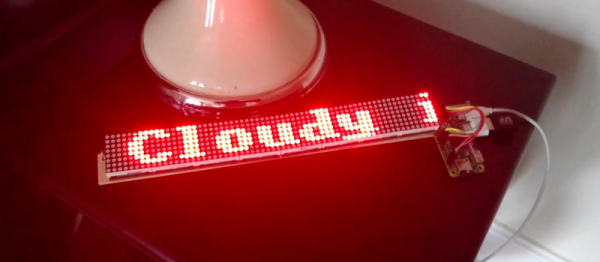
[Petru] seems to have designed his weather ticker project with beginners in mind. Leveraging the inexorable forces of both the Raspberry Pi and cheap online auction house modules, it’s nearly the Hackaday equivalent of painting by numbers. But not everyone is a Picasso, and encouraging beginners to get their feet wet by painting happy little trees is a good cause.

Behind the simplicity is actually a clever architecture. An installation script makes installing the right Raspbian distro simple, and installs a few scripts that automatically update the user code from a GitHub repository. To change the code running on the machine, you can upload a new version to GitHub and press the reset button. (We would also want a way to push up code changes locally, for speed reasons.) Something like this is a great idea for a permanent Pi-based IoT device.

But as a first project, the hope is that something like this will encourage folks who find code too abstract, but who are nonetheless drawn by the allure of blinking lights, to play around with code. And unsurprisingly, this has already been entered in our Enlightened Raspberry Pi Contest which focuses on the simple-yet-impressive stuff you can do with a tiny computer and some electronics.

Never Miss A Thing With This Programmable Vacuum Fluorescent Display Ticker

VFD Ticker

[Coyt] wanted a more convenient way to keep up to date with the ever-changing Bitcoin exchange rates, as well as weather and other useful information. He realized that the vacuum fluorescent display (VFD) he had purchased a couple of years ago would be perfect to display small amounts of information.

[Coyt] discovered that the VFD had a serial interface. The problem was that the VFD was looking for a 12V serial signal but the Raspberry Pi he wanted to use runs at a 3.3V. Upon closer inspection [Coyt] discovered that the VFD actually ran at lower levels as well, but it had a level converter chip installed in front of the main connector. He simply bypassed the level converter and was then able to get the RasPi speaking directly to the VFD.

The brain running this display is a Raspberry Pi. The Pi runs a Python script that pulls down all of the relevant information from the internet and displays it on the VFD. [Coyt] didn’t stop there, though. He knew that having the screen on all of the time would be somewhat of a waste, so he hooked up a PIR sensor to automatically turn on the display only when needed. The PIR sensor can detect motion in the room and will disable the display after a set period of inactivity. Most of this is powered by an LM7805 voltage regulator. While [Coyt] admits a linear regulator is not his ideal solution, it does get the job done. The metal stand acts as a nice heat sink for the regulator.

[Coyt] also wanted his project to have a certain aesthetic. He started by bending a metal plate into a stand for the electronics. He then mounted the VFD on the front of the stand and the RasPi on the back. He also mounted green LEDs between the two plates to light up the edges for a little extra pizzazz. [Coyt] believes he can use the RasPi to PWM the LEDs but this has not yet been implemented. This would allow him to pulse the light for added effect.

Since the whole thing is run by a Python script, it would be trivial to modify it to display other kinds of information. What would you do if you had a motion sensitive automatic ticker?


A Visually Satisfying Tape Ticker

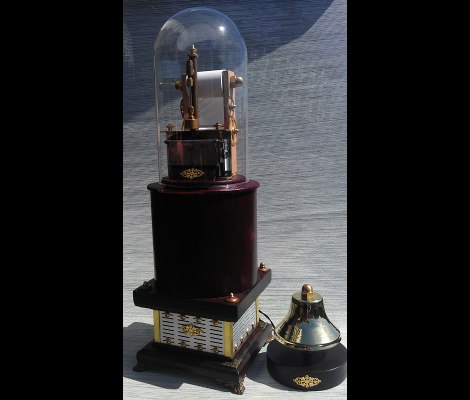
This visually stunning tape ticker prints out [Horatius Steam’s] emails for him. It watches his email address for a secret trigger phrase in the subject line. Sure, thermal receipt printer projects are becoming rather common, but we can’t remember seeing one that took this much time and effort to make it into a showpiece.

The two parts that make this happen are the thermal printer with cutter module and the glass dome which is just large enough to house the business end of it. The driver PCB for the printer is hidden in the base (a paper tube which is painted to took like wood), which positions the outfeed near the bottom of the dome. This had the added benefit of leaving plenty of room for [Horatius] to proudly display the paper roll. Since the receipt printer is designed to work with a Windows machine there was no custom circuitry necessary.