How Computers Work, Starting With Transistor Gates

[Andrew Gibiansky] has just started a tutorial series called Computing with Transistors. It’s purpose is to pull back the many veiled layers between high level languages and the controlling of electrons. And fittingly this first post starts off by explaining voltage source, load, and current. Don’t be thrown by its simplicity though. [Andrew] quickly moves on to talk about switching transistors and how they are used to build gates like the OR NOR gate seen above.

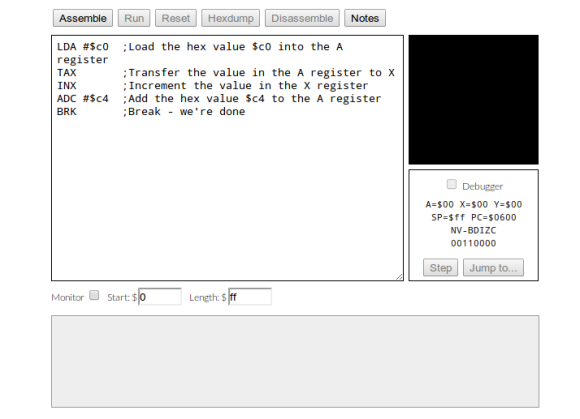
If this is the least bit interesting you should also look back at the post about Nand 2 Tetris. It’s an online course that works its way through The Elements of Computing Systems text book. We’ve been following that journey ourselves, having made it through the hardware build in about a week. The assembler took about the same amount of time, and right now we’re in debugging hell trying to get the last function call and return parts of the VM translator to work right. We’ve used most of the skills needed in this journey before, but never all in one project. It really has shed a lot of light on the gaps in our knowledge, and we’re having a lot of fun at the same time!

[via Reddit]

Reading Analog Sensors With The Raspberry Pi

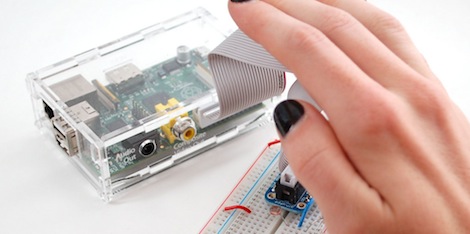
Adafruit just posted an awesome tutorial on reading analog sensors with the Raspberry Pi. It’s a great walkthrough that can be applied to your next Raspi project as well as any project where you just need one more analog input.

Earlier, the folks over at Adafruit posted a tutorial on using a MCP3008 ADC with the Raspi to directly read analog values using a Raspi. Sometimes, though, you don’t need eight analog inputs and a 12-bit ADC to get a project off the ground. Adafruit’s tutorial for reading analog values without an ADC relies on a single 1μF ceramic capacitor attached between a digital input and ground. By pulling the sensor line high for a millisecond or two, the capacitor charges at different rates depending on the value of the analog sensor.

Yes, it’s just an RC timing circuit but seeing as how the Raspi doesn’t have an analog input, we figure this tutorial could help out a few people.

[Balint] Is Starting A Software-defined Radio Tutorial Series

A few months ago, we saw a hack where a $20 USB TV tuner was transformed into a software-defined radio capable of reading GPS signals, listening to radio transmissions between aircraft and a control tower, and even a simple FM radio. This project is a perfect introduction to the RTL-SDR and Ham radio scene, but getting these projects up and running can be a bit overwhelming for anyone who hasn’t played around with this before. [Balint] is tackling this problem head on with a series of YouTube tutorials to get SDR noobs up and running with GNU Radio and the Realtec USB TV tuner.

To demonstrate the power of software-defined radio, [Balint] is using GNU Radio and the USB TV tuner that started it all, the Ezcap EZTV668 (conveniently back in stock at DealExtreme, but other options exist). Because software-defined radio is a touch confusing for a beginner to wrap their head around, [Balint] is beginning his tutorial series by explaining radio sources, sinks, and the GNU Radio interface.

Already, [Balint] has put up 5 tutorials and made the flowgraph files available in his gr-baz project. He’s doing a wonderful job opening up the software-defined radio scene to beginners, but he’s still looking for some feedback. If you have a suggestion on what [Balint] should cover next, leave a note in the YouTube comments and we’re sure [Balint] will get around to that eventually.

Getting Started With OpenCV

[Eric Gregori] sent in an article he wrote for EETimes to introduce the concepts behind computer vision to the masses. As a nice little bonus, [Eric] included a VMware image containing Ubuntu and all the packages and examples necessary to write your own OpenCV apps.

There’s a ton of awesome stuff you can do with computer vision – from automated sentries to keep squirrels away, a kitchen that will tell you when to do the dishes, and automating blindness by mounting a laser on a face tracker, there’s a lot of unexplored territory in the area of computer vision.

Included in [Eric]’s VM image are a motion and line detection example app, an ‘optical flow’ example, and a face detection example. There’s enough here to make a few very interesting projects, so hopefully, [Eric]’s VM image and examples will get your next CV project up and running quickly.

Get Neck-deep Into ZigBee

Here’s a bulky tutorial that will round-out your understanding of ZigBee wireless communications (translated). The protocol is great for hobby electronics projects because it uses low-power short range wireless devices to build a mesh network. The guide covers both hardware and software, but also takes the time to explain what that hardware is doing in the background.

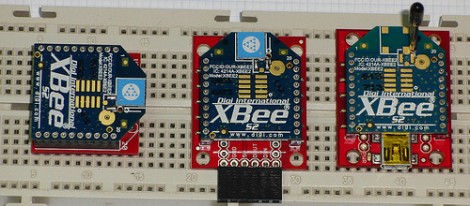
As you can see, several different renditions of an XBee module are used as examples. They pretty much all rely on a series of SparkFun breakout boards that each serve different purposes. Once you’ve acquired these modules, there’s a fair number of choices needed to configure them to play nicely with each other. We read most of the tutorial (we’ll save the rest for later enjoyment) and had no problem following along even without owning the hardware or being able to use the interface as we learned.

Whenever we cover XBee modules we always like to mention that it’s quite easy to use these for remote sensors with no additional microcontroller needed.

Learning To Use The V-USB (AVR USB Firmware) Library

The V-USB library is a pretty handy piece of code that lets you add USB connectivity to ATtiny microcontrollers (it was previously named tinyUSB). But if you’ve ever looked into adding the library to your own projects you may have been stymied by the complexity of the code. There are many examples, but there’s a lack of a concise quick-start for the uninitiated. [Joonas Pihlajamaa] has been working to correct that shortfall with his four-part V-USB tutorial series. It’s not for the absolute newbie; you should already be comfortable working with AVR chips but that’s the only real prerequisite we can see.

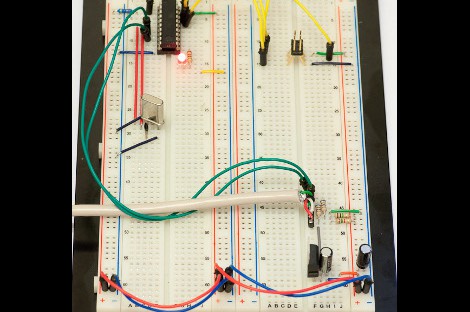
He starts the series with a look into the hardware considerations. USB provides a 5V power rail but the data lines expect 3.3V logic so this must be accounted for. With the test rig built on a breadboard he moves on to pick apart the code, covering various user-defined variables that you’ll need to set based on your project’s needs. We’re going to keep this on the back burner and hopefully the Troll Sniffing Rat will get a makeover (although we must say comments have been a lot nicer as of late… keep it up!).

We’ve embedded links to all four tutorial parts after the break.

Continue reading “Learning To Use The V-USB (AVR USB Firmware) Library”

So You Wanna Learn FPGAs…

FPGAs are the bee’s knees. Instead of programming a chip by telling it what to do, FPGAs allow you to tell a chip what to be. Like everything though, a new skill set is needed to fully exploit the power of FPGAs. [Mike Field] decided to give back to the internet community at large and put up a crash course in FPGA design.

Right now, [Mike] has a couple of modules up that include subjects like binary math, busses, counting, and of course setting up the FPGA hardware. The recommended hardware is the Papilio One, although the Digilent Nexys2 is what [Mike] has been using so far.

We’ve seen a ton of awesome stuff that uses FPGAs, like the emulated Mac Plus, breaking HDCP, and an Ocarina of Time. [Mike]’s tutorials look like a great starting point for some FPGA work. [Mike] is also looking for some feedback on his tutorials, so if you’ve got an idea of what he should cover be sure to drop him a line.

EDIT: The server was running on an FPGA and we can’t find a cache anywhere. If you’ve found a mirror, send a message. Apparently Amazon’s EC2 runs on an FPGA.