An Introduction To Stepper Motors

If you’ve been reading Hack a Day for long enough, you know about our infatuation with stepper motors. These precious little devices put the oomph into our CNC routers, 3D printers, robots, and other miscellaneous projects. Steppers aren’t your run-of-the-mill motors, though. [Steaky] posted a great introduction to stepper motors that lets you hit the ground running building any moving project you could imagine.

Apart from identifying a stepper and figuring out if it works, [Steaky] goes over how to make these motors turn. The theory behind an H-bridge is easy enough, but theory isn’t something often presented in schematics or stepper driver datasheets.

We’ve pulled more than our fair share of steppers from flatbed scanners and old printers. There’s nothing wrong with scavenging old parts, and whether you’re making a robot band to play your kid’s birthday party, robochess, or one of the many 3D printers or CNC machines, there’s going to be a stepper motor in your future.

Beginner Concepts: We’re Gonna Let You Finish, But First This Tutorial On Arduino Interrupts

OK, year-old pop culture references aside [Kyle] dropped us a line to show us his tutorial on using interrupts with your Arduino. Given the single core nature of your average Arduino’s AVR you pretty much have two choices for monitoring occasional un-timed inputs: Either check an input at an interval (which risks missing the signal entirely) or set up an interrupt to pause the chip’s normal operation. Obviously working with interrupts saves you tons of clock cycles since you are not polling a pin over and over. [Kyle] plans on a follow up tutorial to cover timer based interrupts, which can come in handy when generating frequencies and stuff.

Looking for more Arduino Basics? How about Basic on an Arduino. Check out our other beginner concepts posts as well if you need to work on your fundamentals.

Video: Eagle CAD Layout

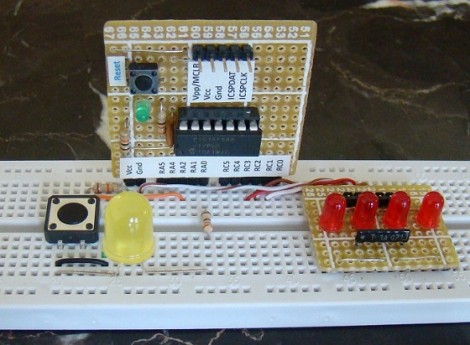
This week’s video is the last in a series of videos where we show how to use Eagle CAD. Today we will look a the Layout portion of the program and will create a circuit board from the schematic that we created previously. We start by creating a layout file and then moving all of the parts to appropriate places on the circuit board. After that, [Jack] shows how to route the traces. Along the way, he talks about the tools that he is using and various ways to use them. The end result is a prototyping board for the PIC18F44J11.

Like the others, this video is fairly long at 29 minutes, so make sure to have some time dedicated towards watching it if you do.

In next week’s video, we will be showing this board as it arrived to us from a manufacturer and will do a tutorial on how to solder.

If you have missed our previous videos, you can find them here:

Schematic part I
Schematic and Custom part creation
CAM Processor

We have also created many supplemental videos explaining how to use many of the tools in the tool palettes. You can find them on our Youtube channel:

Check out the video after the break!
Continue reading “Video: Eagle CAD Layout”

Build Your Own Class AB Audio Amplifier

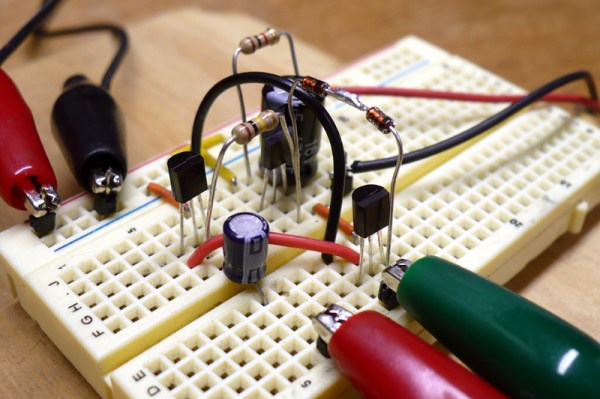
[Dino Segovis] wrote in to tell us about his “hack”, making an AB Audio Amplifier. The advantage of this particular amp is that the transistors never turn off, which would cause distortion. A full schematic is given in the article as well as a parts list. A complete “bill of materials” makes any circuit building project easier, especially for the beginner.

Although this is by no means a new circuit design, (a similar setup is used in car audio equipment) [Dino] does a great job of explaining how things work in the article itself and in the video after the break. He also gives some great tips about transferring your drawn circuit to a breadboard in a neat and organized way at around 5:00 in the video. Continue reading “Build Your Own Class AB Audio Amplifier”

Basic Animatronics Tutorial: PIC Based Servo Eyebrows

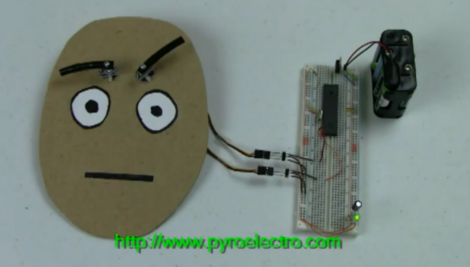
[Chris] writes in to let us know about his latest animatronics tutorial, this time on robotic eyebrows! The tutorial takes us through the process of using a fairly simple PIC  circuit to display various facial expressions. Since a wide array of facial expressions have unique and well understood eyebrow positions this simple hack can make even the most bland looking mask come to life . Animatronics is a subject near and dear to our hearts, but the simple actuation of servos can go much further than cardboard faces. This easy to follow tutorial can help you on your way to controlling all sorts of servo stuff like vent flaps or um…  fish, if you’d like. The software is not very deeply explained but it is commented and available for download from [Chris]’s site.

From here [Chris] plans to expand the project with more tutorials that can help further animate the face. We are particularly interested in the one and two eye systems he mentions, as well as more complicated eyebrow mechanics. Also check out [Chris]’s other servo based robotics tutorials like the Sharpie Spotifier and the Wooden Menace.

There is also a video of the eyebrows in action after the break.

Continue reading “Basic Animatronics Tutorial: PIC Based Servo Eyebrows”

Understanding Interrupts In PIC Microcontrollers

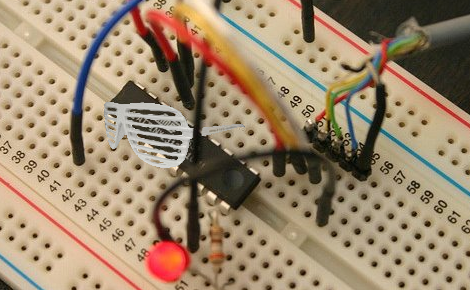
Interrupts are the name of the game for more functional microcontroller firmware. [Rajendra] just posted a tutorial covering all of the interrupt types for the PIC 16F688 microcontroller. He gives an overview of all of the major points: what an interrupt is, what causes interrupts, how to read the datasheet (often overlooked) to set up interrupts, and finally he applies it to a test platform and a bit of code.

We’ve been playing around with an Arduino again over the weekend and are a bit frustrated with the restricted access to interrupts. That issue deals with AVR interrupts, a topic with which we’re already well acquainted. But we work with PIC hardware much less often and it’s fun to explore how the other half does things, both in hardware and in code.

Electronics Tutorial Two-fer: Soldering Skills And Wires

electronics_tutorial_twofer_soldering_skills_and_wires

There is a plethora of electronics tutorials scattered about online. Sometimes it can be hard to separate the good ones from the bad, and the enlightening from the misinformed. We recently came across a pair that we found helpful, and thought they would appeal to anyone starting off in electronics.

In this video tutorial, [Dave Jones] at the EEVblog covers soldering, detailing good practices and common mistakes to avoid when working with through-hole components. As the second video in a series he picks up where part one left off, excitedly demonstrating the ins and outs of good soldering skills.

Hackaday reader [grenadier] is working on a series of beginner’s electronics tutorials, and this week’s entry covers wiring. He discusses wire types, gauges, and even provides a nifty self-computing chart that calculates power loss based on the length and gauge of the selected wire. Before wrapping things up, he briefly touches on fuses and the pitfalls of choosing wire that’s not up to the task at hand. While you’re over there looking over his tutorial, be sure to check out the Junkbox, there’s plenty of awesome stuff to be had!