Beach Buddy Is A Boombox, Phone Charger, And Sunburn Warner

The Beach Buddy

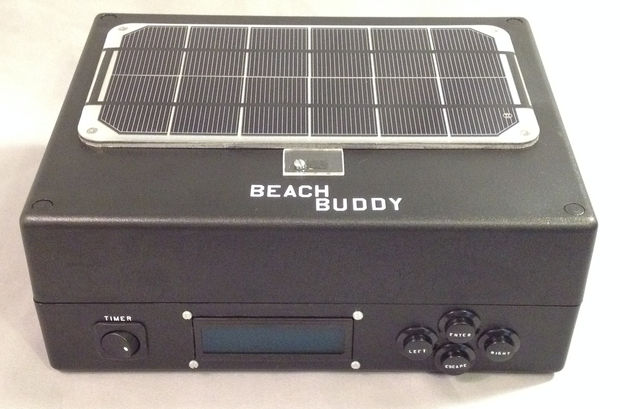
When you venture out onto the beach for a day in the sun, you’re probably not preoccupied with remembering the specifics about your sunscreen’s SPF rating—if you even remembered to apply any. [starwisher] suffered a nasty sunburn after baking in the sunlight beyond her sunscreen’s limits. To prevent future suffering, she developed The Beach Buddy: a portable stereo and phone charger with a handy sunburn calculator to warn you the next time the sun is turning you into barbecue.

After telling the Beach Buddy your skin type and your sunscreen’s SPF rating, a UV sensor takes a reading and an Arduino does a quick calculation that determines how long until you should reapply your sunscreen. Who wants to lug around a boring warning box, though?

[starwisher] went to the trouble of crafting a truly useful all-in-one device by modifying this stereo and this charger to fit together in a sleek custom acrylic enclosure. There’s a switch to activate each function—timer, charger, stereo—a slot on the side to house your phone, and an LCD with some accompanying buttons for setting up the UV timer. You can check out a demo of all the Beach Buddy’s features in a video below.

Continue reading “Beach Buddy Is A Boombox, Phone Charger, And Sunburn Warner”

Using The Raspberry Pi To See Like A Bee

Bee

The Raspberry Pi board camera has a twin brother known as the NoIR camera, a camera without an infrared blocking filter that allows anyone to take some shots of scenes illuminated with ‘invisible’ IR light, investigate the health of plants, and some other cool stuff. The sensor in this camera isn’t just sensitive to IR light – it goes the other way as well, allowing some investigations into the UV spectrum, and showing us what bees and other insects see.

The only problem with examining the UV spectrum with a small camera is that relatively, the camera is much more sensitive to visible and IR than it is to UV. To peer into this strange world, [Oliver] needed a UV pass filter, a filter that only allows UV light through.

By placing the filter between the still life and the camera, [Oliver] was able to shine a deep UV light source and capture the image of a flower in UV. The image above and to the right isn’t what the camera picked up, though – bees cannot see red, so the green channel was shifted to the red, the blue channel to the green, and the UV image was placed where the blue channel once was.

Continue reading “Using The Raspberry Pi To See Like A Bee”

Face Tanner PCB UV Lamp Is So Bright, You Gotta Wear Shades

There may be nothing new under the sun when it comes to etching PCBs with UV light, but [Heliosoph] has brought finer control to a used face tanner he bought that now exposes his boards in ~50 seconds.
The original system allowed for exposure times from 1-99 minutes to be programmed in 1-minute increments. [Heliosoph] though it would be perfect as-is, but the lamp is so powerful that even one minute of exposure was too much. He hoped to find TTL when he opened the thing and was pleasantly surprised to discover a COP410L microcontroller and an MM5484 display driver. Unfortunately, the COP410L’s clock range is too small and he didn’t want to overclock it.

[Heliosoph] built a new board based on the ATMega328P with a salvaged 16×2 LCD, which he was able to easily integrate using the library that ships with the Arduino IDE. He then replaced the BT136 triac lamp switch with a solid state relay, conveniently isolating the electronics from mains power. He re-purposed the unit’s push buttons using the M2tklib, which supports a plethora of common menu functions.

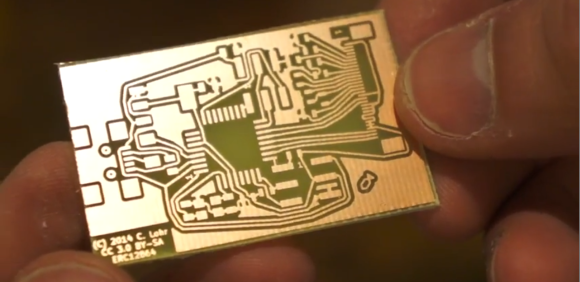
If you need some help with the whole UV PCB etching process, you can’t go wrong with this tutorial from [CNLohr].

[CNLohr] Demos His Photoetch PCB Process

etch

If you’re going to learn something, it only makes sense to learn from a master. [CNLohr] is known around these parts for his fablous PCBs, and he’s finally started to document his entire fabrication process.

[CNLohr] is using a photoetch process, where a mask is created with a laser printer on overhead transparencies. He covers the copper clad boards with a Riston photosensitive mask—available here, and they accept Bitcoin—sent through a laminator, and exposed with the laser printed mask and a UV grow bulb. After the mask has developed, [CNLohr] drops his boards into a ferric chloride bath that eats away the unexposed copper. He then removes the photomask with acetone and cuts the boards with a pair of aircraft snips, and they’re ready to be soldered up with components.

Yes, home PCB etching tutorials are pretty much a solved problem, but [CNLohr]’s work speaks for itself. He’s also the guy who made a microcontroller/Linux/Minecraft thing on a glass microscope slide. Learning from a guy with these skills means you’re learning from one of the best.

Video below, and there’s also a video going over the design of a PCB using KiCAD (!) and TopoR (!!!) available here.

Continue reading “[CNLohr] Demos His Photoetch PCB Process”

Hard Drive Centrifuge For Sensitizing Copper Clad Boards

hdd-to-apply-light-sensitive-ink

We would wager that most of the home etched PCB projects we see around here use the toner transfer method. But the next most popular technique is to use photosensitive ink which resists the etching acid once it has been exposed to light. Most people buy what are called pre-sensitized boards, but you can also get ink to make your own. [Jardirx] does this, and uses an old hard drive to apply an even layer of the light-sensitive ink.

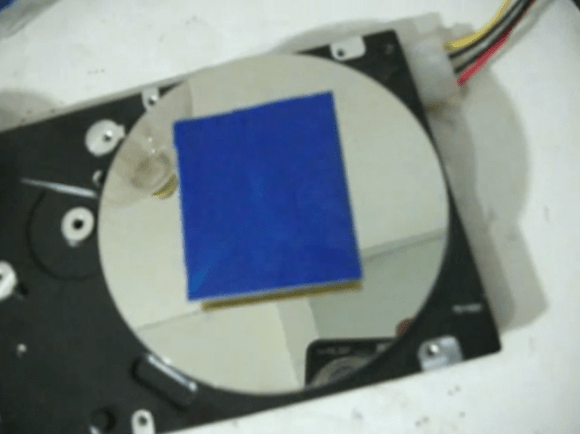
The narration and subtitles of the video found after the break are both in Portuguese, but it’s not hard to figure out what’s going on here. He begins by using double-sided foam tape to secure the piece of copper clad board to the hard drive platters. You’ll want to center it as best as you can to keep the vibrations to a minimum. From there [Jardirx] applies a coating of the ink using a brush. The image above is what results. So as not to get ink everywhere, he then lowers a soda bottle with the bottom cut off to catch the excess. Power up the drive for a few seconds and the board will have a nice even layer ready for a trip through a UV exposure box.

Continue reading “Hard Drive Centrifuge For Sensitizing Copper Clad Boards”

Laser Charged Glowing Display

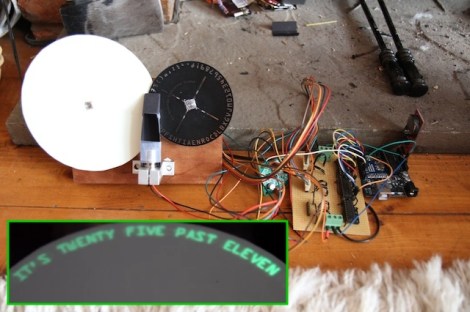
Here’s one of the best takes on a glowing display that we’ve ever seen. Currently [H] is using his creation as a fuzzy clock, but it is certainly capable of displaying just about any messages.

The project uses a wheel of luminous paper as the display surface. This has a glow-in-the-dark quality to it which can be charged up using a bright light source. In this case a UV laser diode was used. This is perhaps the best possible source as its intensity will allow for very quick charging. The innovation here is the use of a second disk as a stencil. Look closely in the image above and you will see that the laser diode is mounted perpendicular to the display surface itself. A mirror reflects — and we believe slightly spreads — the laser dot. It then passes through a cut-out on the black wheel which is shaped as the desired character. As you can see in the video after the break, this results in a crisp and clear glowing letter.

Compare this project to the one that moves the diode itself like a plotter and we think you’ll agree this is a simpler implementation which still looks great!

Continue reading “Laser Charged Glowing Display”

Ikea Provides A Great UV Exposure Box

Making your own boards at home is among the heights of achievement for home tinkerers, and one fraught with frustration. The toner transfer process requires carefully peeling away layers of photo paper, and milling your own circuit boards is an exercise in complexity. One of the best options is using photosensitive copper boards, but this requires exposing the masked-off copper to fairly intense UV light. A UV exposure box is a wonderful project, then, and something [Carlo] just about has wrapped up.

The first portion of [Carlo]’s build involved placing 135 UV LEDs on a piece of protoboard. This UV source eats up a surprising amount of power; [Carlo] is using 12V for the supply, so an old industrial power supply is more than capable of dishing out the 1.5 Amps required for the build.

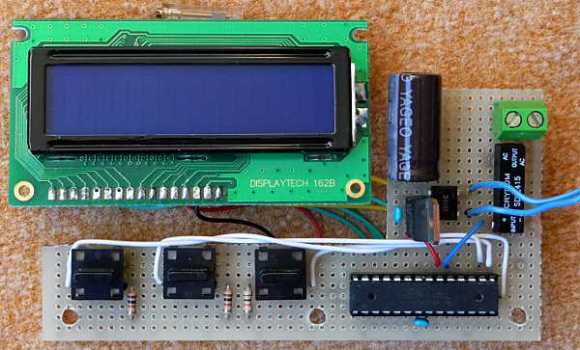
Next, [Carlo] needed a timer for his exposure box. He settled on a design based on an ATMega8 turning a high voltage transistor on and off with a character LCD for the user interface. A few buttons allow [Carlo] to set the countdown timer, after which the LEDs turn on for a set period of time.

All this was packaged into a small box [Carlo] picked up from Ikea. It’s a very useful build, and judging from the video after the break, extremely easy to use.

Continue reading “Ikea Provides A Great UV Exposure Box”