Compiling Your Own Programs For The ESP8266

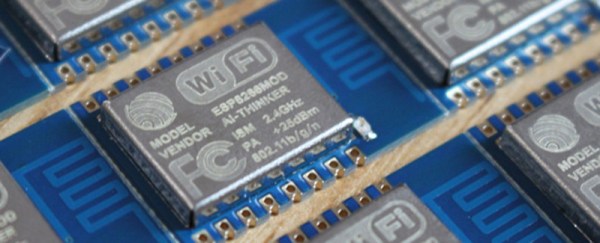
When the ESP8266 was first announced to the world, we were shocked that someone was able to make a cheap, accessible UART to WiFi bridge. Until we get some spectrum opened up and better hardware, this is the part you need to build an Internet of Things thing.

It didn’t stop there, though. Some extremely clever people figured out the ESP8266 had a reasonably high-power microcontroller on board, a lot of Flash, and a good amount of RAM. It looked like you could just use the ESP8266 as a controller unto itself; with this chip, all you need to do is write some code for the ESP, and you have a complete solution for your Internet connected blinking lights or WiFi enabled toaster. Whatever the hip things the cool kids are doing these days, I guess.

But how do you set up your toolchain for the ESP8266? How do you build projects? How do you even upload the thing? Yes, it’s complicated, but never fear; [CNLohr] is here to make things easy for you. He’s put together a video that goes through all the steps to getting the toolchain running, setting up the build environment, and putting some code on the ESP8266. It’s all in a git, with some video annotations.

The tutorial covers setting up the Xtensa toolchain and a patched version of GCC, GDB, and binutils. This will take a long, long time to build, but once it’s done you have a build environment for the ESP8266.

With the build environment put together, [CNLohr] then grabs the Espressif SDK from the official site, and puts together the example image. Uploading to the module requires pulling some of the pins high and some low, plugging in a USB to serial module to send the code to the module, standing well back, and pressing upload.

For his example image, [CNLohr] has a few WS2812 RGB LEDs connected to the ESP8266 WiFi module. Uploading the image turns the LEDs into something controllable with UDP packets on port 7777. It’s exactly what you want in a programmable, WiFi chip, and just the beginning of what can be done with this very cool module.

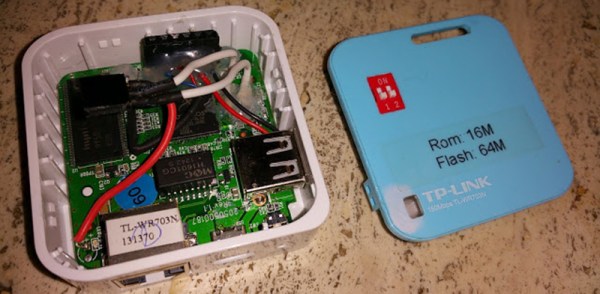
If you’re looking around for some sort of dev board with an ESP8266 on it, [Mathieu] has been playing around with some cool boards, and we’ve been looking into making a Hackaday version to sell in the store. The Hackaday version probably won’t happen because FCC.

Continue reading “Compiling Your Own Programs For The ESP8266”

Using The ESP8266 As A Web-enabled Sensor

A few months ago, the ESP8266 came onto the scene as a cheap way to add WiFi to just about any project that had a spare UART. Since then, a few people have figured out how to get this neat chip running custom firmware, opening the doors to an Internet of Things based around an ESP8266. [Marc] and [Xavi] just wrote up a quick tutorial on how to turn the ESP8266 into a WiFi sensor platform that will relay the state of a GPIO pin to the Internet.

If you’re going to replicate this project, you won’t be using the stock firmware on the ESP. Instead of the stock firmware, [Marc] and [Xavi] are using the Lua-based firmware that allows for access to a few GPIOs on the device and scripting support to make application development easy. To upload this firmware to the ESP, [Marc] and [Xavi] needed a standard FTDI USB to serial converter, a few AT commands through a terminal program, and a few bits of wire.

The circuit [Marc] and [Xavi] ended up demoing for this tutorial is a simple webpage that’s updated every time a button is pressed. This will be installed in the door of their hackerspace in Barcelona, but already they have a great example of the ESP8266 in use.

Bridging Networks With The Flip Of A Switch

The TP-Link TL-WR703n is the WRT54G for the modern era – extremely hackable, cheap, and available just about everywhere. Loaded up with OpenWRT, it’s capable of bridging networks: turning Ethernet into WiFi and vice versa. This requires reconfiguring the router, and after doing this enough times, [Martin] was looking for a better solution. The SOC inside the WR703n has two exposed GPIO pins, allowing [Martin] to choose between WiFi access point or client and between bridged or NAT/DHCP.

According to the OpenWRT wiki, there are a few GPIOs available, and after connecting these pins to a DIP switch, [Martin] could access these switches through the firmware. The hard part of this build is building the script to change the settings when the system boots. This script looks at the state of the GPIOs and changes the WiFi into client or access point mode and tries not to muck about with the DHCP somewhere off in the cloud. Yes, we just used cloud in its proper context.

The only other hardware to complete this build was a simple USB to serial converter that should be shoved into the corner of everyone’s workbench. Not bad for an extremely minimal soldering and configuration required for a something that’s extremely useful.

Running A Web Server On The ESP8266

We’ve written lot about the ESP8266 lately, but people keep finding more awesome uses for this inexpensive module. [Martin] decided that using the ESP8266 with an external microcontroller was overkill, and decided to implement his project entirely on the module with a built-in web server.

[Martin] started out with the ESP8266 web server firmware developed by [sprite_tm]. This firmware provides a basic web server that supports multiple connections and simple CGI scripts right on the module. The web server firmware opens up a ton of possibilities with CGI scripting. When booting up in AP mode, you can even connect the ESP8266 to another access point right from the your browser.

[Martin] decided to connect a DHT22 temperature/humidity sensor to the module as a proof of concept. He used a DHT22 library written for the ESP8266 to read data from the sensor, and wrote a CGI script to display the data on a web page. [Martin] also added buttons to control a GPIO pin as a proof of concept. He posted his source code and a binary (see the end of his post) so you can try out his application and mod it for your own project.

Programming An Arduino Over WiFi With The ESP8266

A lot of people have used ESP8266 to add inexpensive WiFi connectivity to their projects, but [Oscar] decided to take it one step further and program an Arduino over WiFi with the ESP8266. [Oscar] wrote a server script in Python that communicates with firmware running on the Arduino. The Arduino connects to the server on startup and listens for a “reboot” command.

When the command is received, the processor resets and enters the bootloader. The python script begins streaming a hex file over WiFi to the ESP8226, which relays it to the Arduino’s bootloader. Once the hex file is streamed, the microcontroller seamlessly starts executing the firmware. This method can be used with any AVR running a stk500-compatible bootloader.

[Oscar]’s writeup is in Spanish, but fortunately the comments in his Python and Arduino code are in English. Check out the video (in English) after the break where [Oscar] demonstrates his bootloading setup.

Continue reading “Programming An Arduino Over WiFi With The ESP8266”

Using Router SoCs As WiFi Modules (Yet Again)

8-bit AVRs and 32-bit ARMs do one thing, and one thing well: controlling other electronics and sensors while sipping power. The Internet of Things is upon us and with that comes the need for connecting to WiFi networks. Already, a lot of chips are using repackaged System on Chips to provide an easy way to connect to WiFi, and the USR-WIFI232-T is the latest of the bunch. It’s yet another UART to WiFi bridge, and as [2XOD], it’s pretty easy to connect to an AVR.

The module in question can be had through the usual channels for about $11, shipped straight from China, and the only purpose of this device is to provide a bridge between a serial port and a wireless network. They’re not that powerful, and are only meant for simple tasks,

[2XOD] got his hands on one of these modules and tested them out. They’re actually somewhat interesting, with all the configuration happening over a webpage served from the device. Of course the standard AT commands are available for setting everything up, just like the ESP8266.

With a month of testing, [2XOD] has found this to be a very reliable device, logging temperatures every minute for two weeks. There’s also a breakout board available to make connection easy, and depending on what project you’re building, these could be a reasonable stand-in for some other popular UART -> WiFi chips.

A Development Board For The ESP8266

[Necromant] is ready to dip his toes into the world of firmware development for everyone’s favorite WiFi chip, the ESP8266. Before that begins, it would be a good idea to make a nifty little breakout board for this chip. Here it is, a board with a USB to UART converter with board art that’s compatible with a toner transfer process.

Since this is just a board that turns USB into something the ESP8266 can understand, the most reasonable course of action would be to throw an FTDI chip in there and call it a day. We wouldn’t suggest that. Instead, [necromant] is using a Prolific PL2303HX. The RTS/DTR pins on the serial chip aren’t used, but only because the ESP8266 forums haven’t yet decided on how to connect them to the WiFi chip. GPIOs on the Prolific are broken out for some other projects [necromant] has in mind, with a userspace driver to make everything work.

[Necromant] is the creator of Antares, a build system for microcontrollers and a Hackaday Prize entry. He intends to make his build system compatible with this WiFi chip, just as soon as everyone else figures out an easy way to make it work.