Looking for an easy way to keep on making stuff even though you’re living in a tiny dorm room? [Matt Silver] was tired of not having a dedicated work-space, so he spent some serious time designing this modular, re-configurable and collapsible portable workstation ready for almost anything.
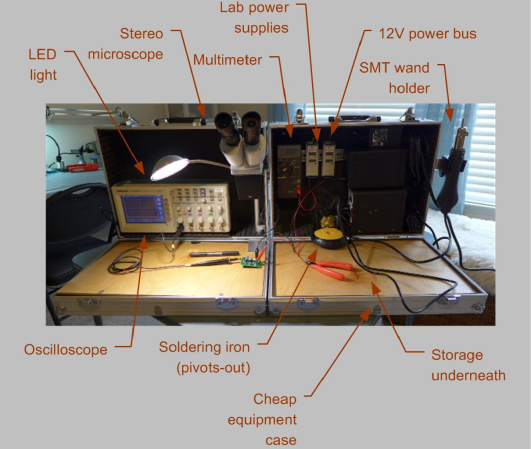
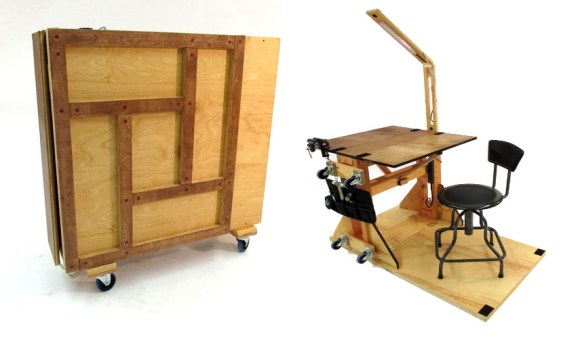
He started out by sketching ideas, playing around with 3D models in SketchUp, and eventually building a few prototypes using trial and error — and what he’s come up with is pretty darn impressive. It folds down to just under a foot by three feet squared and has casters to roll it around. Once unfolded, you stabilize it by placing your chair on one of the walls that folds down, and the desk itself is also re-configurable for different work surfaces. He’s included a power bar, an LED work-light, and it even has storage racks for tools on the side.
It’s a very thorough Instructable, and definitely worth a look through — especially to see how it magically unfolds! And if you’re wondering about how much it would cost to build, you’re probably looking at around $200 depending on what you already have on hand. What we really like is how it’s almost entirely made out of a single 4’x8′ panel of plywood — it’s like this guy works for IKEA or something!