At the close of the 8-bit home computer era there were some machines produced that attempted to bridge the gap between the 8- and 16-bit worlds, either by providing a 16-bit device with a backwards compatibility mode, or an 8-bit one with enhanced capabilities to compete with its newer rivals. These products largely fell by the wayside in the face of new 16-bit only platforms, but they and the various enhanced versions of 8-bit processors that appeared over subsequent decades present a fascinating glimpse of what might have been. It’s a theme [Konstantin Dimitrov] explores with his Z20X computer project, a machine using the Zilog eZ80 processor running at 20 MHz, with 512 kB of external memory, and an interface for a 7″ TFT screen module.
The eZ80 is a more recent development, a pipelined processor capable of much higher clock speeds and addressing up to 16 MB of memory while maintaining software compatibility with the Z80. Had it come to market in the late 1980s it would have been a sensation, but instead it has appeared in embedded computers and perhaps of most interest to Hackaday readers, in TI’s line of programmable calculators.
The Z20X is designed to be a through-hole board, with the only SMD component the eZ80 itself. We can understand the motivation behind this, but at the same time wonder whether its likely builders in 2020 will be people unfazed by SMD assembly. It has a system of processor modules in case of future upgrades, and an expansion backplane with an option of an RC2014-compatible bus. There are also PS/2 keyboard and mouse connectors, a serial bus, and an on-board sound chip. The website is short on details of any software, but we’d expect it to work with the typical Z80 retrocomputer offerings such as a BASIC interpreter and the CP/M operating system.
This machine is likely to appeal to retrocomputing enthusiasts, but had it appeared even without the display in a previous decade it would no doubt have become an object of desire. It does however serve as a reminder that the Z80 line has been updated, and though most of us will have moved on it still offers a few chips that could be of interest. Meanwhile for a comparison, take a look at last year’s review of the latest in the range of RC2014 retrocomputer boards.
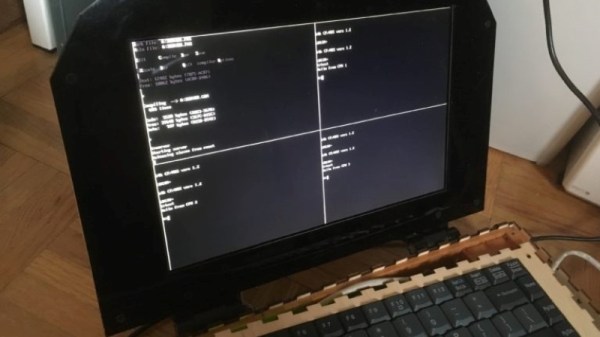
When life hands you a ridiculously expensive and massively powerful FPGA dev board, your first reaction may not be to build a 16-core Z80 laptop with it. If it’s not, perhaps you should examine your priorities, because that’s what [Chris Fenton] did, with the result being the wonderfully impractical “ZedRipper.”
Our first impression is that we’ve got to start hanging around a better class of lab, because [Chris] came by this $6000 FPGA board as the result of a lab cleanout; the best we ever scored was a few old Cat-5 cables and some power strips. The Stratix FPGA formed the heart of the design, surrounded by a few breakout boards for the 10.1″ VGA display and the keyboard, which was salvaged from an old PS/2. The 16 Z80 cores running in the FPGA are connected by a ring-topology network, which [Chris] dubs the “Z-Ring”. One of the Z80 cores, the server core, runs CP/M 2.2 and a file server called CP/NET, while the other fifteen machines are clients that run CP/NOS. A simple window manager shows 80 x 25 character terminal sessions for the server and any three of the clients at once, and the whole thing, including a LiPo battery pack, fits into a laser-cut plywood case. It’s retro, it’s modern, it’s overkill, and we absolutely love it.
Back in the days before kids could be placated with a $50 Android burner phone, many a youngster was gifted a so-called “educational computer” to keep them occupied. Invariably looking like a fever dream version of the real computer their parents didn’t want to let them use, these gadgets offered monochromatic exploits that would make Zork look like Fortnite. Due equally to their inherent hardware limitations and the premise of being an educational toy, the “games” on these computers often took the form of completing mathematical equations or answering history questions.
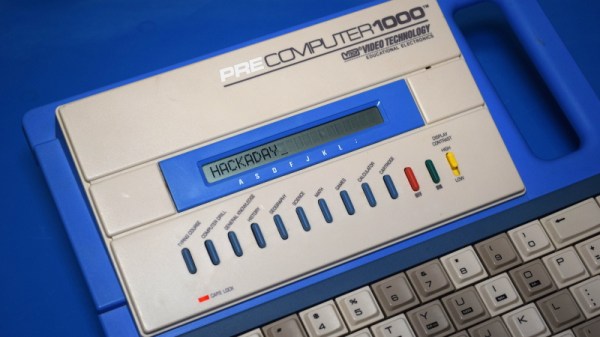
The VTech PreComputer 1000 is a perfect specimen of this particular style of educational toy. Released in 1988, it was advertised as a way for pre-teens to become more comfortable with operating a real computer; since at that point, it had become abundantly clear that the coming decade would see a beige box on every professional’s desk. Its full-size QWERTY keyboard was specifically mentioned in the product’s accompanying literature as a way to get young hands accustomed to the ways of touch typing.
Words of wisdom from the PreComputer 1000’s manual.
By the mid-1990s these devices would have progressed far enough to include passable text-to-speech capabilities and primitive graphics, but the junior professional who found him or herself seated in front of the PreComputer 1000 was treated to a far more spartan experience. It’s perhaps just as well that this particular educational computer was listed as a training tool, because even in 1988, surely a session with this toy must have felt very much like work.
But that’s not to say the PreComputer 1000 is without its own unique charms. In an effort to help cement its role as a “trainer” for more conventional computers, VTech saw fit to equip the PreComputer with its own BASIC interpreter. They even included generous written documentation that walked young programmers through the various commands and functions. Even today, there’s something oddly appealing about a mobile device with a full keyboard that can run BASIC programs for better than 24 hours on batteries (even if they’re alkaline “C” cells).
Let’s take a look inside this more than 30 year old mobile device, and see how the designers managed to create a reasonable facsimile of actual computing on a kid-friendly budget.
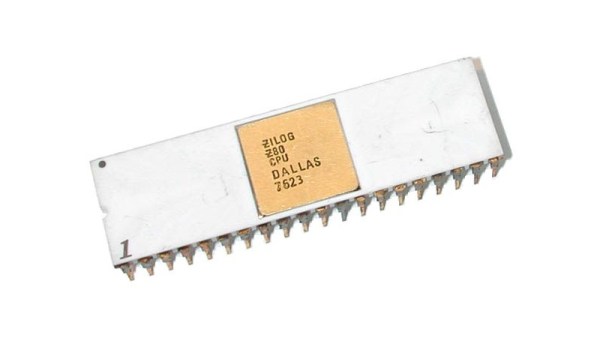
Decades of post-apocalyptic Hollywood movies have taught us that once all the trappings of our civilisation have been stripped away, it’s going to be kinda cool. We’re all going to wear slightly dusty looking 1980s motorcycling gear, and we’re going to drive really cool cars. Except of course Mad Max is fantasy, and the reality is likely to be unspeakbly grim. The future [Virgil Dupras] is anticipating is not a post-nuclear wasteland though, instead he’s trying to imagine what access to computing might look like in a world where the global supply chain has broken down. His solution is CollapseOS, an operating system designed for resilience and self-replication, that runs upon the minimal hardware of an 8-bit Z80.
It’s a pretty basic operating system so brace yourself if you are expecting a 64-bit fully multithreading kernel. Instead, you’re looking at a kernel, an assembler, and a text editor. One of the stated aims is that it can compile assembly language for a wide range of target CPUs, but it does not make it clear whether this means the OS itself will support those platforms. The self-replication is a fascinating feature though.
It’s an interesting question: what computing hardware would be available to the would-be hacker in a world in which all parts must be scavenged? The Z80 and other processors like it fit the bill admirably in one sense as it is possible to create a working computer using them with fairly minimal tools and knowledge, but we can’t help wondering whether the days when almost any electronic junk pile would contain one are now past. So what other easily accessible computing platforms might be created from post-apocalyptic junk in 2019? Remember, with no laptop and IDE you can’t just put an Arduino bootloader on that ATmega328 you desoldered from an old thermostat. As always the comments are open.
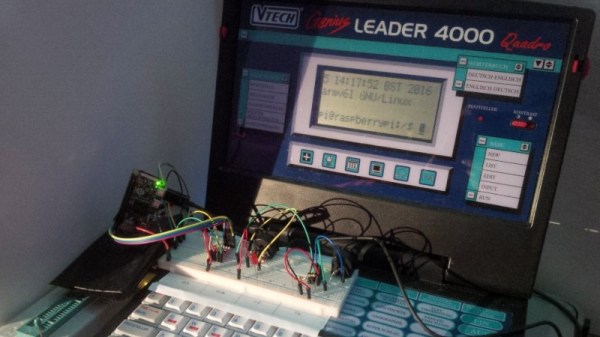
Our more youthful readers are fairly likely to have owned some incarnation of a VTech educational computer. From the mid-1980s and right up to the present day, VTech has been producing vaguely laptop shaped gadgets aimed at teaching everything from basic reading skills all the way up to world history. Hallmarks of these devices include a miserable monochrome LCD, and unpleasant membrane keyboard, and as [HotKey] found, occasionally a proper Z80 processor.
It started, as such things often do, with eBay. [HotKey] found that the second hand market is flooded with these decades-old educational gadgets, often selling for just a few bucks. As it turns out, children of the smartphone and tablet era don’t seem terribly interested in a “laptop” from 1991. At any rate, he ordered about a dozen different models and started tearing into them to see what made them tick.
He found that the VTech machines of around 20+ years old were using the Z80 processor, and what’s more, they shared a fairly standardized external cartridge interface for adding additional software or saving data. Upon attempting to dump some data from the cartridge port, [HotKey] discovered that it was actually connected to the computer’s main bus. He realized that with a custom designed cartridge, it should be able to take over the system and have it run his own code.
After more than a year of tinkering and talking to other hackers in the Z80 scene, [HotKey] has made some impressive headway. He’s not only created a custom cartridge that lets him load new code and connect to external devices, but he’s also added support for a few VTech machines to z88dk so that others can start writing their own C code for these machines. So far he’s created some very promising proof of concept programs such as a MIDI controller and serial terminal, but ultimately he hopes to create a DOS or CP/M like operating system that will elevate these vintage machines from simple toys to legitimate multi-purpose computers.
Trouble in the Golden State this week, as parts of California were subjected to planned blackouts. Intended to prevent a repeat of last year’s deadly wildfires, which were tied in part to defective electrical distribution equipment, the blackouts could plunge millions in the counties surrounding Sacramento into the dark for days. Schools have canceled classes, the few stores that are open are taking cash only, and hospitals are running on generators. It seems a drastic move for PG&E, the utility that promptly went into bankruptcy after being blamed for last year’s fires, but it has the support of the governor, so the plan is likely to continue as long as the winds do. One group is not likely to complain, though; California amateur radio operators must be enjoying a greatly decreased noise floor in the blackout areas, thanks to the loss of millions of switch-mode power supplies and their RF noise.
Good news, bad news for Fusion 360 users. Autodesk, the company behind the popular and remarkably capable CAD/CAM/CAE package, has announced changes to its licensing scheme, which went into effect this week. Users no longer have to pay for the “Ultimate” license tier to get goodies like 5-axis machining and generative design tools, as all capabilities are now included in the single paid version of Fusion 360. That’s good because plenty of users were unwilling to bump their $310 annual “Standard” license fee up to $1535 to get those features, but it’s bad because now the annual rate goes to $495. In a nice nod to the current userbase, those currently on the Standard license, as well as early adopters, will get to keep the $310 annual rate as long as they renew, and The $495 pricing tier went into effect in November of 2018, while anyone still on the $310 annual price was grandfathered in (and will remain to be). At that time there was still a $1535 tier called Ultimate, whose price will now be going away but the features remain in the $495 tier which is now the only pricing option for Fusion 360. Ultimate users will see a $1040 price drop. As for the current base of freeloaders like yours truly, fear not: Fusion 360 is still free for personal, non-commercial use. No generative design or tech support for us, though. (Editor’s Note: This paragraph was updated on 10/14/2019 to clarify the tier changes after Autodesk reached out to Hackaday via email.)
You might have had a bad day at the bench, but was it as bad as Román’s? He tipped us off to his nightmare of running into defective Wemos D1 boards – a lot of them. The 50 boards were to satisfy an order of data loggers for a customer, but all the boards seemed caught in an endless reboot loop when plugged into a USB port for programming. He changed PCs, changed cables, but nothing worked to stop the cycle except for one thing: touching the metal case of the module. His write up goes through all the dead-ends he went down to fix the problem, which ended up being a capacitor between the antenna and ground. Was it supposed to be there? Who knows, because once that cap was removed, the boards worked fine. Hats off to Román for troubleshooting this and sharing the results with us.
Ever since giving up their “Don’t be evil” schtick, Google seems to have really embraced the alternative. Now they’re in trouble for targeting the homeless in their quest for facial recognition data. The “volunteer research studies” consisted of playing what Google contractors were trained to describe as a “mini-game” on a modified smartphone, which captured video of the player’s face. Participants were compensated with $5 Starbucks gift cards but were not told that video was being captured, and if asked, contractors were allegedly trained to lie about that. Contractors were also allegedly trained to seek out people with dark skin, ostensibly to improve facial recognition algorithms that notoriously have a hard time with darker complexions. To be fair, the homeless were not exclusively targeted; college students were also given gift cards in exchange for their facial data.
For most of us, 3D-printing is a hobby, or at least in service of other hobbies. Few of us make a living at it, but professionals who do are often a great source of tips and tricks. One such pro is industrial designer Eric Strebel, who recently posted a video of his 3D-printing pro-tips. A lot of it is concerned with post-processing prints, like using a cake decorator’s spatula to pry prints off the bed, or the use of card scrapers and dental chisels to clean up prints. But the money tip from this video is the rolling cart he made for his Ultimaker. With the printer on top and storage below, it’s a great way to free up some bench space.
And finally, have you ever wondered how we hackers will rebuild society once the apocalypse hits and mutant zombie biker gangs roam the Earth? If so, then you need to check out Collapse OS, the operating system for an uncertain future. Designed to be as self-contained as possible, Collapse OS is intended to run on “field expedient” computers, cobbled together from whatever e-waste can be scrounged, as long as it includes a Z80 microprocessor. The OS has been tested on an RC2014 and a Sega Master System so far, but keep an eye out for TRS-80s, Kaypros, and the odd TI-84 graphing calculator as you pick through the remains of civilization.
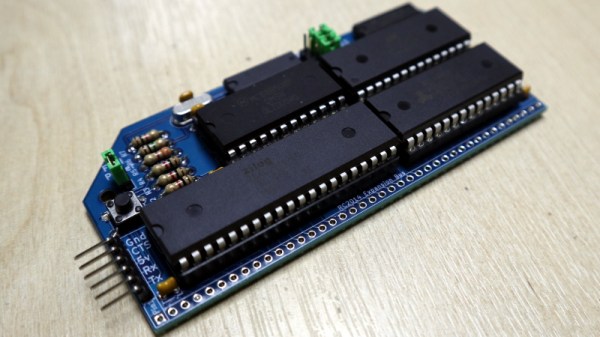
At the end of August I made the trip to Hebden Bridge to give a talk at OSHCamp 2019, a weekend of interesting stuff in the Yorkshire Dales. Instead of a badge, this event gives each attendee an electronic kit provided by a sponsor, and this year’s one was particularly interesting. The RC2014 Micro is the latest iteration of the RC2014 Z80-based retrocomputer, and it’s a single-board computer that strips the RC2014 down to a bare minimum. Time to spend an evening in the hackerspace assembling it, to take a look!
It’s An SBC, But Not As You Know It!
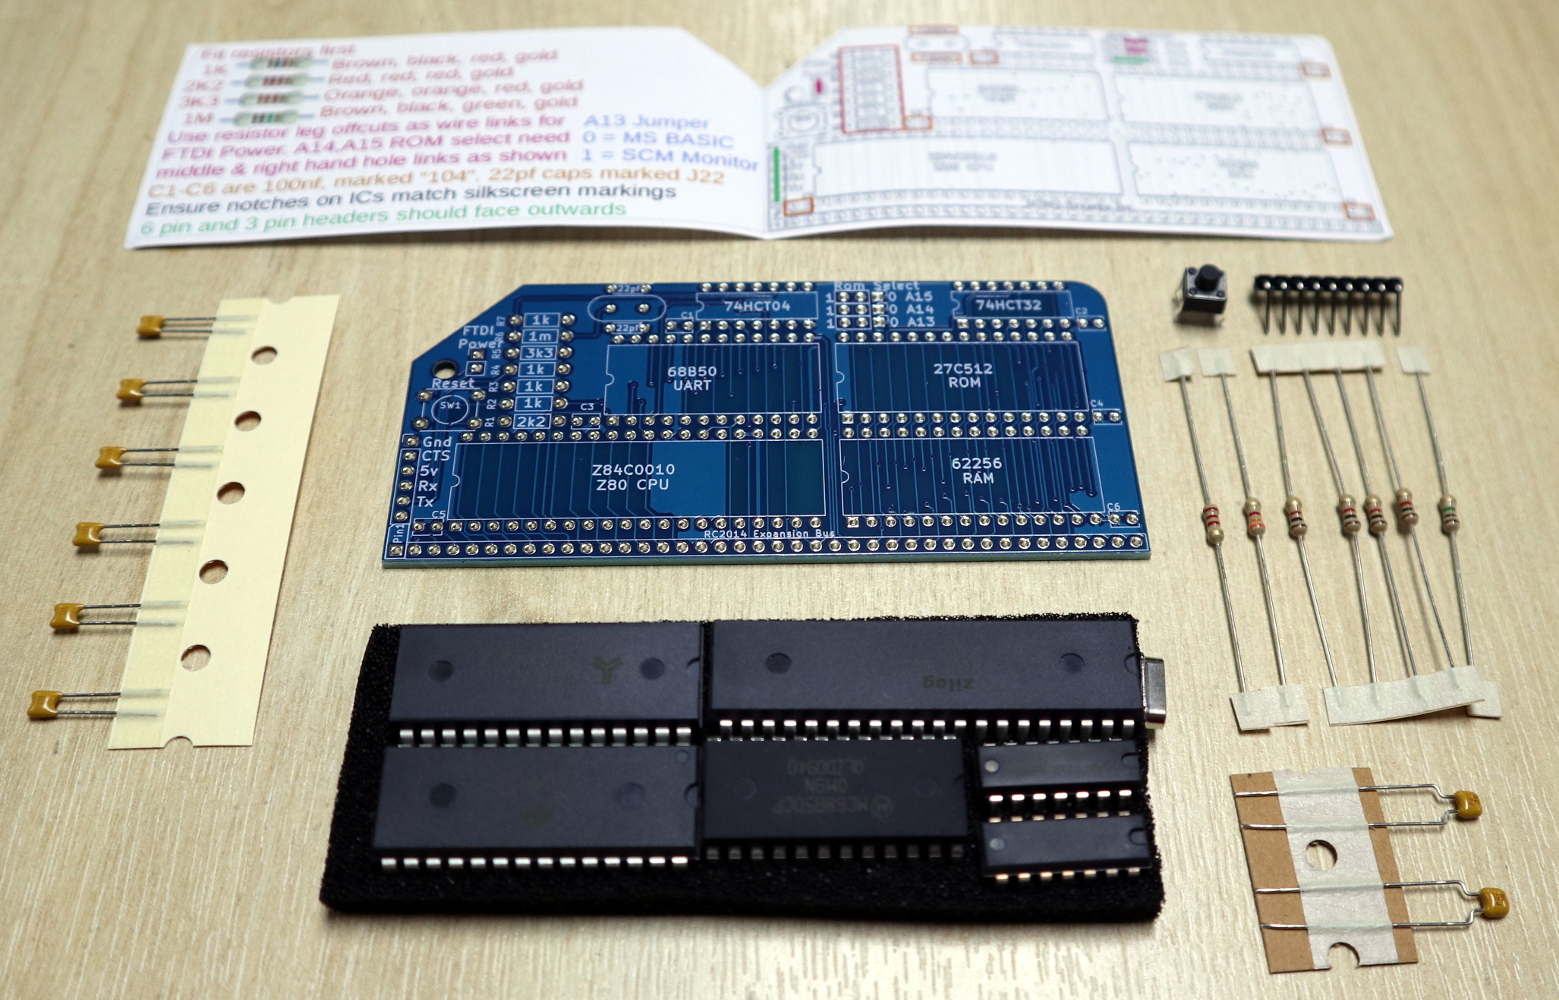
The kit contents
The kit arrives in a very compact heat-sealed anti-static packet, and upon opening was revealed to contain the PCB, a piece of foam carrying the integrated circuits, a few passives, and a very simple getting started and assembly guide. The simplicity of the design becomes obvious from the chip count, there’s the Z80 itself, a 6850 UART, 27C512 ROM, 62256 RAM, 74HCT04 for clock generation, and a 74HCT32 for address decoding. The quick-start is adequate, but there is also a set of more comprehensive online instructions (PDF) available.
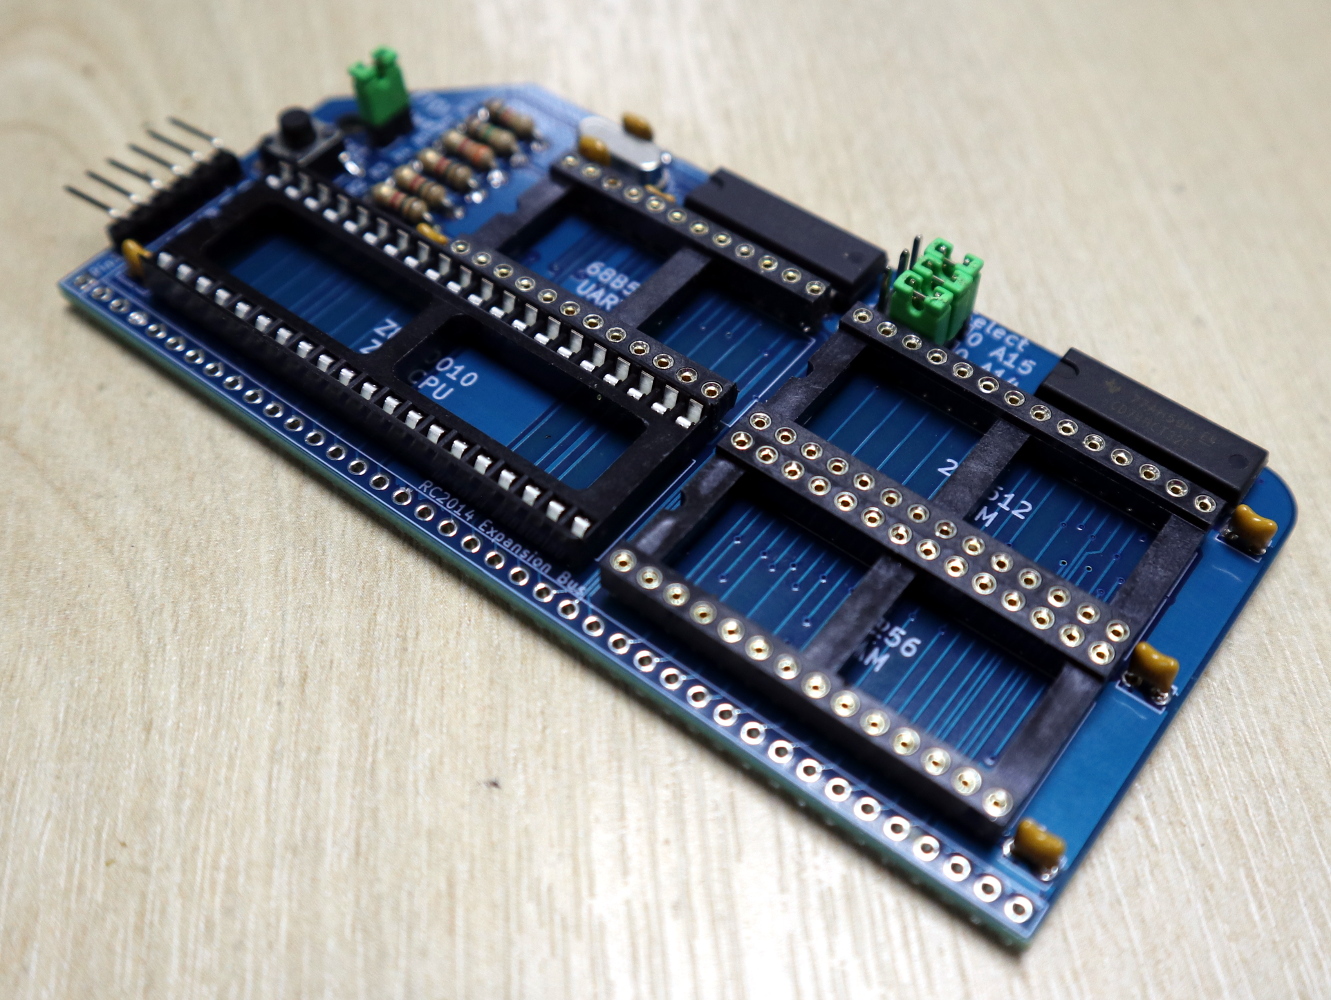
I added chip sockets and jumpers to my kit.
Assembly of a through-hole kit is hardly challenging, though this one is about as densely-packed as it’s possible to make a through-hole kit with DIP integrated circuits. As with most through-hole projects, the order you pick is everything: resistors first, then capacitors, reset button and crystal, followed by integrated circuits.
I’m always a bit shy about soldering ICs directly to a circuit board so I supplemented my kit with sockets and jumpers. The jumpers are used to select an FTDI power source and ROM addresses for Grant Searle’s ROM BASIC distribution or Steve Cousins’ SCM 1.0 machine code monitor, and the kit instructions recommended hard-wiring them with cut-off resistor wires. There was no row of pins for the expansion bus because this kit was supplied without the backplane that’s a feature of the larger RC2014 kits, but it did have a set of right-angle pins for an FTDI serial cable.
Your Arduino Doesn’t Have A Development Environment On Board!
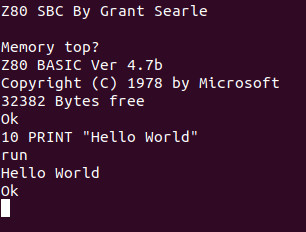
Having assembled my RC2014 Mini and given it a visual inspection it was time to power it up and see whether it worked. Installing the jumper for FTDI power, I attached my serial cable and plugged it into a USB port.
A really nice touch is that the Micro has the colours for the serial cable wires on the reverse side of the PCB, taking away the worry of getting it the wrong way round. A quick screen /dev/ttyUSB0 115200 to get a serial terminal from a bash prompt, hit the reset button, and I was rewarded with a BASIC interpreter. My RC2014 Micro worked first time, and I could straight away give it BASIC commands such as PRINT "Hello World!" and be rewarded with the expected output.
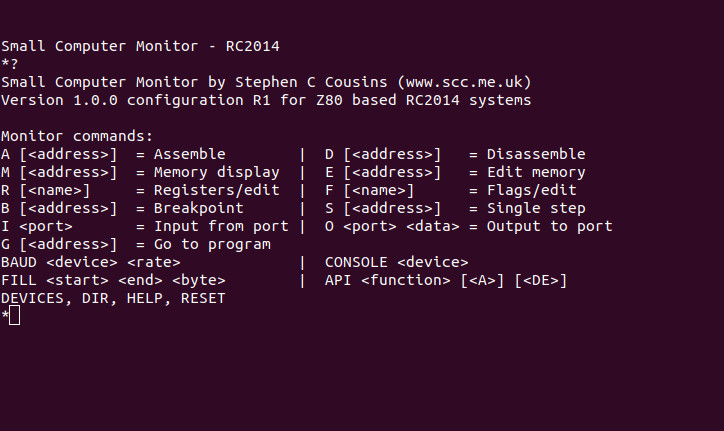
The SCM ROM monitor.
So I’ve built a little Z80 single board computer, and with considerably less work than that required for the fully modular version of the RC2014. Its creator Spencer tells me that the Micro was originally designed as a bargain-basement RC2014 as a multibuy for workshops and similar activities, being very similar to his RC2014 mini board but without provision for a Pi Zero terminal and a few other components. It lacks the extra hardware required for a more comprehensive operating system such as CP/M, so I’m left with about as minimal an 8-bit computer as it’s possible to build using parts available in 2019. My question then is this: What can I do with it?
So. What Can I Do With An 8-bit SBC?
My first computer was a Sinclair ZX81, how could it possibly compare this small kit that was a giveaway at a conference? Although the Sinclair included a black-and-white TV display interface, tape backup interface, and keyboard, the core computing power was not too far different in its abilities from this RC2014 Micro — after all, it’s the same processor chip. It was the platform that introduced a much younger me to computing, and straight away I devoured Sinclair BASIC and then went on to write machine code on it. It became a general-purpose calculation and computing scratchpad for repetitive homework due to the ease of BASIC programming, and with my Maplin 8255 I/O port card I was able to use it in the way a modern tech-aware kid might use an Arduino.
The RC2014 Micro is well placed to fill all of those functions as a BASIC and machine code learning platform on which to get down to the hardware in a way you simply can’t on most modern computers, and though the Arduino represents a far more sensible choice for hardware interfacing there is also an RC2014 backplane and I/O board available for the Micro’s expansion bus should you wish to have a go. Will I use it for these things? It’s certainly much more convenient than its full-sized sibling, so it’s quite likely I’ll be getting my hands dirty with a little bit of Z80 code. It’s astounding how much you can forget in 35 years!
The RC2014 Micro can be bought from Spencer’s Tindie store, with substantial bulk discounts for those workshop customers. If you want the full retrocomputer experience it’s a good choice as it provides about as simple a way into Z80 hardware and software as possible. The cost of simplicity comes in having no non-volatile storage and in lacking the hardware to run CP/M, but it has to be borne in mind that it’s the bottom of the RC2014 range. For comparison you can read our review of the original RC2014, over which we’d say the chief advantage of the Micro is its relative ease of construction.