Breaking Into The Nintendo DSi Through The (Browser) Window

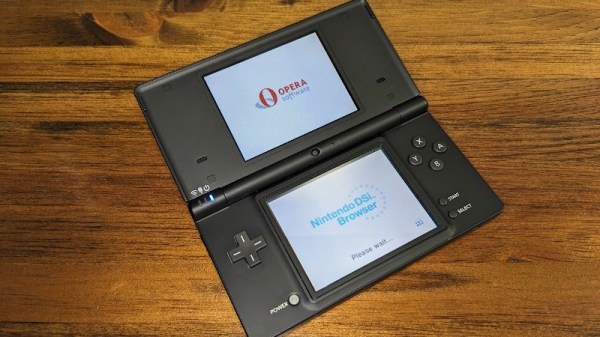
The Nintendo DSi was surpassed by newer and better handhelds many years ago, but that doesn’t stop people like [Nathan Farlow] from attempting to break into the old abandoned house through a rather unexpected place: the (browser) window.

When the Nintendo DSi was released in 2008, one of its notable features was a built-in version of the Opera 9.50 web browser. [Nathan] reasoned an exploit in this browser would be an ideal entry point, as there’s no OS or kernel to get past — once you get execution, you control the system. To put this plan into action, he put together two great ideas. First he used the WebKit layout tests to get the browser into weird edge cases, and then tracked down an Windows build of Opera 9.50 that he could run on his system under WINE. This allowed him to identify the use-after-free bugs that he was looking for.

Now that he had an address to jump to, he just had to get his code into the right spot. For this he employed what’s known as a NOP sled; basically a long list of commands that do nothing, which if jumped into, will slide into his exploit code. In modern browsers a good way to allocate a chunk of memory and fill it would be a Float32Array, but since this is a 2008 browser, a smattering of RGBA canvases will do.

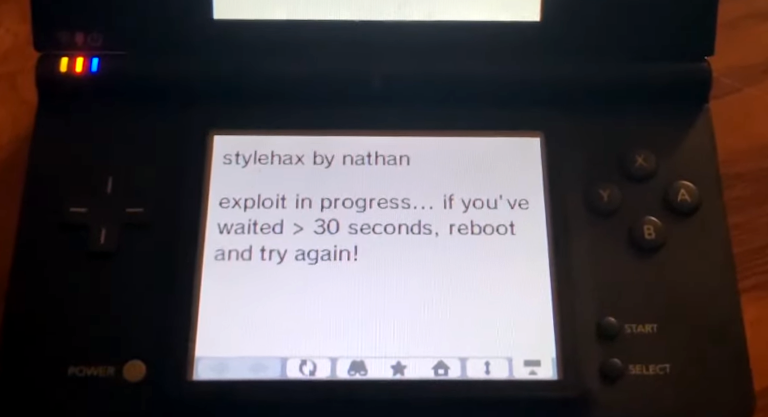
The actual payload is designed to execute a boot.nds file from the SD card, such as a homebrew launcher. If you want to give it a shot on your own DSi, all you need to do is point the system’s browser to stylehax.net.

If you’re looking for a more exotic way to crack into a DSi, perhaps this EM glitching attack might tickle your fancy?

Continue reading “Breaking Into The Nintendo DSi Through The (Browser) Window”

Cramming A DS Inside A Gameboy

Many holiday recipes and console hacks share a common theme: cramming a thing inside another thing. Whether it’s turducken or a Nintendo DS inside a Gameboy, the result is always unexpected. The chassis for this mod is a humble Gameboy color with a Gameboy SP screen tackled on the top to serve as the secondary display. Unfortunately, this mod lost touch screen functionality, limiting some of the games you can play.

[TheRetroFuture] received the custom handheld from [GameboyCustom], which was somewhat damaged in shipping. The original screw mounts had to be removed and the case glued back together to fit the DS motherboard. So for [TheRetroFuture] to get inside to start troubleshooting involved a razor blade and patience. Testing various points and swapping components got [TheRetroFuture] closer to the root problems. The fix ended up being a few wires that came loose during shipping. Finally, after reseating a display connection and some careful soldering, it booted and started playing games.

Overall, it’s pretty impressive to see Mario Kart DS running on both screens on the tiny handheld. But you might be asking, why? Why shove one handheld inside another handheld? Sometimes it’s to gain new functionality like this Raspberry Pi inside a PSP body. Sometimes, it’s just because we can. Video after the break.

Continue reading “Cramming A DS Inside A Gameboy”

Game Boy Macro Build Retains DS Compatibility

Building a so-called “Game Boy Macro” is a great way to salvage a Nintendo DS that has a broken hinge or top screen, as the system only needs the lower display to play Game Boy Advance games. Naturally, DS games that were designed to use both screens would no longer be playable. Or at least, that’s what we thought. But as [Facelesstech] shows, it’s actually possible to play DS games on a Game Boy Macro if you do a little extra soldering.

It turns out that there are two test points on the original DS motherboard where you can pick up the signal for the top and bottom screens respectively. With just three wires and a simple switch, you can select which signal gets fed into the bottom screen in real-time with no image degradation. Now, this won’t do you any good on games that make constant use of both the top and bottom DS displays, but for many titles, the bottom screen was used for little more than a map or inventory display that you only need to glance at occasionally.

Installed screen switch. Note USB-C upgrade module.

With the ability to switch between them at will, a large number of DS games are perfectly playable with just one screen. Interestingly, the touch panel still works the same regardless of which video feed is being pipped in; so if you memorize which areas need to be touched to perform different actions, you don’t even need to flip the images. In the video below, [Facelesstech] demonstrates the concept with New Super Mario Bros, which would otherwise be unplayable as the action usually is shown on the top screen.

This hack is only possible because the two displays on the DS are identical beyond the touch overlay, which as we learned during a previous deep-dive into the technology behind this revolutionary handheld, was a trick Nintendo used to squeeze as much performance as they could out of its relatively meager 3D hardware. Unfortunately, it seems like the modification is much harder to pull off on the DS Lite, so it wouldn’t be compatible with the slick Game & Watch styled Game Boy Macro we covered recently. Continue reading “Game Boy Macro Build Retains DS Compatibility”

Unmasking The Identity Of An Unusual Nintendo DS

The Nintendo DS family encompasses a dizzying array of portable game systems released over a span of 17 years. The original DS received several refreshes and special editions, and when the next generation 3DS came along, it spawned a whole new collection of spin-offs. But even among all those machines there’s a name that even Mario himself would never have heard of: the Nintendo DS ML.

In a recent video, [The Retro Future] says he discovered this oddball system selling for around $25 USD on Chinese shopping site Taobao and bought one so he could get a closer look at it. Externally the system looks quite a bit like the refreshed DS Lite, but it’s notably larger and the screens look quite dated. That was already a strong hint to its true identity, as was the placement of its various buttons and controls.

Note the conspicuous absence of Nintendo’s name.

But it wasn’t until [The Retro Future] cracked the system open that he could truly confirm what he had on his hands. This was an original Nintendo DS, potentially a new old stock unit that had never been distributed, which was transplanted into a custom enclosure designed to look like one of the later upgraded models. As for what this seller meant by calling this chimera the DS ML is anyone’s guess, though one of the commenters on the video thought “Maybe Legal” had a nice ring to it.

Now assuming these really are brand new systems that were simply installed in fresh cases, $25 is arguably a good deal. So long as you aren’t concerned with playing the latest titles, anyway. But at the same time its a reminder that you get what you pay for when dealing with shady overseas sellers. It’s just as likely, perhaps even more so, that these were used systems that got spruced up to make a quick buck.

Fake components are everywhere. In fact there’s an excellent chance most of the people reading this site have received some fake parts over the years, even if they didn’t realize it at the time. When there’s fly by night companies willing to refurbish a nearly 20 year old Nintendo handheld for $25, what are the chances that Bosch actually made that $2 temperature sensor you just ordered on eBay?

Continue reading “Unmasking The Identity Of An Unusual Nintendo DS”

Hidden TV-Out On The Nintendo DS Lite

The DS Lite was one of Nintendo’s most popular handheld gaming consoles, but unbeknownst to all, it has a hidden feature that could have made it even more popular. Digging through the hardware and firmware, the [Lost Nintendo History] team discovered the System-on-Chip (SoC) in the DS Lite can output a composite video signal.

The SoC can output a 10-bit digital output running at 16.7 MHz, but it is disabled by the stock firmware early in the boot process, so custom firmware was required. It still needs to be converted to an analog signal, so a small adaptor board with a DAC (digital-analog converter) and op-amp is attached to the flex cable of the upper screen. A set of buttons on the board allow you to select which screen is displayed on the TV. The adaptor board is open source, and the Gerbers and schematics are available on GitHub.

The current version of the adaptor board disables the upper screen, but the [Lost Nintendo History] team is considering designing a pass-through board to eliminate this disadvantage. The TV-out mod can also be combined with the popular Macro mod, in which the upper screen is removed to turn it into a Game Boy Advance. The Nintendo DS is a popular hacking subject, and we’ve been covering them for well over a decade.

A Look At How Nintendo Mastered Dual Screens

When it was first announced, many people were skeptical of the Nintendo DS. Rather than pushing raw power, the unique dual screen handheld was designed to explore new styles of play. Compared to the more traditional handhelds like the Game Boy Advance (GBA) or even Sony’s PlayStation Portable (PSP), the DS seemed like huge gamble for the Japanese gaming giant.

But it paid off. The Nintendo DS ended up being one of the most successful gaming platforms of all time, and as [Modern Vintage Gamer] explains in a recent video, at least part of that was due to its surprising graphical prowess. While it was technically inferior to the PSP in almost every way, Nintendo’s decades of experience in pushing the limits of 2D graphics allowed them to squeeze more out of the hardware than many would have thought possible.

On one level, the Nintendo DS could be seen as a upgraded GBA. Developers who were already used to the 2D capabilities of that system would feel right at home when they made the switch to the DS. As with previous 2D consoles, the DS had several screen modes complete with hardware-accelerated support for moving, scaling, rotating, and reflecting up to four background layers. This made it easy and computationally efficient to pull off pseudo-3D effects such as having multiple backdrop images scrolling by at different speeds to convey a sense of depth.

On top of its GBA-inherited tile and sprite 2D engine, the DS also featured a rudimentary GPU responsible for handling 3D geometry and rendering. Hardware accelerated 3D could only used on one screen at a time, which meant most games would keep the closeup view of the action on one display, and used the second panel to show 2D imagery such as an overhead map. But developers did have the option of flipping between the displays on each frame to render 3D on both panels at a reduced frame rate. The hardware can also handle shadows and included integrated support for cell shading, which was a particularly popular graphical effect at the time.

By combining the 2D and 3D hardware capabilities of the Nintendo DS onto a single screen, developers could produce complex graphical effects. [Modern Vintage Gamer] uses the example of New Super Mario Bros, which places a detailed 3D model of Mario over several layers of moving 2D bitmaps. Ultimately the 3D capabilities of the DS were hindered by the limited resolution of its 256 x 192 LCD panels; but considering most people were still using flip phones when the DS came out, it was impressive for the time.

Compared to the Game Boy Advance, or even the original “brick” Game Boy, it doesn’t seem like hackers have had much luck coming up with ways to exploiting the capabilities of the Nintendo DS. But perhaps with more detailed retrospectives like this, the community will be inspired to take another look at this unique entry in gaming history.

Continue reading “A Look At How Nintendo Mastered Dual Screens”

3D Print That Charging Dock For Your 3DS

The Switch is the new hotness and everyone wants Nintendo’s new portable gaming rig nestled in a dock next to their TV, but what about Nintendo’s other portable gaming system? Yes, the New Nintendo 3DS can get a charging dock, and you can 3D print it with swappable plates that make it look like something straight out of the Nintendo store.

[Hobby Hoarder] created this charging dock for the New Nintendo 3DS as a 3D printing project, with the goal of having everything printable without supports, and able to be constructed without any special tools. Printing a box is easy enough, but the real trick is how to charge the 3DS without any special tools. For this, [Hobby Hoarder] turned to the small charging contacts on the side of the console. All you do is apply power and ground to these contacts, and the 3DS charges.

Normally, adding contacts requires pogo pins or hilariously expensive connectors, but [Hobby Hoarder] has an interesting solution: just add some metal contacts constructed from LED leads or paper clips, and mount it on a spring-loaded slider. A regular ‘ol USB cable is scavenged, the wires stripped, and the red and black lines are attached to the spring-loaded slider.

There is a slight issue with the charging voltage in this setup; the 3DS charges at 4.6 Volts, and USB provides 5 Volts. If you want to keep everything within exacting specs, you could add an LDO linear regulator, but there might be issues with heat dissipation. You could use a buck converter, but at 0.4 Volts, you’re probably better off going with the ‘aaay yolo’ theory of engineering.

[Hobby Hoarder] produced a few great videos detailing this build, and one awesome video detailing how to print multicolored faceplates for this charging dock. It’s an excellent project, and a great example of what can be done with 3D printing and simple tools.

Continue reading “3D Print That Charging Dock For Your 3DS”