The PhotonPower Zero board laying on a desk surface

PhotonPower Zero For Effortless Solar Pi Zero Projects

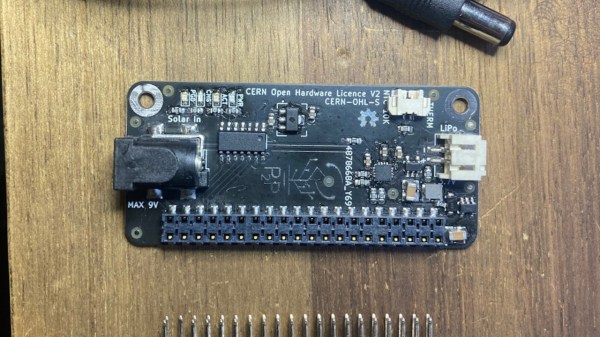
A Pi Zero doesn’t need much to sustain itself, and it’s projects like the PhotonPower Zero that remind us of it its low appetite when we need this reminder most. The PhotonPower Zero board lets you power a Pi Zero board from a solar cell, with a LiIon backup, and a microcontroller for power management. Created by [David Murray], this board’s been a perfect solution for quite a few projects of his, and now he is sharing the design so that we can create outdoor-suited devices as easily as he’s been able to.

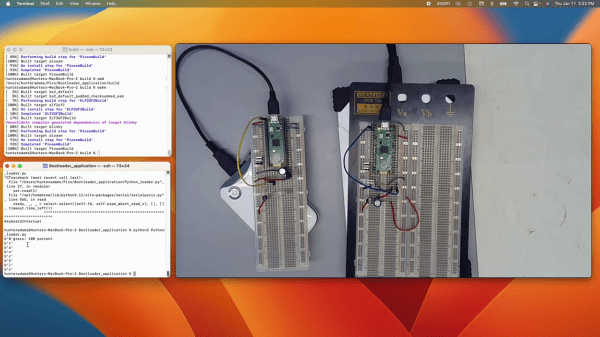
Tested for months in Australian summer and winter conditions alike, the design pulls no punches and has everything you might need. Like any self-respecting power addon, it has a management microcontroller for going as low-power as you’d like, communicating the battery data to the Pi Zero, and being able to safely shut it down when needed. If you fancy what this board does, [David Murray] tells you all, both in the video and in the associated posts!

One of the best parts about this board is that it’s fully open-source – schematics, KiCad PCB source files, and even 3D designs are available in the GitHub repo. You could source all the parts right now and build a fleet of solar-powered Zeros, and if you want the hard parts to be done for you, there’s a Kickstarter campaign that lets you get a PhotonPower Zero board without self-assembly. We’ve covered similar boards before – powering a Pi Zero isn’t lost art, and, there’s a lot to learn from this project specifically. Such boards are especially tempting, given that the latest Pi Zero W 2 is the most efficient Pi Zero to date – outdoor-capable 24/7 powered devices with a fair bit of CPU have never been this close!

Continue reading “PhotonPower Zero For Effortless Solar Pi Zero Projects”

anfractuosity's test setup showing the Pi under test and a few pieces of equipment used to perform the attack

Cold Boot Attack You Can Do With A Pi

A cold boot attack is a way to extract RAM contents from a running system by power cycling it and reading out RAM immediately after loading your own OS. How easy is it for you to perform such an attack? As [anfractuosity] shows, you can perform a cold boot attack with a Raspberry Pi, with a reasonably simple hardware setup and a hefty chunk of bare-metal code.

[anfractuosity]’s setup is simple enough. The Pi 4 under attack is set up to boot from USB drive, and a relay board has it switch between two possible USB drives to boot from: one with a program that fills RAM with , and another with a program that extracts RAM out through UART. The process is controlled by another Pi controlling the relays through GPIOs, that also monitors the target Pi’s UART and uses it as a channel to extract memory.

The outcomes are pretty impressive. After 0.75s of power-down, most of the image could be extracted. That’s without any cooling, so abusing a can of electronics duster is likely to improve these results dramatically. Want to play with cold boot attacks? [anfractuosity]’s code is great for getting your feet wet. Furthermore, the code examples provided serve as a wonderful playground for general memory attack research.

Raspberry Pi not fun enough for you anymore? Well then, you can always start playing with Android phones!

The board in question, with a Pi Pico soldered on, with old PCBs for macropads being used as captouch electrodes

Give Your Pi Pico Captouch Inputs For All Your Music Needs

Unlike many modern microcontrollers, RP2040 doesn’t come with a native capacitive touch peripheral. This doesn’t mean you can’t do it – the usual software-driven way works wonderfully, and only requires an external pullup resistor! In case you wanted a demonstration or you have a capacitive touch project in mind, this lighthearted video by [Jeremy Cook] is a must watch, and he’s got a healthy amount of resources for you in store, too!

In this video, [Jeremy] presents you with a KiCad schematic and an PCB design you can use to quickly add whole 23 capacitive touch sensing inputs to a Pi Pico! The board is flexible mechanically, easy to assemble as [Jeremy] demonstrates, and all the pins involved can still be used as regular GPIOs if you’d like. Plus, it’s fully open-source, can easily be assembled on your own, and available on Tindie too!

Of course, such a board doesn’t get created for no reason – [Jeremy] has a healthy amount of musical creations and nifty ideas to show off. We quite liked the trick of using old PCBs as capacitive touch sensing, using copper fills as electrodes – which has helped create an amusing “macropad of macropads”, and, there’s quite a bit more to see.

If capacitive touch projects ever struck a chord with you and you enjoy music-related hacking, [Jeremy]’s got a whole YouTube channel you ought to check out. Oh, and if one of the musical projects in the video caught your eye, it might just be the one we’ve featured previously! Continue reading “Give Your Pi Pico Captouch Inputs For All Your Music Needs”

A Threat Level Monitor For Everyone

A TV news pundit might on any given evening in 2024 look at the viewers and gravely announce that we are living in uncertain times. Those of us who’ve been around for a bit longer than we’d like to admit would see that, scratch our heads, and ask “Have we ever not lived in uncertain times?” If all this uncertainty is getting to you though, you can now reassure yourself as [Ian Williams] has, with a threat level monitor which displays the UK’s current level of projected fear threat level.

The build is fairly straightforward in hardware terms, with a Raspberry Pi Zero and a Pimoroni e-paper display pHAT. The software grabs the current level of doom from in this case the UK government’s website with a nifty bit of Python code, and turns it into an easy to read alert level bar.

So if you’re genuinely worried that the sky might fall upon your head you can now gain reassurance from a small piece of electronic hardware. If you feel things are really going south though, how about converting your basement into a fallout shelter?

Interactive Cake Takes Your Picture

[Abigail] is a confectionery roboticist, and [Hazal] is a developer advocate at a robotics company. The two met recently and decided to collaborate on a smart cake, with amusing results.

The resulting cake not only looks like a camera it also has a camera inside. When the camera detects people in its field of view, a NeoPixel is lit up in green to signal it’s spotted something. If you so desire, you can then hit a button and the cakera (cake-camera, keep up) will take your photo.

The cake itself looks to be a sponge of some sort with fondant used to create the camera housing and a surround for the preview screen. Inside the cake is a standard photo-booth style setup built with a Raspberry Pi. The Pi is responsible for taking photos with a USB cam. It does this when instructed via an arcade button acting as the shutter release. After taking a photo, the Pi prints out a receipt with an Adafruit thermal printer. This provides the user a number they can use to receive their photo afterward.

We’ve seen some neat cakes before, too. If you’ve been hacking on cakes, either edible or theoretical, we might just want to know more. Drop us a line!

Left: a DIY chording keyboard with seven keys Right: the guts of said keyboard

Chording Keyboard Leaves Your Mouse Hand Free

[akmnos22] was getting tired of moving one hand to the mouse and back to the keyboard. Rather than integrating mouse controls into a keyboard, they decided to really lean in and create a chording keyboard — one that creates characters with combinations of key presses, like playing chords on a piano.

This project was inspired in part by the Infogrip BAT, which has graced these pages before. Much like the BAT, this uses a total of seven Cherry MX switches: one for each finger, and three for the thumb. In order to get the placement just right for you, [akmnos22] suggests laying your hand in a comfortable position on a piece of paper and marking where your fingers naturally rest, then importing these markings into CAD software to decide where the key switch holes should be.

The brains of this operation is a Raspberry Pi Pico, which provides more than enough GPIO pins to do the job. [akmnos22] does a nice job of explaining exactly how to put one of these together, from the design concept through the programming process and how to actually chord on the thing.

Would you rather chord with two hands? It might be even faster.

RP2040 Boot Loader Is A Worm

[Hunter Adams] has written a secondary bootloader for the RP2040 that uses an IR link and can be extended to behave like a polite worm virus. This allows the easy updating of a large cluster of co-located RP2040-based controllers. This could be handy in applications like swarm robotics or virtual cattle fencing. The project he demonstrates in the two videos ( below the break ) uses a pair of IR transmitters/receivers. But he purposely wrote the boot loader to be independent of the serial link, which could be infrared, radio, audio, or just wires.

Not only did [Hunter] make a boot loader, but he documented the entire boot process of the RP2040 chip. Whether or not you need a secondary bootloader, this is an excellent resource for understanding how the RP2040 responds to power cycling and resets. The boot loader code is available at his GitHub repository.

You may recall that [Hunter] is the lecturer of Cornell University’s Designing with Microcontroller classes, whom we’ve mentioned before. We’ve also covered some of his students’ projects as well, like these air drums and this CoreXY pen plotter.

Continue reading “RP2040 Boot Loader Is A Worm”