Simple Chemistry To Metallize And Etch Silicon Chips

We’ve been eagerly following [ProjectsInFlight]’s stepwise journey toward DIY semiconductors, including all the ups and downs, false leads, and tedious optimizations needed to make it possible for the average hacker to make chips with readily available tools and materials.

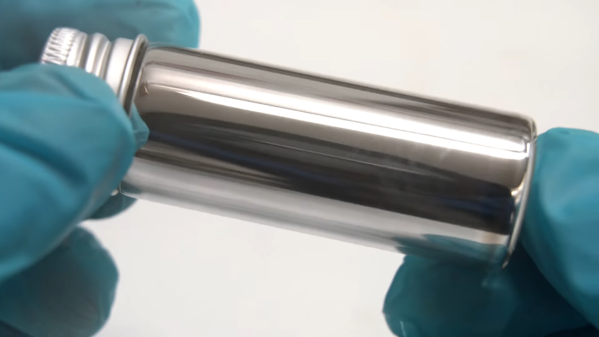
Next up is metallization, and spoiler alert: it wasn’t easy. In a real fab, metal layers are added to chips using some form of deposition or sputtering method, each of which needs some expensive vacuum equipment. [ProjectsInFlight] wanted a more approachable way to lay down thin films of metal, so he turned to an old friend: the silver mirror reaction. You may have seen this demonstrated in high school chemistry; a preparation of Tollen’s reagent, a mix of sodium hydroxide, ammonia, and silver nitrate, is mixed with glucose in a glass vessel. The glucose reduces the reagent, leaving the metallic silver to precipitate on the inside of the glass, which creates a beautiful silvered effect.

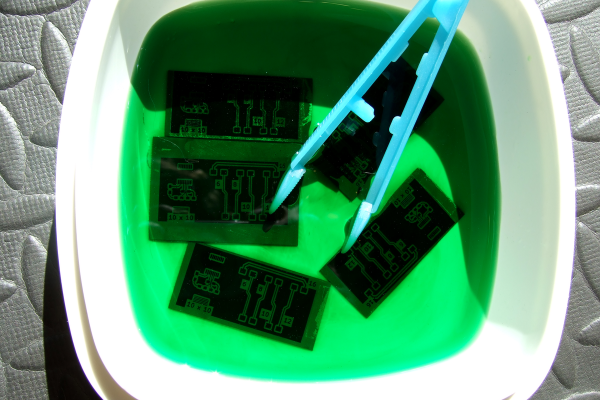
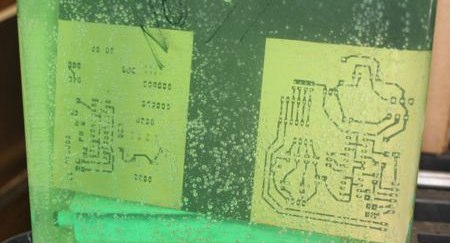
Despite some issues, the silvering method worked well enough on chips to proceed on, albeit carefully, since the layer is easily scratched off. [ProjectsInFlight]’s next step was to find an etchant for silver, a tall order for a noble metal. He explored piranha solutions, which are acids spiked with peroxide, and eventually settled on plain old white vinegar with a dash of 12% peroxide. Despite that success, the silver layer was having trouble sticking to the chip, much preferring to stay with the photoresist when the protective film was removed.

The solution was to replace the photoresist’s protective film with Teflon thread-sealing tape. That allowed the whole process from plating to etching to work, resulting in conductive traces with pretty fine resolution. Sure they’re a bit delicate, but that’s something to address another day. He’s come a long way from his DIY tube furnace used to put down oxide layers, and suffering through the search for oxide etchants and exploring photolithography methods. It’s been a fun ride so far, and we’re eager to see what’s next.

Continue reading “Simple Chemistry To Metallize And Etch Silicon Chips”

Copper Be Gone: The Chemistry Behind PCB Etching

For a lot of reasons, home etching of PCBs is somewhat of a dying art. The main reason is the rise of quick-turn PCB fabrication services, of course; when you can send your Gerbers off and receive back a box with a dozen or so professionally made PCBs for a couple of bucks, why would you want to mess with etching your own?

Convenience and cost aside, there are a ton of valid reasons to spin up your own boards, ranging from not having to wait for shipping to just wanting to control the process yourself. Whichever camp you’re in, though, it pays to know what’s going on when your plain copper-clad board, adorned with your precious artwork, slips into the etching tank and becomes a printed circuit board. What exactly is going on in there to remove the copper? And how does the etching method affect the final product? Let’s take a look at a few of the more popular etching methods to understand the chemistry behind your boards.

Continue reading “Copper Be Gone: The Chemistry Behind PCB Etching”

Different Etching Strokes For Different PCBs, Folks

[Sebastian] probably didn’t think he was wading into controversial waters when he posted on his experimental method for etching PCBs (in German). It’s not like etching with hydrochloric acid and peroxide is anything new, really; it was just something new to him. But is it even possible these days to post something and not find out just how wrong you are about it?

Sadly, no, or at least so it appears from a scan of [Sebastian]’s tweet on the subject (Nitter). There are a bunch of ways to etch copper off boards, including the messy old standby etchant ferric chloride, or even [Sebastian]’s preferred sodium persulfate method. Being out of that etchant, he decided to give the acid-peroxide method a go and was much pleased by the results. The traces were nice and sharp, the total etching time was low, and the etchant seemed pretty gentle when it accidentally got on his skin. Sounds like a win all around.

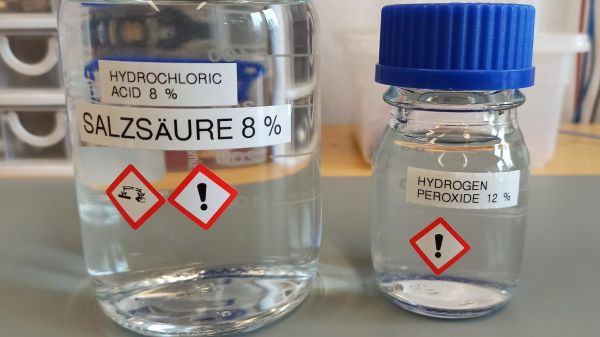
But Twitter wouldn’t stand for this chemical heresy, with comments suggesting that the etching process would release chlorine gas, or that ferric chloride is far safer and cleaner. It seems to us that most of the naysayers are somewhat overwrought in their criticism, especially since [Sebastian]’s method used very dilute solutions: a 30% hydrochloric acid solution added to water — like you oughta — to bring it down to 8%, and a 12% peroxide solution. Yes, that’s four times more concentrated than the drug store stuff, but it’s not likely to get you put on a terrorism watch list, as some wag suggested — a hair stylist watchlist, perhaps. And 8% HCl is about the same concentration as vinegar; true, HCl dissociates almost completely, which makes it a strong acid compared to acetic acid, but at that dilution it seems unlikely that World War I-levels of chlorine gas will be sweeping across your bench.

As with all things, one must employ caution and common sense. PPE is essential, good chemical hygiene is a must, and safe disposal of spent solutions is critical. But taking someone to task for using what he had on hand to etch a quick PCB seems foolish — we all have our ways, but that doesn’t mean everyone else is wrong if they don’t do the same.

Continue reading “Different Etching Strokes For Different PCBs, Folks”

Turning Scrap Copper Into Beautiful Copper Acetate Crystals

Crystals, at least those hawked by new-age practitioners for their healing or restorative powers, will probably get a well-deserved eye roll from most of the folks around here. That said, there’s no denying that crystals do hold sway over us with the almost magical power of their beauty, as with these home-grown copper acetate crystals.

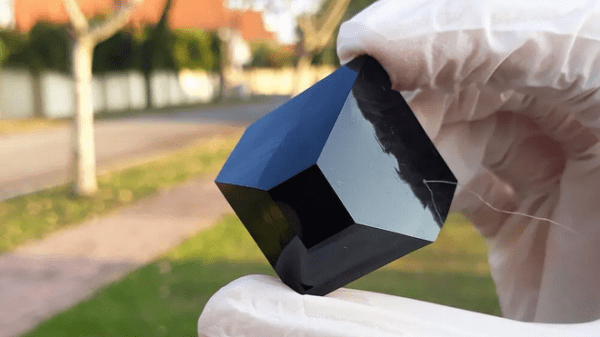
The recipe for these lovely giant crystals that [Chase Lean] shares is almost too simple — just scrap copper, vinegar, and a bit of hydrogen peroxide — and just the over-the-counter strength versions of those last two. The process begins with making a saturated solution of copper acetate by dissolving the scrap copper bits in the vinegar and peroxide for a couple of days. The solution is concentrated by evaporation until copper acetate crystals start to form. Suspend a seed crystal in the saturated solution, and patience will eventually reward you with a huge, shiny blue-black crystal. [Chase] also shares tips for growing crystal clusters, which have a beauty of their own, as do dehydrated copper acetate crystals, with their milky bluish appearance.

Is there any use for these crystals? Probably not, other than their beauty and the whole coolness factor of watching nature buck its own “no straight lines” rule. And you’ll no doubt remember [Chase]’s Zelda-esque potassium ferrioxalate crystals, or even when he turned common table salt into perfect crystal cubes.

Ferric Chloride Etching Chemistry

[ladyada] has republished an interesting snippet from the synthDIY mailing list. [David Dixon] discusses the actual chemistry behind ferric chloride based home circuit board etching. He concludes that ferric chloride is essentially a ‘one-shot’ oxidant. It can’t be regenerated and can be difficult to dispose of properly. The use of acidified copper chloride is a much better path and becomes more effective with each use, as long as you keep it aerated and top up the acidity from time to time. This etchant solution is actually the result of initially using hydrogen peroxide as an oxidant along with muriatic acid. You can see us using this solution in our etching how-to and while creating the board for our RGB lock. For more information on using hydrogen peroxide, check out [Adam Seychell]’s guide and this Instructable.

Aside: [ladyada] has added the receiver code to the Wattcher project page.

How-To: Etch A Single Sided PCB

Making a PCB is very simple; it does not consume a lot of time and the results look professional. After reading this How-To and watching the step by step video, you will be able to make your own PCB in your workshop using just a few inexpensive materials.

Many people use protoboard and point-to-point wire everything, but needing multiple copies of the same circuit is the reason that forces many away from using protoboard. After making your first circuit board, you might not point-to-point wire anything again!

Continue reading “How-To: Etch A Single Sided PCB”