Rotary Indexer Gives Mill A 4th Axis (sort Of)

Rotary indexer’s are standard issue in most machine shops. These allow you to hold or chuck a work piece, and then a graduated handle lets you to rotate the workpiece. Useful when you want to drill or tap axial or radial features. A rack and pinion drive ensures that the workpiece does not move under machining load. Quite often, these indexers also have a manual lock to take care of gear backlash and play. Automating them is not too difficult either. You could use just a stepper motor (open loop) or servo+encoder (closed loop) to drive the turntable.

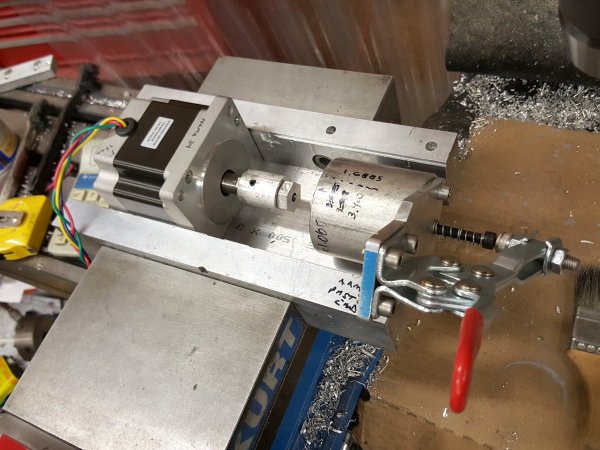
[smashedagainst] needed to drill six radial holes on a part. And he had to do it on 500 pieces for a total of 3000 holes. That was just for the first initial run, with more drilling likely in the future. The part in question was small and light weight. So instead of using a heavy duty, industrial grade unit, he built an all-electric rotary indexing jig using a stepper motor and an Arduino, giving him a sort of rotary 4th axis. His idea was to directly use the stepper motor to rotate the workpiece without any gearing, but he needed to build his own rig to do so.

Continue reading “Rotary Indexer Gives Mill A 4th Axis (sort Of)”

Forbidden Fruit Machine

Here’s another example of how today’s rapid-prototyping technologies are allowing Artists and Craftsmen to create interactive works of art rapidly and easily. [Kati Hyypa] and [Niklas Roy] teamed up to transform a classic painting in to an interactive exhibit. It’s a painting of Adam, Eve and the apple with a joystick attached. Spectators can control the destiny of the apple with the joystick and thus explore the painting.

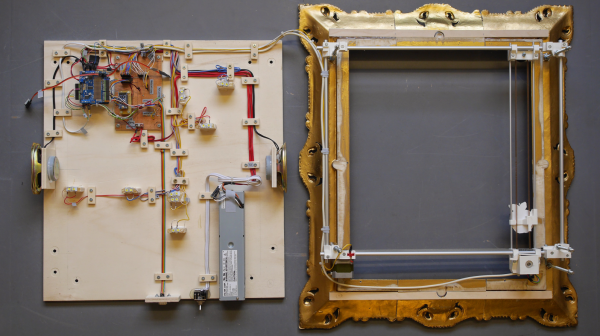
The “Forbidden Fruit Machine” is based on a painting called “The Fall of Man” created by [Cornelis Cornelisz van Haarlem] in 1592. The painting depicts Eve and Adam in the Garden of Eden, being tempted by the serpent to eat the forbidden fruit. A public domain, high-resolution scan of the painting is available for download from the Rijksmuseum Amsterdam. Starting with that, the arms were edited out, and replaced with articulated versions (mounted on acrylic) driven by servos. The apple was mounted on a X-Y gantry driven by two stepper motors. These are driven by a motor shield, which is controlled by an Arduino Uno. The Uno also controls a Music Maker shield to play the various audio tracks and sound effects. Finally, an additional Arduino Pro-Mini is used to control the LED lighting effects via a Darlington driver and also connect to the end stops for the X-Y gantry. The joystick is connected to the analog ports of the Uno.

The LED’s give clues on where to move the apple using the joystick, and pressing the red button plays an appropriate audio or sound effect. For example, pressing the button over the cat at Eve and Adam’s feet elicits a heart-breaking meow, while letting Eve eat the apple results in an even more dramatic effect including a thunder storm.

The machine is open source with code posted on Github and 3d files on Youmagine. Watch a video after the break. The artist’s names may be familiar to some some readers – that’s because both have had their earlier work featured on our blog, for example this awesome ball sucking machine and another one too.

Continue reading “Forbidden Fruit Machine”

Temperature, Altitude, Pressure Display

During a recent trip to Bhutan, [electronut] wished for a device that would show the temperature and altitude at the various places he visited in the Kingdom. Back home after his trip, he built this simple Temperature, Altitude and Pressure Display Device using a few off the shelf parts.

Following a brief search, he zeroed in on the BMP 180 sensor which can measure temperature and pressure, and which is available in a break-out board format from many sources. He calculates altitude based on pressure. The main parts are an Arduino Pro Mini clone, a BMP180 sensor and a Nokia 5110 LCD module. A standard 9V battery supplies juice to the device. A push button interface allows him to read the current parameters when pressed, thus conserving battery life.

Standard libraries allow him to interface the LCD and sensor easily to the Arduino. He wrapped it all up by enclosing the hardware in a custom laser cut acrylic box. The result is bigger than he would like it to be, so maybe the next iteration would use a custom PCB and a LiPo battery to shrink it in size. While at it, we think it would be nice to add a RTC and some sort of logging capability to the device so it can store data for future analysis. The schematic, code and enclosure drawing are available via his Github repository.

Pico-Kubik Quadruped Fits In The Palm Of Your Hand

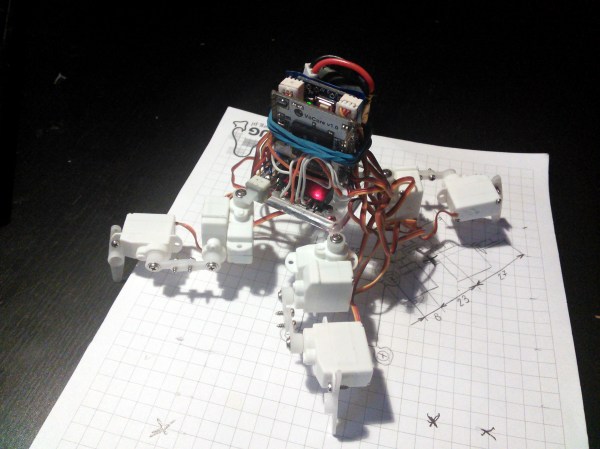
Most of the legged robots we see here are of the hexapod variety, and with good reason. Hexapods are very stable and can easily move even if one or more of the legs has been disabled. [Radomir] has taken this a step farther and has become somewhat of an expert on the more technically difficult quadruped robot, building smaller and smaller ones each time. He has been hard at work on his latest four-legged creation called the Pico-Kubik, and this one will fit in the palm of your hand.

The Pico-Kubik runs Micropython on a VoCore board, which allows for it to have a small software footprint to complement its small hardware footprint. It accomplishes the latter primarily through the use of HK-282A Ultra-Micro Servos, an Arduino Pro Mini, and a tiny lithium ion battery. It’s still a work in progress, but the robot can already crawl across the tabletop.

This isn’t [Radomir]’s first time at the tiny quadruped rodeo, either. He has already built the Nano-Kubik and the µKubik, all of which followed the first (aptly-named) Kubik quadruped. Based on the use of SI prefixes, we can only assume the next one will be the hella-Kubik!

DIY Guided Missile (…err Model Rocket)

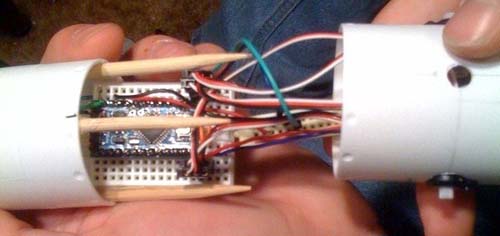
Hackers [Navic] and [K.o.D] have fitted an Arduino Pro Mini and an array of components into an off the shelf rocketry kit to create a guided model rocket, taking the whole idea of Arduino-based space technology to another level

The Arduino reads signals from internally mounted accelerometers, and adjusts balsa fins (via 4 micro servos) to correct the rocket’s flight path. Due to the nature of model rocketry, the active guidance is limited to the 3 seconds that the rocket is traveling upwards. A valiant effort nevertheless. Videos of the rocket’s maiden voyage, and a system check after the break. Continue reading “DIY Guided Missile (…err Model Rocket)”