A Pair Of Toaster Reflow Oven Builds

For some reason or another, the Hackaday tip line sometimes sees a short burst of submissions for the same project. The latest one of these was for toaster oven reflow stations. They’re both great builds and different approaches to making a useful tool out of home appliances.

First up is [Richard]’s build. he ended up with a fairly high-end build using a Rocket Scream Reflow Oven Controller Arduino shield. This shield accepts a normal K-type thermocouple and controls an external solid state relay with the Arduino’s PID library. [Richard]’s build has a few neat additions – a properly dremeled enclosure, computer fan, and a welding blanket for insulation. Now that we think about it, it’s odd we’ve rarely seen any sort of insulation in these reflow oven builds.

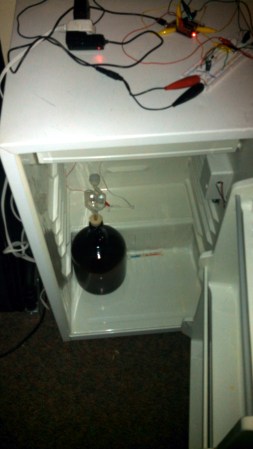
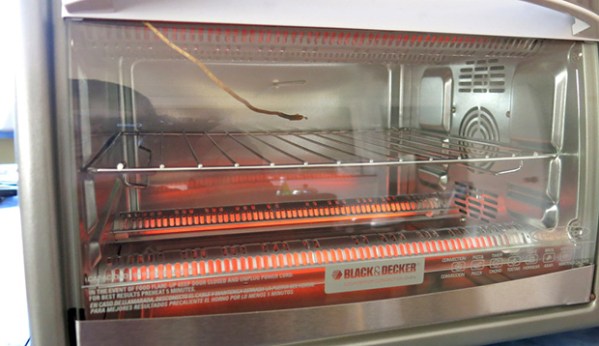
Next up is [Ray]’s version of a Black & Decker reflow oven. While not as fancy as [Richard]’s build, this one does have a few features that make it very interesting. Instead of messing around with thermocouples, [Ray] simply took a digital kitchen thermometer – a neat tool that already a thermistor in a compact metal probe – and read the analog value with an Arduino. To control the power, [Ray] is using a cheap 433 MHz radio transmitter to control a few remotely operated power sockets. It’s a very clever and inexpensive replacement for a SSR, especially since [Ray] had these power sockets just lying around.

So there you go. The same tool, built two different ways. A great demonstration of how you can not only build anything, but you can build anything any way you want.

Tracking Cicadas With Radiolab And An Arduino

Cicadia

Once every 17 years, a population of cicadas ranging from Connecticut to the Appalachian highlands of North Carolina emerges to annoy everyone within earshot. The last time east coasters saw this brood was in 1996, making 2013 yet another year of annoying insect pests. The only question is, when will we start to see this year’s cicada brood?

Radiolab, the awesome podcast and public radio show, has put together an awesome project that asks listeners to track when the cicadas in their area will emerge. Cicadas generally enter their loud and obnoxious adult stage when the ground temperature 8 inches below the surface reaches 64º F. Armed with an Arduino, thermistor, and a few wires and resistors, any Radiolab listener can upload soil temperature data to Radiolab servers where all the data will be correlated with documented cicada sightings.

After following the page’s instructions for wiring up a bunch of LEDs and a thermistor to an Arduino, just upload the most well-commented code we’ve ever seen and go outside to take soil temperature measurements. The temperature is displayed in a pseudo-binary format on nine LEDs. To decode the temperature without counting by powers of two, Radiolab has an online decoder that also allows you to upload your data and location.

That’s Not Beer! A Biofuel Fermentation Controller Project

biofuel-fermentation-controller

Any home brewer will recognize the setup pictured above as a temperature controlled fermentation chamber. They wouldn’t be wrong either. But you’re not going to drink what results. This project is aimed at providing a temperature controlled environment for fermenting biofuel.

[Benjamin Havey] and [Michael Abed] built the controller as their final project in his microprocessor class. The idea is to monitor and control the mini-refrigerator so that the strain of Saccharomyces Cerevisiae yeast produce as much ethanol as possible. An MSP430 microcontroller was used. It monitors a thermister with its analog to digital converter and drives a solid state relay to switch mains power to the fridge. At 41 degrees Fahrenheit this is down below what most lager yeasts want (which is usually in the low fifties). But the nice thing about using a microcontroller is you can set a schedule with different stages if you find a program that gives the yeast the best environment but requires more than one temperature level.

Who knew all that beer making was getting you ready to produce alternative fuels?

Toaster Oven Reflow Control Without Modifying The Oven

[Eberhard] wanted his own reflow oven but didn’t really want to mess around with the internals that control the heating element. He put his microcontroller programming experience to work and came up with an add-on module that controls the oven by switching the mains power.

The image above shows a board in the midst of the reflow process. If you’re not familiar, solder paste usually comes with a recommended heat curve for properly melting the slurry. [Eberhard] managed to fit three of these temperature profiles into his firmware.

The ATtiny45 which makes up the controller samples oven temperature via the thermistor seen next to the board. A PID algorithm is used to calculate when to switch mains power on and off via a relay. One button and one LED make up the controller’s user interface for scrolling through the three preprogrammed temperature profiles.

It looks like it works great, see for yourself in the clip after the break.

Continue reading “Toaster Oven Reflow Control Without Modifying The Oven”

Spaduino Heats Up A Used Hot-tub

[Ryan] and the roomies decided that a hot tub was just what they needed to spice up the place. They hit Craig’s List and found one for the right price. After acquisition and setup they were pleased to find that the jets and pump worked great. But you’re not going to want to stick as much as your big toe into this ice-cold cryogenics experiment. Some poking around in the control system exposed the dead relays which are responsible for switching the heater. Instead of swapping the parts, [Ryan] began building a control system that will replace the twenty-year-old original.

The heating element still works, but it’s rated at 5.5 kW and here’s no way to automatically switch it on and off. [Ryan] found a 60 Amp solid state relay which can handle the load, and plays nicely with his Arduino. Initial tests got the tub up and running again. Obviously you want the tub to maintain temperature and so a thermistor was added to take readings from the heater core. There’s also a potentiometer to adjust the temperature, and an LCD screen to show the current settings. But [Ryan] hopes to add more features over time, like incorporating jet control, and adding wireless communications via an Xbee module.

ChipKIT Temperature Shield Supports A Dozen Sensors

chipkit_temp_board

[Will] wrote in to share a useful add-on he designed for the ChipKIT UNO 32, a 12-port temperature sensor board.

Constructed for one of his customers, the shield accepts any 2-wire 10k thermistor sensors, outputting the readings to a small LCD screen. The screen is supported by some code put together by his associate [crenn], but you are not limited to solely displaying the temperatures there. Since this module piggybacks on top of the ChipKIT the same fashion as any standard shield, you clearly have the ability to use and manipulate the data at will. With 12 ports on board this would work well for a house-wide temperature monitoring system, or perhaps in a complex brewing setup.

Both the temperature shield and LCD boards have been released under the Open Source Hardware License, so you can easily build your own if you have the means, though [Will] has a few extras he’s willing to sell if you need one quickly.

Fan Throttling For PS3 Temperature Control

This setup will let you monitor Play Station 3 temperatures and throttle the cooling fan accordingly. [Killerbug666] based the project around an Arduino board, and the majority of the details about his setup are shared as comments in the sketch that he embedded in his post. He installed four thermistors in his PS3 on the CPU heatsink, the GPU heatsink, the Northbridge or Emotion Engine, and one in front of the air intake grate to measure ambient room temperature.

Above you can see the setup he used to display temperatures for each sensor on a set of 7-segment displays. The project also includes the ability to push this data over a serial connection for use with a computer or a standalone system.

The project is still in a prototyping stage. It works, but he likens the fan throttling to the sound of a car engine constantly revving. Future plans include smoothing out the fan speed corrections and scaling down the size of the hardware used in the system. We’d suggest doing away with three of the displays and adding a button that lets you select which set of sensor data you’d like to display.

[Thanks User]