A weatherproof enclosure, opened to show a supercapacitor-based system inside

Wireless Weather Station Gets Solar-Powered Supercap Upgrade

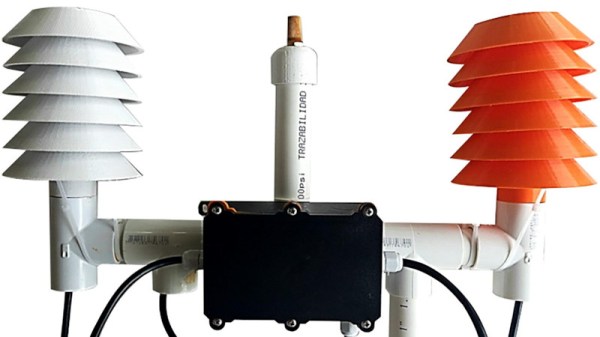
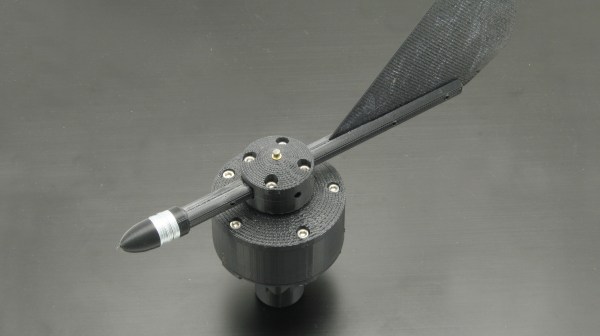
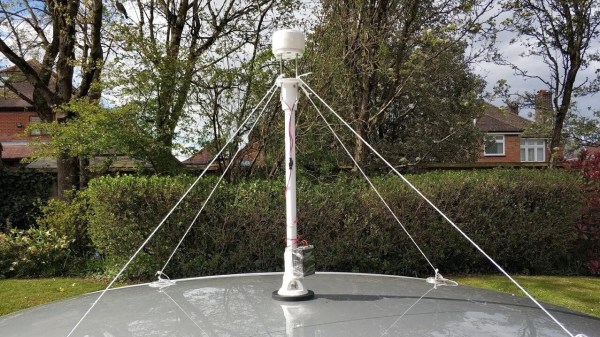
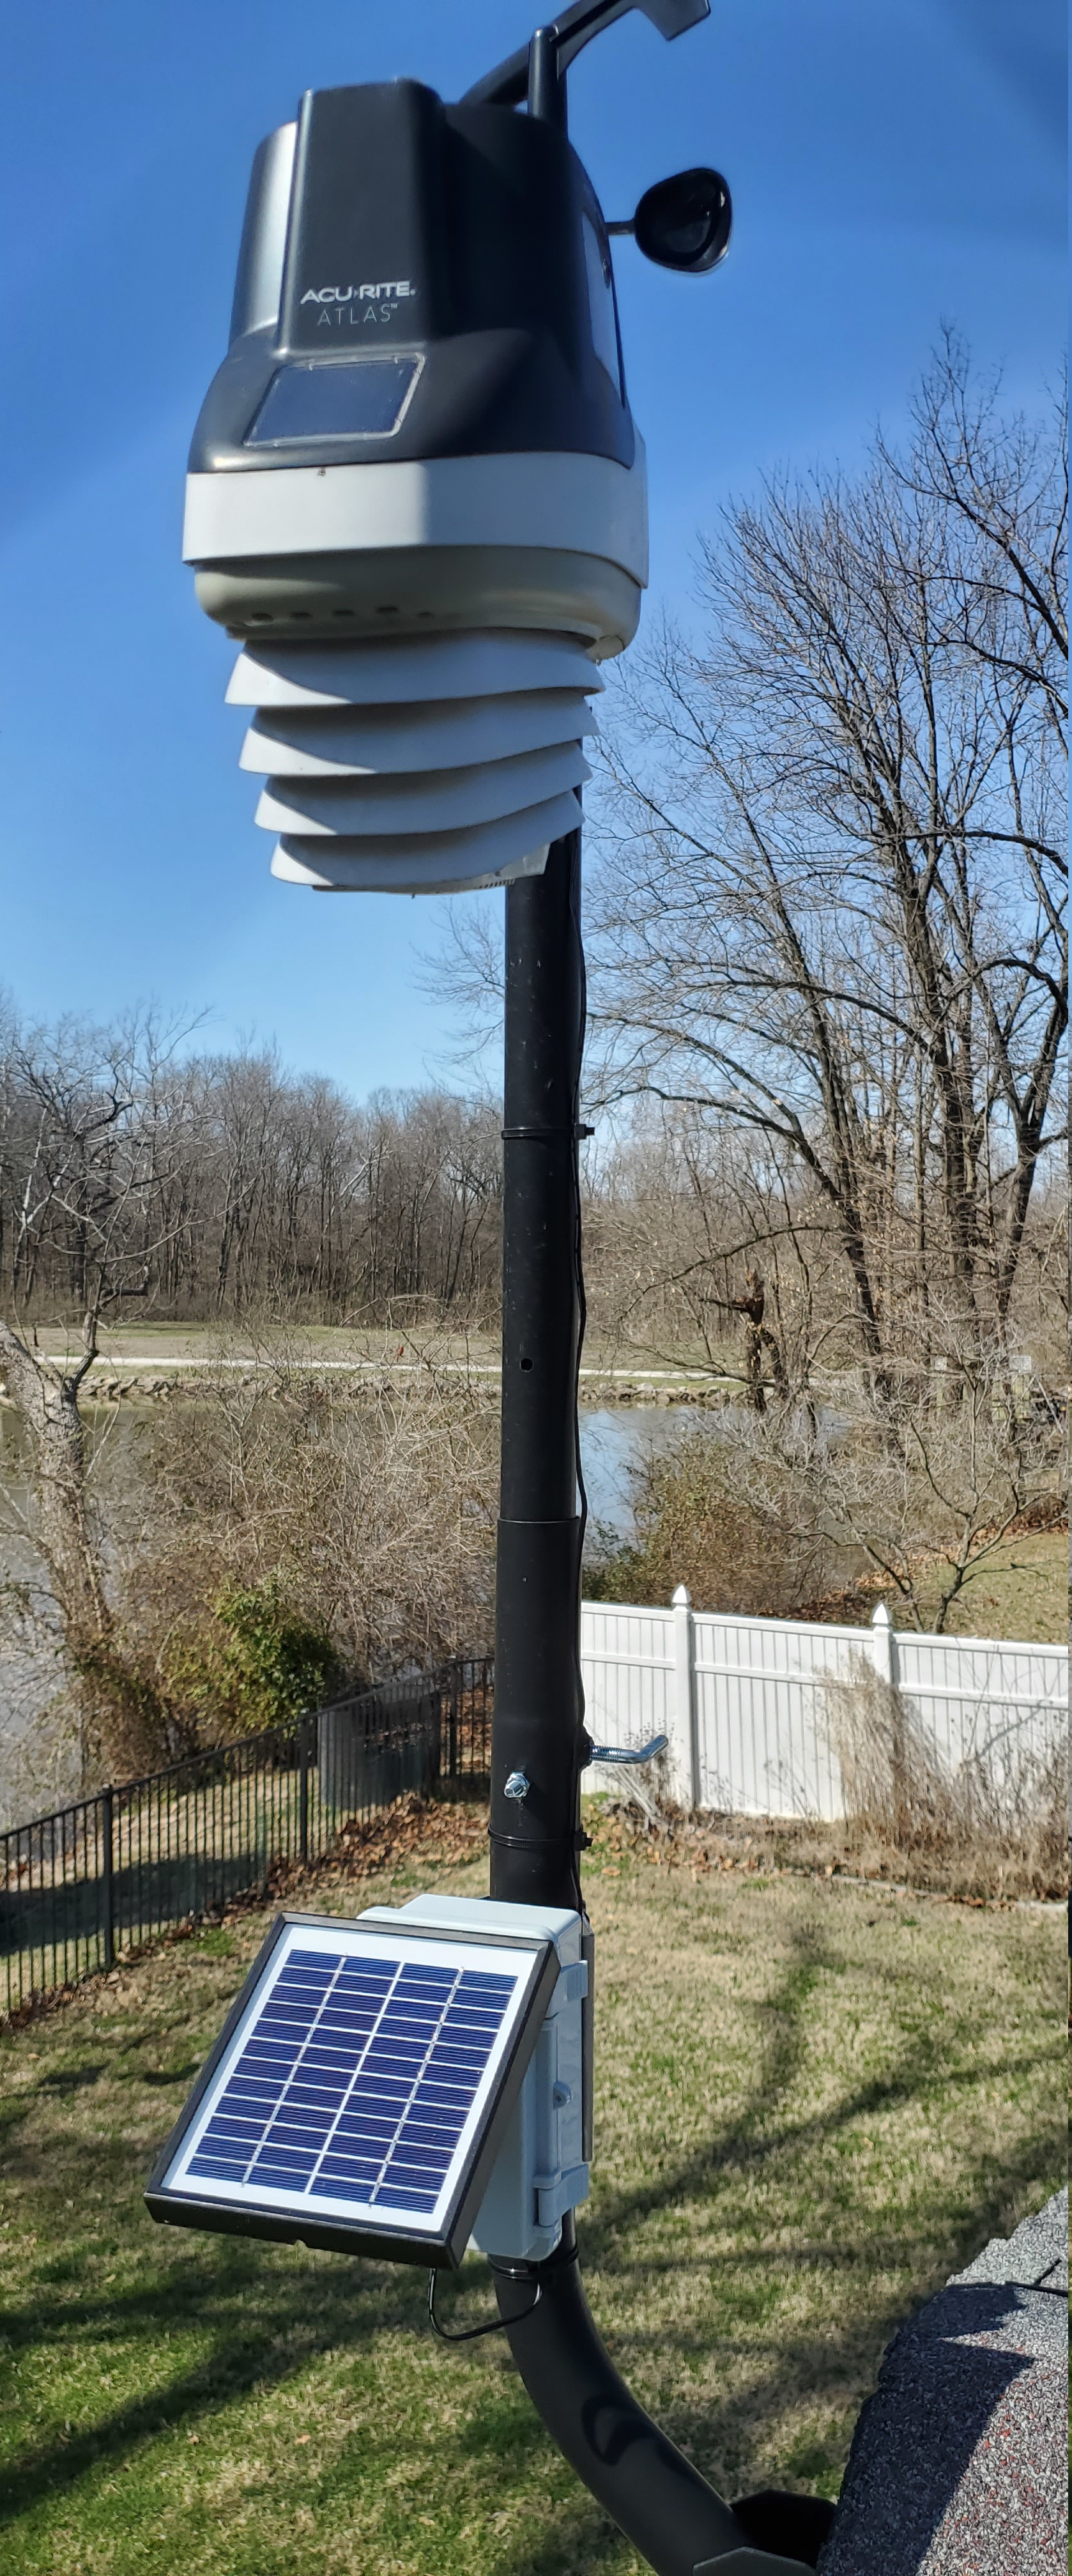
When [knight-of-ni] bought an Acurite Atlas weather station to replace his earlier 5-in-1 model, he was initally happy with its performance. However, after just ten months the batteries in the outdoor unit died; since the previous model would happily run for several years on one charge, this was a bit of a bummer. Climbing up on the roof more than once a year just to replace batteries was becoming inconvenient as well, so [knight-of-ni] designed a solar power system with supercap backup and remote monitoring that should keep the sensors running 24/7, come rain or shine.

A weather station mounted on a pole outside
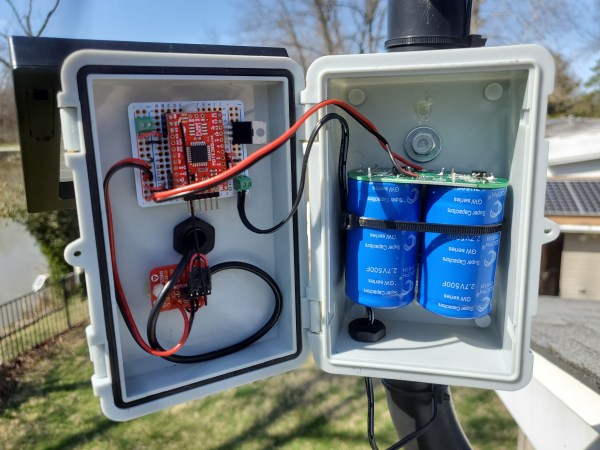
The heart of the new power system is a pair of supercapacitors totalling 250 Farads, with an integrated protection circuit that limits the voltage to 5.4 Volts. The caps are charged by a 12 V solar panel; this means that quite a bit of power is dissipated in the protection circuit when the supercaps are fully charged, but since this is completely free solar power that is not much of an issue. A 6 V panel would have worked as well in full sunlight, but might have struggled on a cloudy or snowy day.

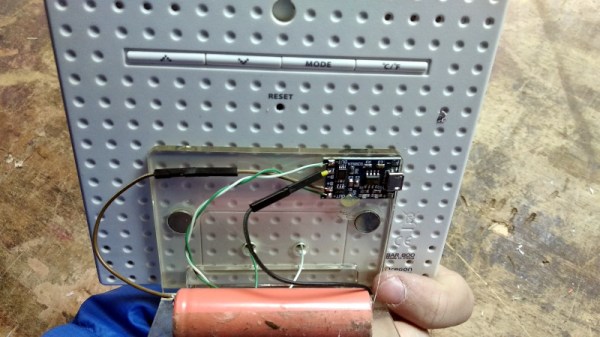
[knight-of-ni] wasn’t content with just letting the new power system run unattended however, and decided to integrate a remote monitoring tool as well. For this he used a Moteino, which is an Arduino-type board with an integrated 915 MHz transceiver. The data coming from this board is received by a Raspberry Pi running Linux and presented through a nice web interface. Thanks to this data [knight-of-ni] was able to confirm that the supercaps were fully charged in just an hour and a half on a sunny morning, and maybe three or four times that on a dark and rainy day.

If you’re interested in solar-powered weather stations, we’ve featured a few: some very simple, some more comprehensive, and one built into an IKEA lantern. If you’d like a recap on the working principle of supercapacitors and how they compare to batteries, look no further than our in-depth article on supercaps.

Thanks for the tip, [felix]!

Build Yourself A Weather-Reporting Diorama

These days, if you don’t fancy watching morning TV, you can always get an update on the day’s weather from your smartphone, computer, or any one of a series of other connected devices. However, if you’re looking for a more fun way to see what’s in store, this weather diorama from [Lewis] of DIY Machines might be just what you’re looking for.

The build uses an ESP32 as the brains of the project, responsible for querying the Internet for up-to-date weather information. This info is then displayed on a 2.9″ e-ink display, showing the temperature, chance of rain, and wind speed predicted for the local area. So far, so straightforward.

However, where it gets really creative is the use of laser-cut “scene discs” with different graphics on them to represent different weather conditions. They can alternatively be 3D printed,too. These are rotated via servos controlled by the ESP32, allowing the diorama to display a representative scene informed by the current forecast. If there’s snow coming, you’ll see a snow man, but if things are looking fine, you’re more likely to see a woman strolling with a dog.

It’s a fun way to learn about what Mother Nature has in store, and would look great on any breakfast bar to boot. We’ve seen some great builds from [Lewis] before, too, like this amazing seven-segment clock shelf.

Continue reading “Build Yourself A Weather-Reporting Diorama”

3D Printed Radiation Shields Get Put To The Test

Don’t get too excited, a 3D printed radiation shield won’t keep you from getting irradiated during WWIII. But until the Doomsday Clock starts clanging its midnight bell, you can use one to improve the accuracy of your homebrew weather monitoring station by keeping the sun from heating up your temperature sensor. But how much does it help, and what material should you load up in your extruder to make one? Those questions, and more, are the topic of a fascinating whitepaper included in the upcoming volume of HardwareX.

Design and Implementation of 3-D Printed Radiation Shields for Environmental Sensors not only tests how effective these low-cost shields are when compared to an uncovered sensor, but addresses specific concerns in regards to leaving 3D printed parts out in the elements. Readers who’ve squirted out a few rolls worth of the stuff will know that common polylactic acid (PLA) filament, while easy to work with and affordable, isn’t known for its resilience. In fact, one of the advertised properties of the renewable plastic is that it’s biodegradable (theoretically, at least), so leaving it outside for any length of time sounds like it’s bound to go poorly.

PLA’s mechanical strength dropped rapidly.

To make a long story short, it does. While the team demonstrated that the PLA printed radiation shield absolutely helped preserve the accuracy of the temperature and humidity sensors mounted inside of it, the structure itself began to deform rapidly from UV exposure. Further tests determined that the mechanical strength of the PLA showed a notable reduction in as little as 30 days, and a sharp decline after 90 days.

Luckily, there was more than one plastic horse in the race. In addition to the PLA printed shield, the team also tested a version printed in acrylonitrile styrene acrylate (ASA) which fared far better. There was no visible deformation of the shield, and after 90 days, the reduction in mechanical strength was negligible. It even performed a bit better when it came to shielding the temperature sensor, which the team believes may be due to the material’s optical transmission properties.

So there you have it: a 3D printed radiation shield will absolutely improve the accuracy of your weather sensors, but if you want it to last outside, PLA just isn’t going to cut it. On the other hand, you could also save yourself a whole lot of time by just using a stack of plant saucers. Whatever works.

Thanks to [tahnok] for the tip.

How The Hunga Tonga Volcano Eruption Was Felt Around The World

On the 14th of January, 2022, the Hunga Tonga-Hunga Ha’apai volcano began a gigantic eruption that would go on to peak in ferocity the next day. The uninhabited island volcano would quickly make headlines as the country of Tonga was cut off the world and tsunamis bore out from the eurption zone.

In a volcanic event of this size, the effects can be felt around the world. With modern instruments, they can be properly understood too. Let’s take a look at how the effects of the Hunga Tonga eruption were captured and measured across the globe.

Continue reading “How The Hunga Tonga Volcano Eruption Was Felt Around The World”

3d printed windvane

3D Printed Sensor For Finding Wind Direction And Likely Much More

Have you ever wondered how an electronic wind vane translates a direction into a unique signal? It seems as though it might be very complicated, and indeed some of them are. [martinm] over at yoctopuce.com has an excellent writeup about measuring wind direction using just a single, easily printed disk and some phototransistors.

Commercial weather vanes often use complicated multi-tracked disks with magnets and reed switches, conductive traces and brushes, or some other means of getting a fine resolution. Unfortunately some of these are prone to wear or are otherwise more complicated than they need to be.

What makes [martinm]’s solution unique is that they have applied previous research on the subject to a simple and durable 3d printed wind vane that looks like it’ll be able to handle whatever global warming can throw at it. The encoder’s simplicity means that it could likely be used in a large number of applications where low resolution position sensing is more than enough- the definition of a great hack!

Adding more tracks or even more disks would enable higher resolution, but the 12 degree resolution seems quite good for the purpose. Such a neat wind vane design will surely be welcome if you want to 3d print your own weather station. Thanks to [Adrian] for the great tip!

Weather Station Dumps CR2032 Cells, Gains 18650

Despite the fact that we’re rapidly approaching the year 2022, there are still an incredible number of gadgets out there that you’re expected to power with disposable batteries. Sure you can buy rechargeable stand-ins that come in the various shapes and sizes of the traditional alkaline cells, but that’s a stopgap at best. For some, if a new gadget doesn’t feature an internal Li-ion battery and standardized USB charging, it’s a non-starter.

[Danilo Larizza] is one of those people. Bothered by the fact that his Oregon Scientific weather station required a pair of CR2032 coin cells, he set out to replace them with an integrated rechargeable solution. The conversion ending up being easier to implement than he initially expected, and by his calculations, his solution should keep the unit up and running for nearly 40 days before needing to be topped off with a standard USB charger.

Wiring in the new battery.

The first step was determining how much power it actually took to run the weather station. Although the two CR2032 cells were wired in series, and therefore providing a nominal 6 V, he determined through experimentation with a bench power supply that it would run on as little as 3.2 volts. This coincides nicely with the voltage range for a single 18650 cell, and meant he didn’t need to add a boost converter into the mix. He notes the weather station does flash a “Low Battery” warning most of the time now, but that seems a fair price to pay.

Confident in the knowledge that the weather station could happily run with an 18650 cell connected in place of the original CR2032s, all [Danilo] needed to do was figure out a way to charge the battery up from time to time. To that end, he reached for a common TP4056 module. This handy little board is a great match for 18650 cells, and is so cheap that there’s really no excuse not to  have a few of them kicking around your parts bin. You never know when you might need to teach an old gadget new tricks.

Open Source Ultrasonic Anemometer

Weather stations are a popular project for experimenting with various environmental sensors, and for wind speed and direction the choice is usually a simple cup anemometer and wind vane. For [Jianjia Ma]’s QingStation, he decided to build another type of wind sensor: An ultrasonic anemometer.

Ultrasonic anemometers have no moving parts but come at the cost of significantly more electronic complexity. They work by measuring the time it takes for an ultrasonic audio pulse to be reflected the receiver across a known distance. Wind direction can be calculated by taking velocity readings from two ultrasonic sensor pairs perpendicular to each other and using a bit of simple trigonometry. For an ultrasonic anemometer to work properly, it requires a carefully designed analog amplifier on the receive side and a lot of signal processing to extract the correct signal from all the noise caused by secondary echoes, multi-pathing, and the environment. The design and experimentation process is well-documented. Since [Jianjia] does not have access to a wind tunnel for testing and calibration, he improvised by mounting the anemometer on his car’s roof and going for a drive. This yielded readings that were proportional to the car’s GPS speed, but a bit higher. This might due to a calculation error, or external factors like wind, or disturbed airflow from the test car or other traffic.

Other sensors include an optical rain sensor, light sensor, lighting sensor, and a BME280 for air pressure, humidity, and temperature. [Jianjia] plans to use the QingStation on an autonomous boat, so he also included an IMU, compass, GPS, and a microphone for environmental sounds. The fact that none of the sensors have moving parts is a major advantage for this use case, and we look forward to seeing the boat project. All the hardware and software are open-source and available on GitHub.

Continue reading “Open Source Ultrasonic Anemometer”