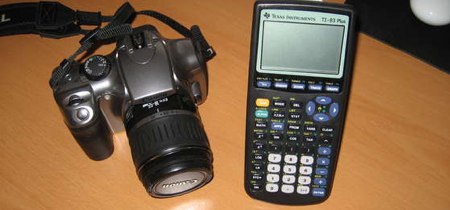
The headline How to Make Time Lapse Video With Your DSLR didn’t really grab us. Honestly, you pay that much for a camera and it can’t do time lapse out of the box? Well, we nearly missed the real story: [Chris Martino] was using a TI-83 to act as the intervalometer for the camera. The calculator has a 2.5mm audio jack for it’s data port and the camera has an identical port for the shutter trigger. The TI-83 runs a program with a FOR loop to act as the timer. When the loop completes it sends data to the port, and the voltage triggers the shutter. The rate isn’t very exact and varies depending on the charge left in the batteries. [Chris] estimated 10000 program iterations ends up being about 26 seconds between pictures. This technique has been tested on 84, 86, and 89 series calculators too. There are a couple example time lapse videos embedded after the break.
Month: June 2008
RGB Laser Diode Projector
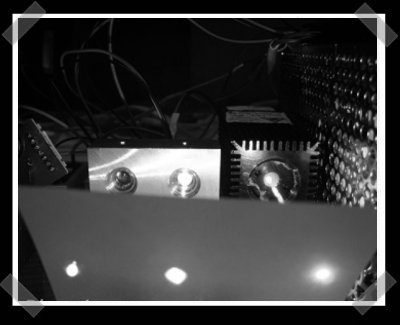
[fl-consult] published this interesting RGB laser diode projector. The build uses three lasers, 532nm green, 660nm red and a 405nm blue diode from an XBox 360 HD-DVD drive. Aside from the salvaged diodes, it uses some off the shelf hardware to power and scan the lasers to make the display. Details are a bit lacking, but google translate helps a bit. If you’re not quite sure what’s going on: the three lasers bounce off of a set of mirrors that scan from side to side as well as up and down to create images.
Hackit: Simple Portable Monitor
We’re often asked what a simple way to add a display to a project is and we even hinted at this yesterday with the HMD comparison. The answer is: we’re not really sure. In the past, the go to was PSOne add on displays. They accept composite input which means you can painlessly attach almost any other consumer device with video out. The problem is they’re a little large. Then there’s the spy video car HMD. It’s black and white and accepts composite video too. It’s a little small though, which makes it difficult to work with outside of the original application. So, Hack-a-Day readers, what have you used as a simple palm sized portable display in your projects?
Portrait Robot
[bre] passed along this portrait drawing robot from the same people that brought you the chief cook robot. Like the previous project, the portrait drawing bot emphasizes man machine interaction. The subject sits down and is asked for the quill. The robot captures the subject’s image and runs it through several processing steps. One set is to determine the contours and another is to determine the fill. The robot then draws the the contours and fills returning to the ink pot each time it reaches a trajectory threshold. Quill drawing can be quite hard for novice illustrators, but the robot’s smooth trajectory calculations prevent drips and stains.
Robofish > Real Fish

This is the kind of engineering that gets us excited, and not just because we like machines modeled on living things. Science Daily reports that Associate professor [Kristi Morgansen] from The University of Washington has developed these robofish for underwater data collection. Her technology is notable for two major reasons: the small robots use fins for locomotion instead of propellers, which reduces drag and creates greater maneuverability. The second and more important reason is that the robofish can communicate with each other via sonar, largely obviating the need for the robofish to surface for more instructions. Both design concepts were inspired by the shape and behavior of real fish. Currently the robots are only programmed to swim with or away from each other, but these are still prototypes and the technology looks promising. For more tech specs on these “Fin Actuated Autonomous Underwater Vehicles” (see why Robofish is better?), you can have a look at Morgansen’s notes.
DIY TomTom Docking Station
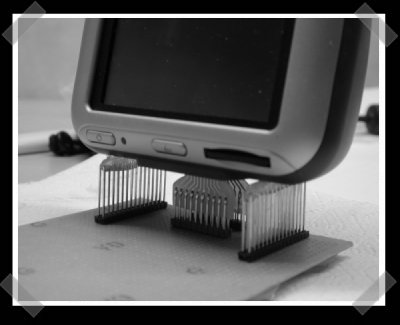
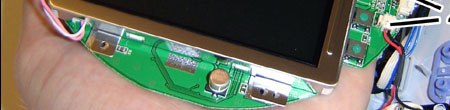
TomToms have been getting pretty cheap. We like ’em because they’re nice and hackable. This diy docking station was made from some etched PCBs, a bunch of male pin headers and a bit of hot glue.
Consumer HMD Comparison

We’ve wanted headed mounted display technology to take hold for a long time. Gizmodo recently compared two consumer models: the Zeiss Cinemizer ($400) and the Myvu Crystal ($300). Unfortunately the resolution of HMDs has gone nowhere in the last 10 years. These two devices only support 640×480 and are aimed specifically at iPod users. With computers getting smaller and higher resolution, we’re surprised that HMDs have not followed suit. Why isn’t someone going to market with a 1280×720 headset? If you really must choose one of these two, we’d recommend the Myvu. It has composite input so you can hook almost anything up to it.


