Waking Up With The (fake) Sun

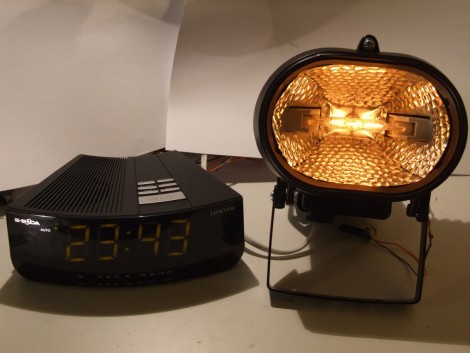
[Bogdan] has some trouble getting up in the morning. A blaring alarm will do the trick but that’s no way to start the day. To get him through the dark winter months he wanted to try a sunrise simulator. He patched into the alarm signal of his bedside clock, intercepting the command from the clock’s microprocessor and using it as an input for his own ATtiny13. From there, the tiny13 gradually brightens a 150W halogen lamp using a triac until his room is as bright as a July morning. A signal is then sent to the alarm clock’s audio amplifier to turn on the audible alarm. He’s got the system set for a 20-minute sunrise so it’s just a matter of programming his alarm 20-minutes early than the ‘I absolutely have to get out of bed now’ time.

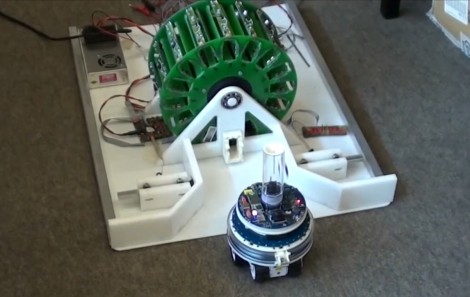
Autonomous Battery Exchange


That may look like a Ferris wheel but it acts a battery replacement station for small robots. The marXbot heads to the battery station when it gets low on juice. Once in the cradle, arms on each side hold the bot in place while the low battery is sucked out and a fresh one from the 15-slot carousel is inserted. The robot doesn’t power down but relies on stored electricity from some large capacitors during the changeover. See it happen after the break.

A while ago we saw a robot that could plug itself into a wall outlet. That’s great because the robot doesn’t have to return to a charging station, but it still has to wait for its battery to top off. With a few strategically placed battery stations it’s easy to keep a robot up and running with almost no down time for a battery swap.

Continue reading “Autonomous Battery Exchange”

Nixie Sudoku

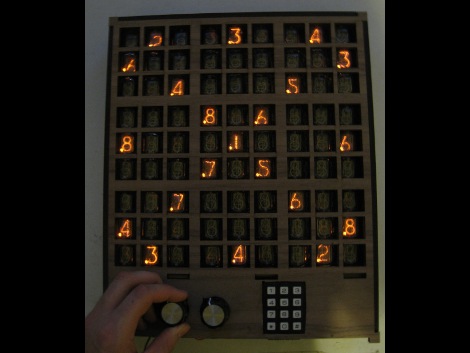
[John Sarik] asked himself why a project should only have a handful of Nixie tubes? Without a good answer to his query he went ahead and built this Sudoku game using 81 Nixie tubes. There’s not much of a description for his work but here’s how we think things go: The two knobs manipulate a cursor, one for rows and the other for columns, while the keypad is used to input your chosen number. The system is Arduino based and [John’s] linked to his code, schematic, and board layout files on Dropbox. He’s even written a recursive solver which can be seen in the video after the break. Would it be inappropriate to bring this to work and whip it out during some down time?

Continue reading “Nixie Sudoku”

Headset and microphone

Get Started With Speech Recognition

Speech recognition makes it easier for us to be lazy with our devices – or perhaps set up the coolest voice-controlled project around. After the voice controlled home automation post, we received a lot of emails asking “how can I make it recognize my voice?”. Whether your project involves a PC or an Android phone, a high-budget, or no budget at all, there is a solution out there.  Join us after the break for a complete set of instructions on setting up speech recognition, and some of the best software options out there to meet your needs.

Continue reading “Get Started With Speech Recognition”

Control A TV With GLCD Commands

[youtube=http://www.youtube.com/watch?v=t3gMjuVdQnA]

This hack lets you use a TV in place of a graphic LCD screen. But we like to think of this less as a replacement for a GLCD and more of a simple way to get your information onto a television. A PIC 18F452 acts as a translator between the GLCD parallel inputs and a composite video output. There are some malformed image links on the page which we’ve fixed and linked to after to the break so that you can take a look at the schematic, component layout, and PCB artwork. The assembler code and hex file are available for download but you’ll need to register to get access to them.

Working image links:

[Thanks Flacoclau]

Stylin’ HMD

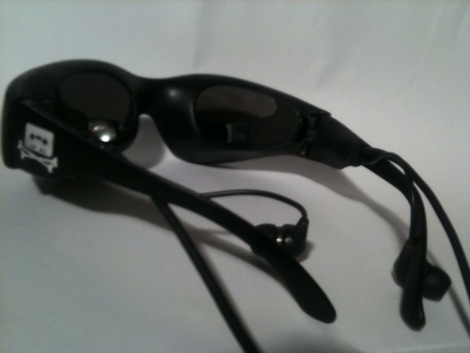
Watch out, these sunglasses are actually a head mounted display. [Staffan] says he’s wanted dataglasses since ’95, but whats currently out there makes the user look ridiculous, and we have to agree. While his forum posts are a little lacking in detail, he’s promised us more info soon. And for now lets us know at least the resolution, well sort of: Its either 480×1280 or 480x427x3, you can be the judge. Update: [Staffan] has clarified “The resolution is 480*1280 true pixels. It is accomplished by spanning the screen across two Kopin CyberDisplay VGA modules.”

Regardless, [Staffan] is looking for help perfecting the glasses, with what in particular we’re not sure, but the project looks promising and we hope he keeps up the good work.