Carbide3D Router Teardown And Testing

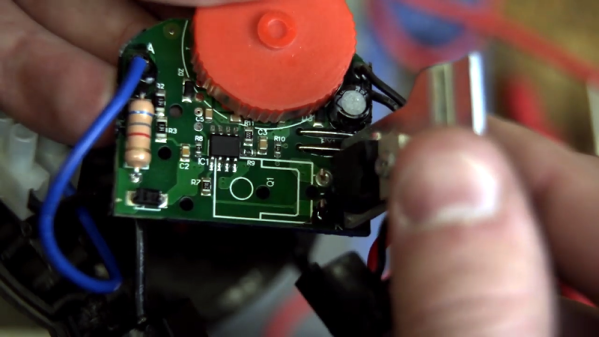
On the face of it, you’d think a small router would be pretty simple. After all, what is it other than a spinning motor? However, that motor has to handle some pretty serious torque depending on what you are routing. [Baki1] had his Carbide3D router die in the middle of a project, so he did what any of us would do. He tore it open.

In addition to showing off its insides, he also tried to figure out what was wrong with it. It looks like a blown triac was the culprit, and we assume that part 2 will be the repair and how that actually worked out.

Continue reading “Carbide3D Router Teardown And Testing”

Fail Of The Week: Solid State Relay Fails Spectacularly

A lot of times these days, it seems like we hackers are a little like kids in a candy store. With so many cool devices available for pennies at the click of a mouse, it’s temptingly easy to order first and ask questions about quality later. Most of the time that works out just fine, with the main risk of sourcing a dodgy component being a ruined afternoon of hacking when a part fails.

The stakes are much higher when you’re connecting your project to the house mains, though, as [Mattias Wandel] recently learned when the solid-state relay controlling his water heater failed, with nearly tragic results. With aplomb that defies the fact that he just discovered that he nearly burned his house down, [Mattias] tours the scene of the crime and delivers a postmortem of the victim, a Fotek SSR-25DA. It appears that he mounted it well and gave it a decent heatsink, but the thing immolated itself just the same. The only remnant of the relay’s PCB left intact was the triac mounted to the rear plate. [Mattias] suspects the PCB traces heated up when he returned from vacation and the water heater it was controlling came on; with a tank full of cold water, both elements were needed and enough current was drawn to melt the solder build-up on the high-voltage traces. With the solder gone, the traces cooked off, and the rest is history. It’s a scary scenario that’s worth looking at if you’ve got any SSRs controlling loads anywhere near their rated limit.

The morals of the story: buy quality components and test them if possible; when in doubt, derate; and make sure a flaming component can’t light anything else on fire. And you’ll want to review the basics of fire protection while you’re at it.

Continue reading “Fail Of The Week: Solid State Relay Fails Spectacularly”

Put The 3D Printer To Sleep So You Can Rest Easy

At this point you’ve probably already heard the news: cheap Chinese 3D printers sometimes catch fire. Now we can’t say we’re shocked to find out that absolute bottom of the barrel gear wasn’t designed to the highest standards (gotta cut those corners someplace), but that doesn’t change the fact that there are thousands of hackers and makers out there who are in possession of one of these suspect machines. Just tossing them to the curb is hardly the hacker way, so we’ve got to find ways to make the best of the hand dealt to us.

After sleeping with one eye (and maybe one nostril) open during some overnight prints, Hackaday.io user [TheGrim] wanted a way to make sure his Alunar Anet A6 didn’t stay powered on any longer than necessary. So he came up with a way of using the printer’s own endstop switch to detect if the print has completed, and cut the power.

The idea is simple, but of course the real trick is in the implementation. By adding a “Home” command to his ending G-Code in Cura, [TheGrim] reasoned he could use the Y endstop switch to determine if the print had completed. It was just a matter of reading the state of the switch and acting on it.

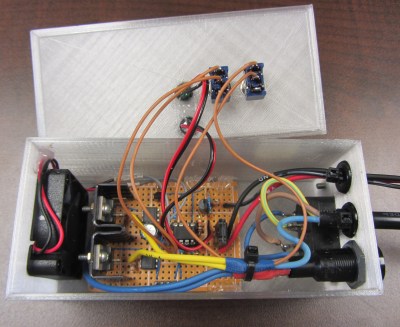
In the most basic implementation, the switch could be used to control a relay on the AC side of the power supply. But [TheGrim] doesn’t trust relays, and he wanted to pack in a couple “smart” features so he ended up using a PIC microcontroller and two 12 amp TRIACs. There’s also a couple of LEDs and toggle switches to serve as the user interface, allowing you to enable and disable the automatic shutdown and get status information about the system.

Will cutting the juice to the PSU prevent another terrible fire? It’s debatable. But it certainly can’t hurt, and if it makes [TheGrim] feel more confident about running his machine, then so be it. We’d still advise anyone with a 3D printer at home to brush up on their fire safety knowledge.

DIY SSR For Mains Switching

Typical power strips have their sockets tightly spaced. This makes it cumbersome to connect devices whose wall warts or power bricks are bulky — you end up losing an adjoining socket or two. And if the strip has a single power switch, you cannot turn off individual devices without unplugging them.

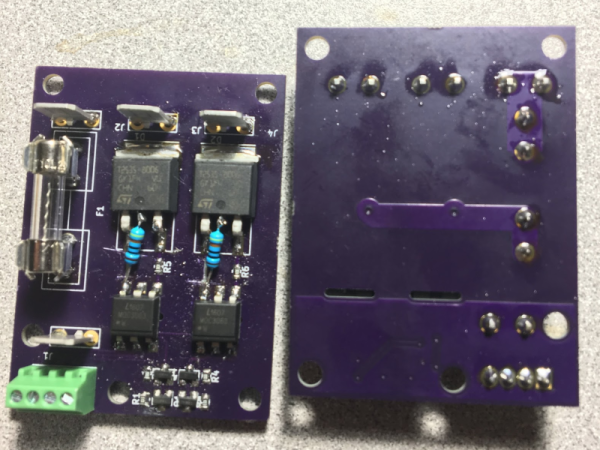
Planning to tackle both problems together, [Travis Hein] built himself some custom Dual SSR Controlled Socket Outlets for his workbench. He also decided to add remote switching ability so he could turn off individual sockets via a controller, Raspberry Pi, smartphone app or most ideally, a nice control panel on his desk consisting of a bank of switches.

The easiest solution for his problem would have been to just buy some off-the-shelf SSR or relay modules and wire them up inside his sockets. But he couldn’t find any with the features he wanted, and SSR’s were a little bit on the expensive side. Also, we wouldn’t have a project to write about – sometimes even the simple ones can show us a thing or two.

For starters, he walks us through a quick and simplified primer on figuring out thermal dissipation for the triacs which will be used on his boards. This is tricky since the devices are connected directly to utility voltage so he needs to take care of track clearances, mechanical separation as well as safety. However, for his first board prototypes, he did not add any heat sinking for the triacs, thereby limiting their use to low current loads. Since the SSR also needs to have a wide control voltage range, he describes how the two transistor constant-current input block works to limit opto-triac LED current over a range of 2 V to 30 V.

Before he moves on to his next prototype, [Travis] is looking for feedback to improve his design, make it safer, and figure out if it can pass safety protocols. Let him know via comments below.

Dual-Purpose DIY Spot Welder Built With Safety In Mind

Ho-hum, another microwave oven transformer spot welder, right? Nope, not this one — [Kerry Wong]’s entry in the MOT spot welder arms race was built with safety in mind and has value-added features.

As [Kerry] points out, most MOT spot welder builds use a momentary switch of some sort to power the primary side of the transformer. Given that this means putting mains voltage dangerously close to your finger, [Kerry] chose to distance himself from the angry pixies and switch the primary with a triac. Not only that, he optically coupled the triac’s trigger to a small one-shot timer built around the venerable 555 chip. Pulse duration control results in the ability to weld different materials of varied thickness rather than burning out thin stock and getting weak welds on the thicker stuff. And a nice addition is a separate probe designed specifically for battery tab welding — bring on the 18650s.

Kudos to [Kerry] for building in some safety, but he may want to think about taking off or covering up that ring when working around high current sources. If you’re not quite so safety minded, this spot welder may or may not kill you.

Continue reading “Dual-Purpose DIY Spot Welder Built With Safety In Mind”

Light Dimmer Shows How To Steal Power From AC Line

We see a lot of traffic on the tips line with projects that cover old ground but do so in an instructive way, giving us insight into the basics of electronics. Sure, commercial versions of this IR-controlled light dimmer have been available for decades. But seeing how one works might just help you design your Next Big Thing.

Like many electronic controls, the previous version of this hack required a connection to a neutral in addition to the hot. This version of the circuit relies on passing a small current through the light bulb the dimmer controls to avoid that extra connection. This design limits application to resistive loads like incandescent bulbs. But it’s still a cool circuit, and [Muris] goes into great detail explaining how it works.

We think the neatest bit is the power supply that actually shorts itself out to turn on the load. A PIC controls a triac connected across the supply by monitoring power line zero-crossing. The PIC controls dimming by delaying the time the triac fires, which trims the peaks off of the AC waveform. The PIC is powered by a large capacitor while the triac is conducting, preventing it from resetting until the circuit can start stealing power again. Pretty clever stuff, and a nice PCB design to boot.

Given the pace of technological and cultural change, it might be that [Muris]’ dimmer is already largely obsolete since it won’t work with CFLs or LEDs. But we can see other applications for non-switched mode transformerless power supplies. And then again, we reported on [Muris]’s original dimmer back in 2009, so the basic design has staying power.

An ESP8266 In Every Light Switch And Outlet

[Hristo Borisov] shows us his clever home automation project, a nicely packaged WiFi switchable wall socket. The ESP8266 has continuously proven itself to be a home automation panacea. Since the ESP8266 is practically a given at this point, the bragging rights have switched over to the skill with which the solution is implemented. By that metric, [Hristo]’s solution is pretty dang nice.

esp8266-smart-lightswitchIt’s all based around a simple board. An encapsulated power supply converts the 220V offered by the Bulgarian power authorities into two rails of 3.3V and 5V respectively. The 3.3V is used for an ESP8266 whose primary concern is the control of a triac and an RGB LED. The 5V is optional if the user decides to add a shield that needs it. That’s right, your light switches will now have their own shields that decide the complexity of the device.

The core module seen to the right contains the actual board. All it needs is AC on one side and something to switch or control on the other The enclosure is not shown (only the lid with the shield connectors is seen) but can be printed in a form factor that includes a cord to plug into an outlet, or with a metal flange to attach to an electrical box in the wall. The modules that mate with the core are also nicely packaged in a 3D printed shield. For example, to convert a lamp to wireless control, you use a shield with a power socket on it. To convert a light switch, use the control module that has a box flange and then any number of custom switch and display shields can be hot swapped on it.

It’s all controllable from command line, webpage, and even an iOS app; all of it is available on his GitHub. We’d love to hear your take on safety, modularity, and overall system design. We think [Hristo] has built a better light switch!