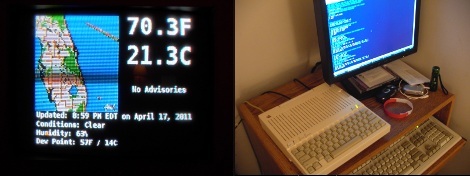
Apple II Weather Display (part 2)

In part one of the Apple II weather display I quickly went over how data is fetched and phrased. Now its time to do something with it in part 2. In the order of functions I do the text parts first, and though its very similar to the process that the radar image goes through, its in monochrome and a bit simpler to explain. Before I go into how it works I should explain how I am dividing the Apple II’s screen.

Continue reading “Apple II Weather Display (part 2)”

Teaching Children To Walk Using Video Games

team_equiliberator

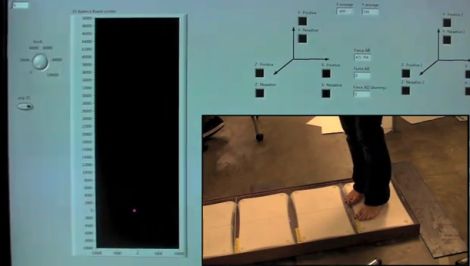
Medical conditions that prevent individuals from being able to walk are difficult to handle, even more so if the patient happens to be a child. Shriner’s hospitals treat a good number of children suffering from cerebral palsy, spina bifida, or amputations. They are always looking for creative treatment methods, so their Motion Analysis Laboratory looked to some Rice University undergrads for help. They asked the group of engineers to design a system that would make physical therapy a bit more fun, while helping encourage the children along.

The team recently unveiled their project, called the Equiliberator. The game system incorporates a series of five Wii balance boards situated between a pair of pressure-sensitive handrails. The platform communicates with a computer via Bluetooth, registering the patient’s movements as he or she moves along the path. The software portion of the system consists of a monster-slaying game which requires the child to step on a particular section of the pathway to dispose of the oncoming enemies.

The game is designed to get more difficult as the child’s balance and coordination improve, encouraging them with an ever growing bank of points as they progress. The final goal of the project is to enable the pressure sensitive handrails to determine how much the child is relying on them for balance, offering in-game incentives to walk with as little support as possible.

We love seeing hacks like this which not only entertain, but truly help people in the process. Kudos to the team at Rice University – they have done a fantastic job here.

Continue reading to see a quick video describing the Equiliberator in the designers’ own words.

[via MedGadget]

Continue reading “Teaching Children To Walk Using Video Games”

Cellphone Battery Mouse Modification

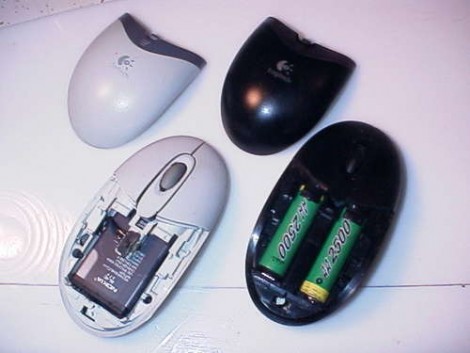
Ever wanted to increase the battery performance in your wireless mouse? [Davetech] shows you the way with this guide for converting a mouse from AA to lithium batteries. We were delighted by his hack-tacular approach that seems to have a nice little work-around at each step in the process. He grinds down the plastic battery housing that is molded into the original mouse body, then uses an old Compact Flash card connector as a set of spring terminals for a Nokia cellphone battery. This battery has more capacity and recharges faster than non-Lithium AA cells. But unfortunately the spring terminals didn’t quite reach the recessed batter contact. No problem, he just builds up solder on the battery to bridge the gap.

[Davetech] manages to fit the entire battery inside the mouse and the pointing-device still works. Your mileage may vary by model (both battery and mouse). It is necessary to take the battery out of the mouse for recharging, but since this only happen about every couple of weeks thanks to the extended capacity it’s not too much of a hassle. Perhaps someone could carry this to the next level by adding a USB port and the necessary charging circuitry?

Build A Spinning POV In A Day

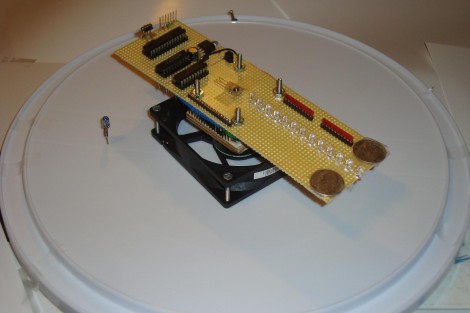
We love spinning POV displays but have yet to build one to call our very own. This project might be the one that we end up building. It’s looks good and it’s the only persistence of vision display that comes to mind which can be built in twelve hours.

The spinning is taken care of by a PC fan. This actually helps with some of the calculations as this fan spins at a know RPM. That information, along with a bit of geometry, can be used to calculate the timer interrupts for syncing the display. A reference point for this device is provided by an IR receiver/emitter pair which is easy to wire up since you already need a voltage source for the fan itself. The rest of the hardware is pretty common: a battery holder is centered on the axis for proper weight distribution and protoboard houses the components such as a PIC 18F252, 74LS373 data latches, and the LEDs themselves. The circuit is wire-wrapped, and works like a charm as evidenced in the clip after the break.

Continue reading “Build A Spinning POV In A Day”

Guitar Teaches You To Play Using LEDs

guitarduino

[Andrew] is an electrical engineering student at UIC, and decided that he would build a MIDI guitar for his senior design project. After tinkering for awhile, things were not looking good, and the MIDI guitar idea was scrapped. With his deadline creeping up, he came up with a new idea, the Guitarduino. His new project is a guitar that teaches you how to play chords and scales by showing you the proper notes to play via LEDs embedded in the guitar’s neck.

He removed the neck, and carefully drilled the holes that would eventually house his 130+ LEDs. The LEDs were wired to his Arduino via some multiplexing circuitry that resides on the back of the guitar’s body. The Arduino was mounted on the front of the guitar along with a shield used for communicating with his LED array. He built another shield that serves as the LCD display as well as the input board for his guitar.

The final result of all his work is fantastic. The user simply needs to dial in the chord or scale that he wants to learn, and the guitar lights up, showing the proper finger positions on the fretboard. We could see this coming in quite handy for anyone just starting to learn how to play.

Check out the video below to see a demonstration and walkthrough [Andrew] put together highlighting his guitar’s features.

Continue reading “Guitar Teaches You To Play Using LEDs”