RFID Drink System Eliminates The Need For Change

popcard_vending_machine

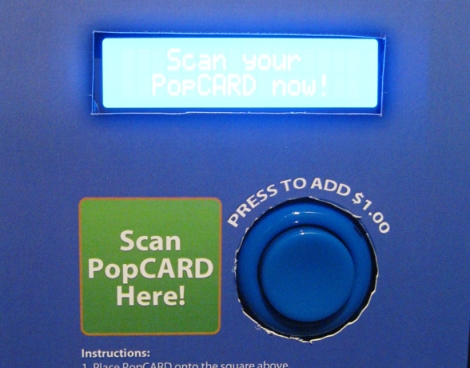
[Avatar-X] snagged a drink vending machine online a few years back, and has been selling drinks to his neighbors ever since. People are always asking him for change, and just the other day he was thirsty and out of change himself.  He considered adding an override key so that he could snag free drinks whenever he pleased, but decided to go all out and built a cash card system instead.

He didn’t know how to interface with the machine’s logic board, so after poring over the service manual he consulted with a support rep from the company that manufactured it. Luckily, he was able to get enough information from them to start making some headway. With his friend’s assistance, he was able to figure out which pins on the Bill Validator Interface needed to be shorted in order to simulate the addition of funds.

Using an Arduino with an Ethernet shield, LCD display, and an RFID reader, he had his PopCARD system up and running in no time. Now all his neighbors have to do when they want a drink is swipe their card in front of the machine and hit a button to add funds from their account.

As you can see in the video below it works great, and we’re sure his neighbors are pleased with the improvements he has made.

Continue reading “RFID Drink System Eliminates The Need For Change”

Power-sipping MSP430 Mini Alarm Clock

msp430_alarmclock

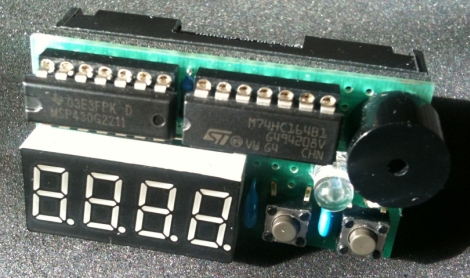
[Markus] had a TI MSP430 sitting around from the LaunchPad kit he bought a while back. He didn’t know what to do with it, but eventually decided that it would make a great miniature alarm clock.

He added a shift register to the mix in order to drive his 7-segment LCD display, using two of the MSP430’s output pins in the process. Four more pins were tied to the display’s cathodes, while the remaining two pins are connected to push buttons which register user input.

He crammed the clock’s logic as well as an alarm tune into the chip’s scant 2KB of memory space, literally occupying everything up to the last available byte. The clock is quite a power-miser, using just 2 µA in standby mode. According to [Markus’] calculations, that should enable the clock to use one set of batteries for 10+ years.

While this isn’t the first MSP430 clock we have seen, it certainly is the smallest and most simple.  Stick around to see a quick video of his clock in action.

Continue reading “Power-sipping MSP430 Mini Alarm Clock”

Thinkpad Dock-Picking

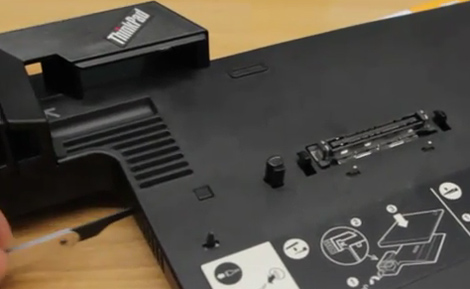
Hackers at the “RaumZeitLabor” hackerspace in Mannheim Germany have noticed that the locking mechanism on the thinkpad mini dock is extremely easy to circumvent. Sold as an additional layer of security, the mechanism itself is not really secured in any way. The button that actuates it is locked by a key, but the latch isn’t secured and can be accessed via a vent on the side. They are using a lockpicking tool in the video, but they say that even a long paperclip would suffice.

We know that no security device is perfect, and if someone really really wants it, they’ll take it, but this seems a bit too easy. Maybe the next version will have a little plastic wall protecting the latch from being actuated manually.  Hopefully if security is your main concern you are using something a little more robust that a dock-lock.

[via the RaumZeitLabor hackerspace (google translated)]

Continue reading “Thinkpad Dock-Picking”

Solar-powered GameBoy Color Never Runs Out Of Juice

solar_gbc

Instructables user [Andrew] was given a free, but damaged GameBoy color by a friend. The friend’s dog had done quite a number on the outside of the handheld, but it was definitely usable.  After replacing some of the outer shell, [Andrew] decided that he would try tweaking the GameBoy to utilize a solar cell in order to keep the batteries topped off.

He bought a solar garden light for $5 and disassembled it, being careful not to damage the heavily-glued solar panel in the process. The GameBoy was pulled apart next, and the solar panel was soldered to the handheld’s battery leads. Once the wires were properly routed through the case, he reassembled the handheld and picked up a pair of rechargeable AA batteries to test things out.

[Andrew] tells us that the solar panel works nicely, and that simply setting it out face-down keeps his batteries charged and ready to go.

Stick around for a quick video demo of his solar-powered GameBoy.

Continue reading “Solar-powered GameBoy Color Never Runs Out Of Juice”

Gun Turret Built Into A Cake Box

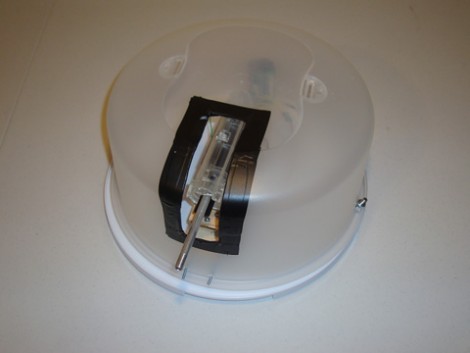
Couch potatoes have a new line of defense thanks to this remote-controlled turret. The gun itself is a hacked down airsoft model. The mount started with a servo motor in the center of a plastic cake box. A thin strip of plywood was added, along with a couple of sliding furniture feet to stabilize the platform as it rotates. A second servo mounts to that platform, which allows the trajectory of the projectile to be adjusted up or down. A PIC 18F4520 controls both of the motors, as well as the firing of the airsoft module, all while listening for commands from an IR receiver. Just adjust the firmware to match an unused device on your universal remote and the power to annoy your roommates will be at the tips of your fingers.

You can see an overview of the build process, as well as a demonstration of the final project in the video after the break. The page linked at the top has a very detailed build log but some of the ‘next’ buttons on that page don’t work for us. Luckily you’ll see a table of contents in the right column which lets you navigate around these bad links.

Continue reading “Gun Turret Built Into A Cake Box”

Kapton Tape Aids In Drag Soldering Surface Mount Parts

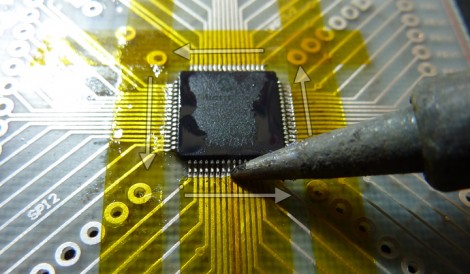
Drag soldering works exactly as its name implies, by dragging a bead of solder across fine-pitch pins you can quickly solder an entire row. The method relies on clean joints, so liquid solder flux is often used to make sure there is good flow. But if you’re drag soldering on boards that you’ve etched yourself the solder can sometimes run down the trace, rather than staying where you want it. Professionally manufactured boards don’t have this problem since they have solder mask covering the copper that doesn’t need soldering. [Ahmad Tabbouch] has a method that uses Kapton tape to act as a temporary solder mask on diy boards.

The process involves several steps. First, three strips are place horizontally across the board, leaving just a portion of the upper and lower pads exposed. Those pads are then tinned with solder, and a light touch with an X-acto knife is then used to score the tape covering the vertical rows of pads. Once the waste as been removed, two more strips are added and those rows are tinned. From there the chip is placed and soldered as we’ve seen before; first tacked in place, then fluxed, and finally drag soldered to complete the connections. This achieves a crisp and clean connection, presumably without the need to clean up your solder mess with solder wick.

Kapton tape resists heat, making it perfect for this process. We’ve also seen it used on hot beds for 3D printers, and as a smoothing surface for sliding mechanisms.

[via Dangerous Prototypes]

Aftermarket Visor-mounted GPS Better Than OEM

mini_gps

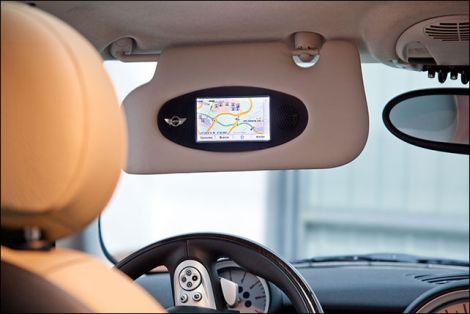
When [Roberto] bought his Mini Cooper, he opted to forgo the factory GPS system as it was over priced and didn’t have the best of reputations. He decided that he still needed GPS in his car, so he committed himself to install a TomTom unit in a way that would not detract from the car’s interior.

He dismantled the driver’s side sun visor, taking measurements of the original plastic housing that contained the mirror and lighting. He then drew up a 3D model of a replacement housing that would allow him to fit both the GPS unit and the speaker in the same amount of space formerly occupied by the mirror.

He gutted his TomTom unit, removing any extraneous parts he could find. A smaller speaker was sourced due to size constraints, then everything was mounted in his new housing once it arrived.

The end result is amazing. The GPS unit looks like it was installed at the factory – there is no sign that this was any sort of aftermarket modification. We are sure people will be quick to say that would be difficult to keep your eyes on the road while looking at the navigation screen, but as [Roberto] points out, you should be following the spoken directions once the car is in motion anyhow.