Capacitive Sensing Tutorial

[Bertho]’s submission for the 74xx logic contest is really impressive. He designed a capacitive sensing touchpad using only 74xx and 40xx logic chips. We’re impressed with the build and his writeup is one of the best resources we’ve ever seen for capacitive sensing.

There are two ways to go about designing a capacitive touchpad. The first option is put a voltage through an RC circuit. Measure the voltage-time curve, and you have a measure of the capacitance of the circuit. The second method is setting up an RC circuit to change polarity after a threshold for C has been reached. Microprocessors only use one of these methods (AVR uses the first, PIC uses the second), but [Bertho] decided to implement both methods for unknown reasons we still respect.

The circuit [Bertho] designed has a 30MHz clock using only 74xx logic chips, an amazing feat in itself. An 8×8 channel panel was fabricated and the whole build connects to a computer over RS-232.

The finished build is good enough has 64 points of resolution and is able to detect proximity very well. The touchpad is even able to recognize when a pen is placed on the panel. Check out the video after the break for the walk through and demo of this amazing build.

Continue reading “Capacitive Sensing Tutorial”

The Water Calligraphy Tricycle

Many westerners visiting or living in China may observe the art of “water calligraphy” and some may even try to imitate it. However, media artist [Nicholas Hanna] decided to take a totally new approach and make his own water painting machine.

Someone less creative would have devised some imitation of a human, but [Nicholas] decided to totally rethink the process in the form of a tricycle.  Using 16 PC-controlled water solenoids, this tricycle is turned into a sort of moving dot matrix printer. It doesn’t have the same sort of grace that the traditional Chinese art does, but it’s quite a bit faster, so if you want to get your message out, this might have some practical applications.

The post doesn’t go into the electronics, but the video after the break includes some close-ups and video of [Nicholas] assembling the device. If you happen to be in china, his tricycle is part of an event for “Beijing Design Week” at the Northern Electric Relay Factory until October 3rd.

Continue reading “The Water Calligraphy Tricycle”

Over-the-air FM Radio Gains Internet Control

[Old bit collector] is giving up control of his radio dial to the Internet. He combined a couple of Parallax products which now allow him to tune, adjust volume, and toggle the power for an FM radio receiver.

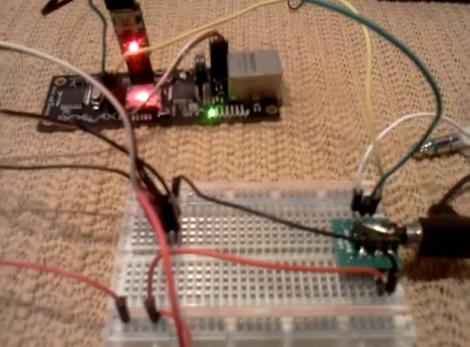
The setup is pretty simple. An FM receiver module is mounted in the breadboard seen above which helps to break out its control pins. Those are connected to a Parallax Spinnarette web server board. It’s auxiliary I/O pins are controlled via a web interface that he set up and plans to operate with the browser on his Android phone. But as you can see after the break, any web browser works as long as you know the correct address.

This is pretty good if you’re on a quest to make everything controllable from your smart phone. But we would love to use the concept to make our own streaming radio. You’d be able to tune in to all of your local stations from anywhere in the world.

Continue reading “Over-the-air FM Radio Gains Internet Control”

Announcing Our Next Theme – Sustainability Hacks

Our last theme, ATtiny hacks, received a really good response but it is time to move on. Today we are announcing our next theme, which will be Sustainability Hacks. In this theme we will be showing projects that allow us to have a lighter footprint. This could be things like projects that run on renewable resources, projects that control systems that allow us to use less energy such as an automated fan to preempt the need for more aggressive cooling. We are also interested in showing projects that push power consumption to the limit. Like our other themes, we need your help for this to be successful. If you have a project that you think we might be interested in, please let us know on our tip line.

As food for thought, driving is simply part of life for most of us. There are ways to make it have less impact on the earth though. One example of this that isn’t seen very often these days but will probably become more commonplace as fuel prices go up is boat-tailing. This is the process of reshaping the rear of a vehicle to make it more aerodynamic. You can catch a video after the break that makes up for its lack of sound with a pretty good run down on their process.

Continue reading “Announcing Our Next Theme – Sustainability Hacks”

How To Decode IR Remote Control Signals With Your PICkit 2

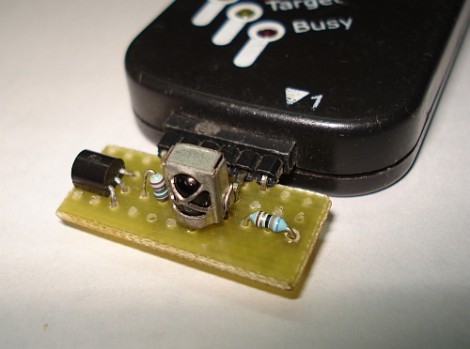
[SpiralBrain] needed to figure out the coding scheme used by an IR remote control so that he could use it with his own project. He built an IR receiver board for the PICkit 2 and figured out how to use some of the Microchip software to measure the timing of the incoming signal.

The hardware’s dead simple; a 38 kHz IR receiver does the heavy lifting by filtering out errant infrared light. When it does detect a signal with the correct frequency the output pin drives the base of a transistor to toggle the input pin on the PICkit 2. The breakout board has a pin header which makes it a snap to detach and store for later use. The PICkit 2 Logic Tool software captures this input, by setting the correct pin as a trigger and choosing a 10 kHz sample rate.

As we discussed in our PIC programming with Linux tutorial, the PICkit 2 really is far superior to its replacement, the PICkit 3. [SpiralBrain] mentions that it is more versatile than the newer version but doesn’t go so far as to tell us whether you can use this hardware with the PICkit 3 or not.

Improvised Metal Lathe

[McKGyver] needed a few parts manufactured. Instead of going the normal route – finding friends with machine tools or paying a machine shop, he improvised a rudimentary metal lathe.

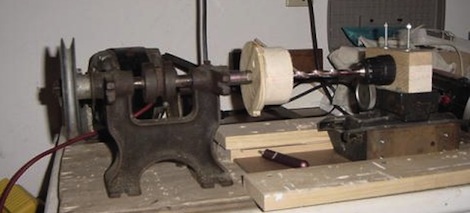
As much as we love 3D printers, they’re not the be-all, end-all solution for everything. Sometimes, you need to get a little dirty and do it the old-fashioned way. [McKGyver] needed a way to produce aluminum shaft couplers to join stepper motors to lead screws. A 1940s grinding wheel was used for the headstock. Since [McKGyver] only needed couplers of one size, he made a jig out of wood to attach the aluminum blanks to the spindle. A drill and a focuser from a photographic enlarger makes up the tailstock of the improvised lathe. The use of a camera focuser is pretty clever. Unless the equipment has been damaged, it’s guaranteed to move in a straight line. A small laser was used to align the drill.

The finished couplers were concentric to 0.005″. A ‘passable precision’ for his application, and a clever build that doesn’t involve moving a thousand pound South Bend lathe.

SNES Gamepad Coversion To USB

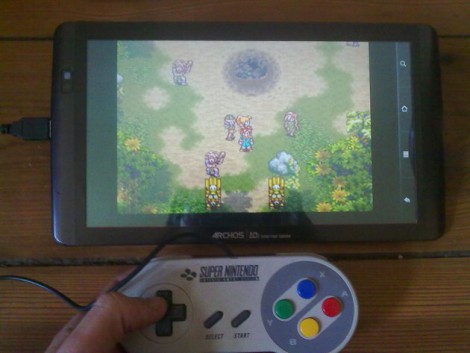
[Kekszumquadrat] wanted to use a classic controller to play emulator games on his Android tablet so he set out to convert an SNES gamepad to connect via USB. He found an old USB keyboard at a yard sale for about 3 Euros. He knew that the emulator he prefers has the option of remapping all the inputs to keyboard keys which means a USB keyboard has all of the electronics he would need to pull this off.

Once he had separated the keyboard circuitry from the case [Kekszumquadrat] plugged it into his Linux box and used Xev to establish how the keyboard matrix is set up. Xev is a common package that opens up an active window on the X desktop. When run from command line, any events that happen to the window will be echoed along with verbose data about that event. When it comes to keypresses, you’ll get the keycode you need. He simply shorted columns and rows until he found the desired mapping, then it was on to soldering.

The SNES controllers are very simple devices. As we’ve seen with previous projects, they use a serial-to-parallel shift register to gather button data and send it to the console. [Kekszumquadrat] simply soldered between button traces and keyboard matrix contacts. Once he finished, the keyboard parts were tucked inside of the controller case and he’s left with a USB controller that appears to be unaltered.