Weekly Roundup 8/27/2011


In case you missed them, here are our biggest posts from the past week.

For the weapons enthusiasts in our audience, make sure to check out our most popular post this week where [Liquider] shows a project in which an airsoft pistol was converted into a coil gun.

Our next most popular post was based around an xkcd comic where the concept of viewing clouds in 3D is explored using a pair of webcams. This post had lots of comments and also spawned a forum topic.

Next up is a post about a reward that has been place on the head of porting Android to run on a HP Touchpad. The bounty for all of the various challenges was originally $1500 but now sits at $2275!

This isn’t our normal fare since we usually don’t cover hacking that could be malicious. This post describes some of the exploits covered recently at Black Hat and Defcon.

Finishing up the pack is our own video where [Jack] shows how to build a stun glove and proves that it works by taking a jolt from it himself.

High Voltage Hacks: Transmute The Elements In Your Garage

The magnum opus of alchemy was the Philosopher’s stone, a substance that was able to turn common metals into gold. Unlike alchemists, [Carl Willis] might not be poisoning himself in a multitude of ways, but he did build a Farnsworth fusor that’s capable of turning Hydrogen into Helium.

To fuse Hydrogen in his device, [Carl] first evacuates a vacuum chamber. Deuterium (Hydrogen with an added neutron) is injected into the chamber, and a spherical cathode made of Tungsten is charged to 75 kV. The deuterium gas is heated and confined by the cathode and fuses into Helium. The electrostatic confinement of the plasma isn’t very much different from some old CRT tubes. This isn’t a coincidence – both the fusor and CRTs were invented by the same man.

While no fusion experiments – including some billion dollar experiments – have ever produced a net energy gain, this doesn’t mean it’s not an impressive engineering feat. If you’d like to try your hand at building your own fusor, drop by the surprisingly active research forum. There’s a lot of really good projects to look through over there.

Hacking [Steve Jobs]: A Retrospective


steve_jobs_steps_down_as_ceo_world_panics

Provided you haven’t been toiling away in a secret lair somewhere (we’re looking at you [Jack]), odds are you may have seen the news that [Steve Jobs] stepped down as CEO of Apple this past Wednesday.

This earth-shattering news even eclipsed that of the East Coast Megaquakeapocalypse. It sent the blogosphere into a tizzy, sparking a whirlwind of news posts and retrospectives on his career. It’s been impossible to ignore the coverage (we’ve tried), and since we see everyone else writing about it, we feel the need to be at least somewhat up on our current events as well.

At the end of the day though, we don’t care how many patents [Steve] owns, how many failed products he has dreamed up over the years, or that he and [Woz] used to wear matching thongs to the beach in the 80s*.

Nope, we just care about the hacks. So here’s a trip down memory lane highlighting the Apple-related hacks we’ve seen so far in 2011, which will forever be known as the year [Steve Jobs] gave up the reigns at Apple (again).

*Bald-faced lie

XBMC on iOS Devices

Overhauling an old Apple keyboard

Mac Pro serial terminal

Taking secret photos of Apple Store patrons

Apple ][ USB keyboard conversion

Apple ][ Weather Display Parts 1, 2, 3

Making Oscilloscopes From ARM Development Boards

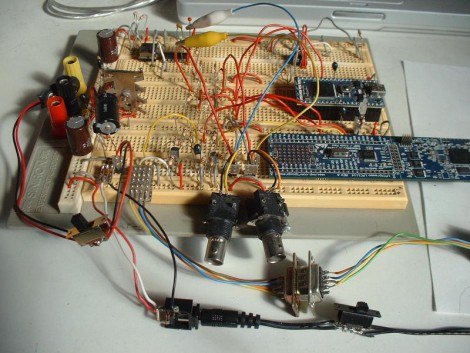
If you’ve got an ARM development board gathering dust in the corner of your shop, perhaps you could repurpose it as an oscilloscope. [Arend-Paul Spijkerman] was able to use an mbed and LPCXpresso as the hardware end of an oscilloscope. He didn’t use a standalone screen as a display, instead opting to push the scope readings from the hardware to a computer for display. This was greatly simplified by using StampDock as a basis for the GUI.

His circuit diagrams calls for an RS-232 connection for the LPCXpresso but not for the mbed. We’re not quite familiar enough with the mbed to know why, but perhaps those in the know can clue us in by leaving a comment. The probe connections are quite simple, each made up of a voltage divider and a pair of diodes. But the breadboard above looks much busier because it has two oscilloscope circuits built on it, and there’s a 10 MHz clock and a 4040 ripple counter which were used to provide a test signal.

Installing OpenSSH On The HP TouchPad

hptouchpad_openssh

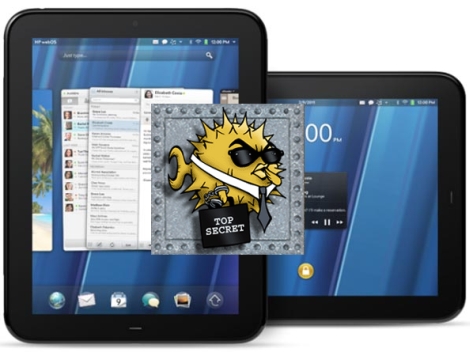
[Russ] was lucky enough to get his hands on a deeply discounted HP TouchPad, and after hearing about the huge bounty being offered for getting Android up and running on the device, he decided to poke around and see if he could make some headway.

He started off by making a full backup copy of his file system using a tool HP has on their WebOS site, just in case anything unfortunate happened to his device in the process. He grabbed a copy of the ARM cross-compiler and set off to build a copy of OpenSSH for the TouchPad. Once he had the binaries in hand, he started what he thought would be the arduous process of getting SSH onto the TouchPad, but it turned out that it was a simple drag and drop operation.

After remounting the file system to allow write operations, he fired up the SSH daemon and hoped for the best. It worked like a charm, and while it’s a relatively small part of getting Android running on the TouchPad, every bit helps.

arduino_bootloader_burner

A Beginner’s Guide To Burning Arduino Bootloaders

When it comes to learning about microcontrollers, everyone has to start somewhere. [Lady Ada] recently posted a tutorial on burning the Arduino bootloader to standalone chips for those just getting started with the micro.

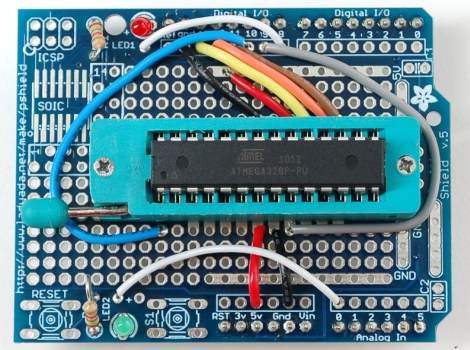
The tutorial cites a common situation, where someone is working on a project using an Arduino chip but they don’t want to sacrifice their dev board when just the micro and a few other components would do just fine. A short list of supplies is required, including an Arduino, a proto shield kit, a ZIF socket, and a blank ATmega chip.

The process is probably pretty straightforward and likely familiar to many of you out there. The ZIF socket is soldered to the board and handful of wires are added for powering and programming the new chip. The protoboard is installed on top of the Arduino like any other shield, and using a sketch that [Lady Ada] has made available, the bootloader burning process is a cinch.

It’s a useful tip for newcomers, and definitely a skill that seasoned Arduino users should have under their belts as well.

Milling Curves Into Mirrors And Glass

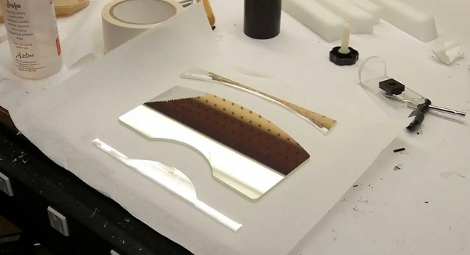
[Ben Krasnow] is working on  a project that uses an extremely expensive specialty mirror. He needed to cut curves into it, taking care not to chip or shatter the material. He’s found a reliable way of doing this with a CNC mill and is sharing his methods.

The material he’s working with is a cold mirror; it reflects visible light while allowing infrared light to pass through. He had to custom order it, breakage is not acceptable. [Ben] explains that the biggest risk when milling glass is the clamping method used. He built his own jig and uses shims, rather than clamps, to secure the material along the X and Y axes. It is held down on the Z axis using a bar of acrylic spanning from one side to the other with rubber feet on the bottom.

A diamond burr cutter does the work, spinning at 3000 RPM. [Ben] recommends moving the head at the slowest rate possible in order to give the cutter time to do its work. And of course the material needs to be kept cool by pumping cutting fluid across it. As he shows in the video after the break, what you get is a piece of glass that comes out with clean and smooth edges.

In case we’ve sparked your curiosity, this mirror will be used during an MRI scan. The patient looks at a monitor reflected in the mirror at a 45 degree angle. At the same time, an infrared camera records the patient from the other side of the mirror to monitor where they are looking.

Continue reading “Milling Curves Into Mirrors And Glass”