FPGA Bitcoin Miner Is Probably The Most Power Efficient.

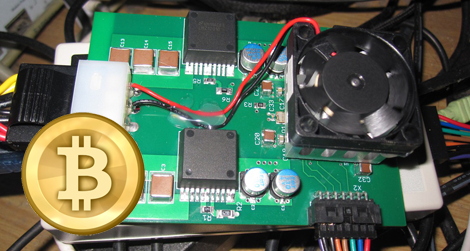
[fpgaminer], [li_gangyi], and [newMeat1] have been working together for the last few months to build an FPGA bitcoin miner that blows GPU mining rigs out of the water in terms of power efficiency. The board requires only 6.8 watts for 100 Mhashes/second, but [li_gangyi]’s blog says the team expects to hit 150-200 Mhashes with some improvements. That’s efficiency GPUs can’t touch.

Bitcoins are a digital currency that are ‘mined’ by calculating hashes that verify bitcoin transactions. While mining operations can be performed on a CPU, graphics cards and FPGAs beat CPUs by several orders of magnitude in terms of how many hashes can be performed per second.

The heart of the board is a Spartan-6 LX150 FPGA – a pricey bit of kit – and the team is selling each board for $440 USD. For that amount of money, you could buy two ATI 6770s at half the price and crunch four times as many hashes a second. At less than 7 watts, though, we wouldn’t worry too much about cooling the rig and the electricity costs will be very low.

Video: Shocking [Jack] Into Submission With High Voltage

Hackaday headquarters has recently been overrun by techno-groupies hanging around outside so we decided to take some measures to discourage that. A word of warning though, if last week’s video ruffled your feathers then you probably shouldn’t watch this one. In this video [Jack] shows you how to create a stun glove using a disposable camera and some leather spikes. To prove that it really works, he intentionally takes a jolt from it courtesy of Hackaday’s security chief [Vlad].

Check out the video after the break.
Continue reading “Video: Shocking [Jack] Into Submission With High Voltage”

Hacking A2DP Support Into An Old Car Stereo

a2dp_tape_deck_retrofit

[Roofus] had an older car, and unfortunately his stereo’s cassette player just wasn’t doing it for him. He always wanted to simply get into his car, pull out his cell phone, and have his music ready to play without any fuss. After messing around with all sorts of different tape adapters, he got fed up and decided to rig up an A2DP (Stereo Bluetooth Audio) adapter on his own.

He pulled the head unit out and started looking around to see how he could wire an adapter in. He figured the best course of action would be to remove the tape deck, and fool the stereo into thinking that a tape had been inserted. After spending some time tracing wires and studying how his old tape adapters worked, [Roofus] had an A2DP connection wired in and was ready to rock out.

Greeted with nothing but silence, he turned to his favorite hacking site (Hackaday, naturally) for assistance. Some friendly forum-goers helped him identify a ground loop issue, and he set off to his nearest RadioShack for a pair of isolation transformers that would fix his problem.

Once he knocked out the ground loop issues, his adapter worked like a charm. He put everything back together, and aside from a tiny switch he installed to toggle between audio sources, you would never know it was there.

Hackaday Links: August 21, 2011

Arduino + PS2 controller + R2D2

Here’s an unbelievably real-looking R2D2 replica driven by a PS2 controller with an Arduino inside that plays sounds from the movies. Too bad we couldn’t find any more details about it. [Thanks Bill]

Server build time-lapse

[Justin] and his colleagues spent five days upgrading their server by building a 29-unit cluster. Lucky for us they set up a web-cam to capture the process.

Cockroach computer

Behold this working desktop computer, complete with monitor and mouse. We’re not sure how it was done, or what it’s for, but worth a peek just because of its size. [Thanks Harald via Dvice]

Modelling self-assembling viruses

A 3D printer and magnets were used to build this model of a self-assembling virus. Shake the jar and it falls apart. Shake a bit more and it’ll rebuild itself… it has the technology.

Tardis cufflinks

[Simon] is exercising his geek chic with these Tardis cuff links. The Doctor Who inspired accessories were made from a model railroad telephone booth.

One-man SMD Assembly Line Shares A Lot Of Tips About Doing It Right

Need to use that antiquated hardware that can only be connected via a parallel port? It might take you some time to find a computer that still has one of those, or you could try out this USB to Parallel port converter. It’s not limited to working with printers, as the driver builds a virtual parallel port that you should be able to use for any purpose. But what we’re really interested in here isn’t the converter itself, but the build process. [Henrik Haftmann] posted a three-part series of videos on the assembly process, which you can watch after the break.

The build is mostly surface mount soldering with just a handful of components that need to be hand soldered. The first of his videos shows him stenciling solder paste onto the boards. From what we can see it looks like he built a nice jig for this using scrap pieces of copper-clad which match the thickness of the PCB, and hold it and the stencil securely in place. There’s a bunch of other tips you can glean from the videos, like the image seen above. It’s a clamp that holds the PCB and USB jack together while they are soldered.

If you’re ever thinking of assembling a bunch of boards you should set aside thirty minutes to watch them all.

Continue reading “One-man SMD Assembly Line Shares A Lot Of Tips About Doing It Right”

Resurrecting An Electric Razor

[Salvatore Ventura] likes a close shave from an electric razor, and nothing shaves closer than a new set of blades. After shelling out for some sharp ones, the rechargeable batteries died so he set out to replace them with a couple of double A’s (not the ones pictured above as those are alkaline).

This fix actually increased the original battery life of the razor by about 30%. That’s thanks to a larger capacity than the battery that had come with the razor. But [Salvatore] didn’t get to enjoy the windfall for very long. One morning the charge light was blinking on the razor and it wouldn’t spin up at all. After testing the batteries with a multimeter he found that they had a full charge and figured it was the main board that had gone out.

The real question is, what is that board actually doing? A bit of study led him to the conclusion that it is just a charging circuit, and an on/off switch. He kissed the board goodbye, wired up the AA battery holders directly. Now he jams a paper clip into the recharging jack, shorting the pins to complete the circuit. He could even keep using rechargeables with an external charger if he was careful not to run them too low.

This GLaDOS Potato Is A Lie

Why settle for virtual reality when you can make the digital world into reality? [Josh] wanted to have a GLaDOS potato accompany him through life when not playing Portal 2. He set to work to see what kind of replica prop he could come up with. Judging from the image above, and demo video after the break, he nailed it right in the spud.

There’s no worrying about rot. The potato and a few parts were molded from Sculpey and baked in the oven. Since the fake spud is hollow in the center it’s easy to hide the bits that make it talk. An old MP3 player was loaded with quotes from the game, and plays them back via an LM386 audio amplifier circuit and a speaker hidden below the electronic eye. The eye is lit by five yellow LEDs which are also tied into the amplifier to make them blink and fade with the intensity of the audio signal.

A paint job and the nails and wire really make the build look just right. Now [Josh] needs to host a geek-themed Halloween party so he can really show this off.

Continue reading “This GLaDOS Potato Is A Lie”