Power Up With Knowledge

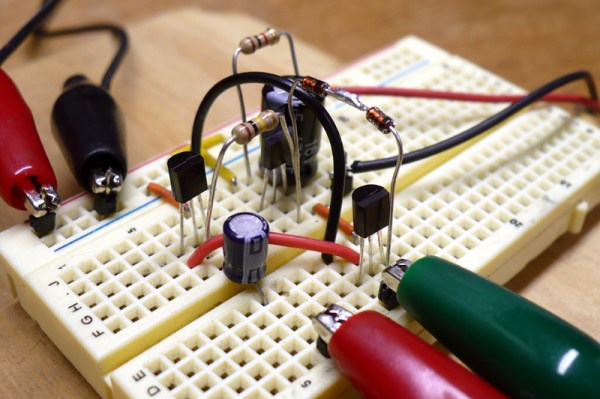
The LM317 is a favorite for many people who want quick, cheap, reliable and ajustable power. It only takes a few parts to set up and it does its job rather well. Sometimes though, you just need a power supply.While there are a million tutorials out there, not many go as in depth as [Phil] does in his 2 newest videos.

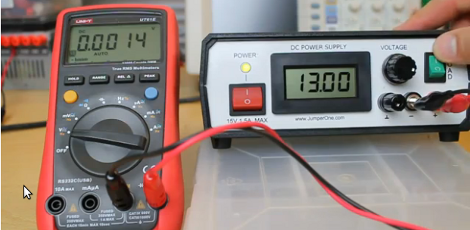
Covering everything from the wall outlet to the final output, [Phil] explains each part step by step, stating what it does and the math and formulas behind it all to produce quality results. He then goes over to a working model and reviews each part showing its real output on a oscilloscope, which is very handy if you do not have one yourself.

In the second video he takes that knowledge and builds it all up into a professional looking bench top model with LCD meter readout and varnished paper to complete the front look. If you’re looking to build your first bench supply or want a better grasp on what exactly is happening in the one you have now, you should join us after the break for these 2 quality productions.

Continue reading “Power Up With Knowledge”

Hacking A Better Pressure Cooker

This pressure cooker hack on [Dave Arnold]’s great cooking blog was sent into us (thanks, [techartisan]!). Most pressure cooker recipes are written for pressure cookers that can go up to 15 PSI or 250° F / 121° C. At these temperatures, a lot of interesting chemistry happens in the food. The popular Cuisinart electric pressure cooker doesn’t reach these pressures and temperatures, so [Dave Arnold] set out to make his Cuisinart better.

After measuring the temperature with a thermocouple, [Dave] deduced that the Cuisinart cooker only reached 237° F and 9 PSI. After having a look at the electronics, he realized that adding a resistor to the temperature sensor circuit would give him the pressure he wanted. After soldering in a trim pot, everything went swimmingly and the cooker was able to reach 15 PSI.

[Dave] isn’t sure how his modifications will hold up – he doesn’t know how the cooker will hold up to overheating (and there are a few concerns about non-stick pressure cookers in the first place). That being said, it’s a great mod to get some more capabilities out of a Cuisinart.

Make Your Own Custom Hot Glue Sticks

Hot glue guns can be very handy tools for bonding all sorts of surfaces, while getting you accustomed to plastic burns. The one thing they lack though is color, and while yes, you can on occasion find colored glue sticks, there is usually only a limited selection and they cost way more than the normal amber or clear sticks.

[Ken] solves the blandness problem of hot glue sticks in his kitchen, as shown in this cool slideshow. In a melt and recast process, glue sticks and crayons in a 3:1 ratio are slowly heated on an electric stove in a old can. Metal tubing is lined with silicone parchment paper to act as a release agent. The now vivid and scalding hot glue is poured into the tube and left to cool.

You might be wondering how mixing colored wax into ethylene-vinyl acetate effects the glue’s strength . According to the author if you need  decrease the mix viscosity, you can add up to 10% paraffin wax by weight without effecting the bond strength. Color and viscosity control? Hot glue just keeps getting better!

Largest LED Cube We’ve Ever Seen Is Still Only Half Complete

[Brendan Vercoelen] is a university student in New Zealand studying engineering. He says his recent gigantic LED cube build, “isn’t very serious” compared to other student projects, but that doesn’t mean it’s not impressive. The original plan for the build was a 16x16x16 tri-color LED cube. After realizing how much soldering that really was, [Brendan] scaled back his design a little to a 16x16x8 cubeoid, but the other half can be attached when the project is complete.

From the cost breakdown, [Brendan] only spent about $550 USD – far less expensive than we expected. The most expensive item was the 4,000+ Red-Green-Orange tri-color LEDs. The largest LED cubes (1, 2, 3) we’ve covered have maxed out at 8x8x8, or 512 total LEDS. Even though [Brendan]’s build is only half done, it’s still four times larger in volume than the largest LED cube we’ve seen.

The gauntlet has been thrown down. This is the one to beat, folks. Check out a video of the cube after the break.

Continue reading “Largest LED Cube We’ve Ever Seen Is Still Only Half Complete”

Automated Aquarium Chemical Dispenser Is Extremely Precise

precision_doser_nano_doser_espresso_pump

[Robovergne] prides himself on the beautiful reef aquarium that he has set up in his home. These sorts of water displays require constant maintenance due to the mineral requirements of living coral. Rather than add mineral solutions manually, he decided to build a nano-doser using espresso machine pumps (Google Translation).

These vibration pumps run on mains voltage, so he had several options as far as how to control them. Using relays would likely make things pretty noisy, so he chose to use a zero crossing detection circuit to precisely control the pumps’ duty cycles and output.

His setup uses a PIC to control everything from the zero crossing circuit to the display LCD. An amount of product and the distribution time frame are entered using a handful of buttons mounted on the front of his control box, leaving the PIC to do the heavy lifting. It will calculate the proper length of time to run the pump based on several factors, including fluid viscosity and height of release.

It really is an impressive system, and while his needs are very precise, we imagine this sort of setup would be quite useful in building less complicated dispensers, such as those found in an automated bar.

Continue reading to see a few videos of his Nano-doser in action.

Continue reading “Automated Aquarium Chemical Dispenser Is Extremely Precise”

Eye See You.

So you want to add animated eyes to your next robot? Now you can.. Using ping-pong balls, some scrap plastic and 6 servo motors [Chris] has created these animatronic eyes along with some nifty animated eyebrows. To get motion emulating realism [Chris] created a 2 axis gimbal using plastic rings and some nuts and bolts. The eyes (ping-pong balls) are held in the gimbal and actuated using two servos each. The eyebrows use another pair of servos and some tubing covered in electrical tape as the actual eyebrow.

[Chris] Kindly goes through the entire build process including information for beginners such as servo motor control. The whole thing is controlled using a PIC 18F452 and circuit diagrams and code are all available on the site. Check out the video after the break to see the eyes in action, you will also find more videos describing the build process if you follow through the tutorial.

Continue reading “Eye See You.”

Build Your Own Class AB Audio Amplifier

[Dino Segovis] wrote in to tell us about his “hack”, making an AB Audio Amplifier. The advantage of this particular amp is that the transistors never turn off, which would cause distortion. A full schematic is given in the article as well as a parts list. A complete “bill of materials” makes any circuit building project easier, especially for the beginner.

Although this is by no means a new circuit design, (a similar setup is used in car audio equipment) [Dino] does a great job of explaining how things work in the article itself and in the video after the break. He also gives some great tips about transferring your drawn circuit to a breadboard in a neat and organized way at around 5:00 in the video. Continue reading “Build Your Own Class AB Audio Amplifier”