Muff-Fones Sound Dirty; Well, Not Literally

Baby, it’s cold outside. But that doesn’t stop [Grissini] from listening to some tunes when not indoors. He added headphones to a pair of ear warmers. We guess you could call them ear muffs, which is where the name comes from. But these are the newer type that wrap around the back of your head.

[Grissini] picked up a set of headphones that similarly wrap around the back of your head. After pulling the speakers out of their plastic enclosures he needed a way to soften the sharp edges when they’ll be pressed against your ears. Sugru once again shows its versatility by providing a soft, self-bonding, and moldable surface. The last step is dead simple, as the ear warmers already have a fabric pocket by each ear perfect for accepting the speakers.

Now we need this to go one step further, by making them wireless. We figure hacking in a bluetooth headset board would make it work with your cellphone. Or you could roll your own minimal MP3 board and house it in the part that wraps around your neck.

GE Color Effects Hacking For The Nautically Inclined

ge-color-effects-controller

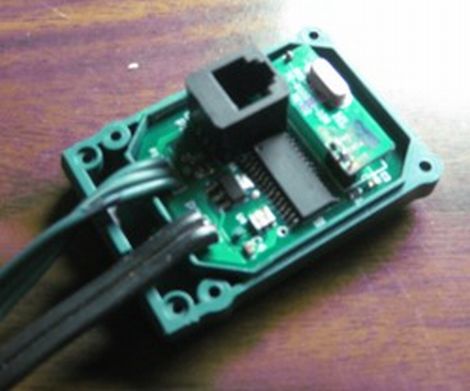
[Jim] wrote in to share some work he did with GE Color Effects LED lights in an effort to create a light display for his boat. He saw our coverage of the Color Effects G-35 hacking efforts by DeepDarc last year, and knew that they would be prefect for the boat. He did some careful scouring of eBay to score 8 strings of lights at bargain basement pricing, then he got down to the business of hacking them.

He originally built a control circuit using a single PIC18F, but just before he started to put everything together, he realized that wiring everything up would be a huge undertaking. Going back to the drawing board, he decided it would be best to replace the lights’ stock board with one of his own. Now, he uses a single master controller board to send messages to his slave “pods”, significantly cutting down the amount of wiring required for the project.

The display looks great as you can see in the video below, though as many do, [Jim] has plenty of improvements in mind for the future.

Continue reading “GE Color Effects Hacking For The Nautically Inclined”

Nokia N900 Control Pad Is Perfect For Gaming On The Go

nokia-n900-gamepad

[Andrzej] loves his Nokia N900, noting that it makes a great portable gaming device. Since it supports a wide array of emulators, it’s perfect for indulging his gaming nostalgia on the go. He says that the one downside to the N900 is that its keyboard doesn’t make gaming easy, nor comfortable.

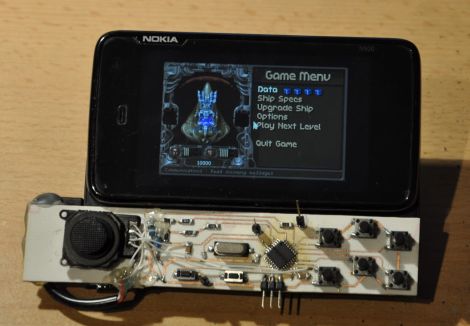
To make gaming a big more fun, he built himself an add-on gamepad that fits perfectly over the phone’s keyboard. Connected via the phone’s USB port, it features 8 push buttons along with a PSP joystick. He used an ATmega8A as the brains of the controller, communicating with the phone as a USB keyboard. He says that this sort of configuration makes it extremely easy to do all sorts of custom button mapping on a per-game basis.

As you can see in the picture above the controller is currently lacking a case, but we think that with a bit of clever packaging, it could look as nice as a retail add-on.

Check out the short video below to see his gamepad in action.

Continue reading “Nokia N900 Control Pad Is Perfect For Gaming On The Go”

A Clock Made Out Of Some Very Weird Tubes

If you’re like [Richard], you’ve got a few really rare components lying around. Maybe it’s a very weird micro or a really tiny CRT, but eventually you’ve got to build something with these parts. When [Richard] decided to put some ITS1A neon display tubes to use, he fell back to the old standby – a really awesome clock.

Unlike the lowly Nixie tube, the ITS1A tube is weird. It’s a neon seven-segment display that can be controlled directly from the pins of a microcontroller. It does this with the help of seven tiny thyratrons in each segment. Even though this tube has neon, the display isn’t the familiar neon orange-red. The tube emits a lovely green with the help of a phosphor coating.

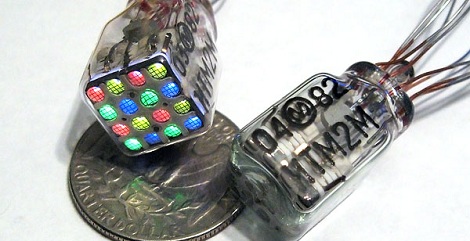
With a single digit already incorporated into [Richard]’s clock, he needed four indicators for the hours and minutes. After a failed experiment with a crazy 4-color, 16-pixel Melz ITM2-M display, he moved on to a simpler MTX90 thyratron indicator.

Using the same control scheme as his earlier numitron clock, Richard had a PCB made and wired everything up. The seven-segment tube indicates the value, and the indicator tubes indicates the position of the digit in the XX:XX standard. A very cool  build with parts you don’t see coming around often.

Dimming AC Lights The Hard Way

It’s that time of year again where the thermometer drops, the sun sets earlier, and we try to warm our hearts with the solstice festival that is common in our own respective cultures. Of course we all need a few strings of lights, but wouldn’t it be great if we had PWM controlled dimmable lights?

When he started out on his PWM-controlled, AC-powered light box, [Waterbury] immediately realized that relays were not going to be an optimal solution. The best way out of the mess he dug himself into would be via zero crossing. After getting a transformer wired up to a transistor for the detection circuit, a short bit of code was written in the wee hours of the morning and a proof of concept was had.

With the control box complete, [Waterbury] hacked up a quick VB app and piped the output of a WinAmp visualizer into the lights via serial. The Inception demo was great, but finer-grain control was needed. After seeing a Hack a Day post on a nice equalizer chip, the seven band output on IC were converted to UART.

[Waterbury] took his seven-band AC-controlled light box to a Halloween party with his synth and the results looked awesome. You can check that out after the break, but we’re really waiting to see his Christmas decorations this year.

Continue reading “Dimming AC Lights The Hard Way”

Chrono-tomic Shield Helps Your Arduino Keep Perfect Time

chronotomic-arduino-shield

[Josh] and his lab partner [Eric] needed a final project for their Embedded Systems Design class, and thought that designing an Arduino shield would be a cool idea. They noticed that there are plenty of ways to get an Arduino to keep time, though none that they knew of utilized WWVB (Atomic Time) signals directly.

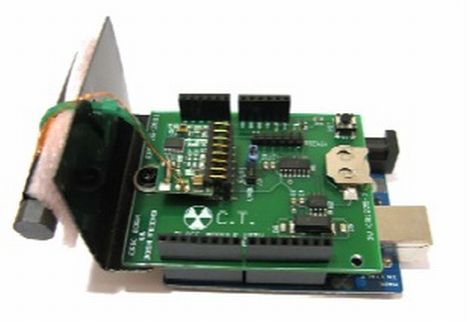
The Chrono-tomic Arduino shield uses a C-MAX radio to demodulate the WWVB signal, demodulating it and passing it along to a PIC16F1824 microcontroller. The PIC decodes the data frame and verifies it is valid, sending the time to an MCP79410N real-time clock module.

We can hear the “Yo dawg I herd you like microcontrollers so I put a microcontroller on your microcontroller shield” jokes already, but the pair says that they offloaded the time processing to the PIC in order to let the Arduino focus on whatever tasks it has been delegated. The Arduino code merely needs to request the time from the RTC whenever it is required, rather than deal with the decoding itself.

Is it overkill? Perhaps – though we think it heavily depends on your application and configuration. We can certainly conjure up situations where it would be useful.

arduino-seismic-sensor

Detecting Seismic Waves With A Piezo Element

While we normally see piezo elements being used to output audio, [Veedo] thought that they could be used in a more useful manner. He bought way too many piezo film tabs and decided to use them to build a makeshift seismic sensor.

The piezo tabs came with weights attached at one end, though while testing them, he found that they more or less only detected vibrations with frequencies in the KHz range. Since earthquakes tend to produce vibrations in the 30-80 Hz range, he had to tweak his setup to detect the proper frequencies. To do this, he attached a weight made of a screw and washers, checking the output signals on his oscilloscope until the dominant sensed frequencies were in the range of 40 Hz.

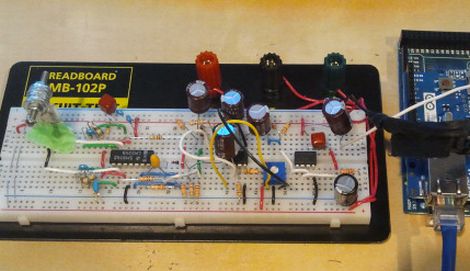
The sensor was attached to a breadboard, then wired through a charge amp to create a small AC signal, which floats on 2.5Vdc. The bottom half of the wave is chopped off with a diode, after which it is fed into an Arduino Mega. The seismic data is then pushed up to his Pachube account for storage, though he can view the feeds locally via the a web server programmed into the Arduino.

We’re not sure how much advanced notice this sort of setup would give you in the event of an earthquake, but it seems like a fun project to build either way.