Advanced Robotic Arm Control Using Kinect

kinect_teleoperation

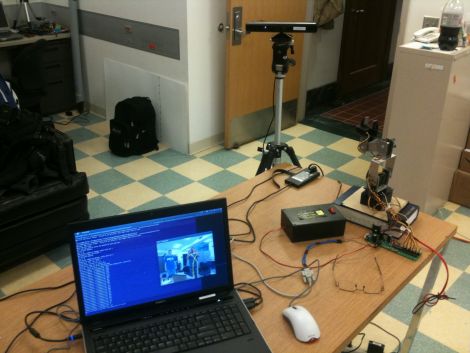
[Ryan Lloyd], [Sandeep Dhull], and [Ruben D’Sa] wrote in to share a robotics project they have been keeping busy with lately. The three University of Minnesota students are using a Kinect sensor to remotely control a robotic arm, but it’s not as simple as it sounds.

Using OpenNI alongside PrimeSense, the team started out by doing some simple skeleton tracking before working with their robotic arm. The arm has five degrees of freedom, making the task of controlling it a bit tricky. The robot has quite a few joints to play with, so the trio not only tracks shoulder, elbow, and wrist movements, but they also monitor the status of the user’s hand to actuate the robot’s gripper.

When everything was said and done, the results were pretty impressive as you can see in the video below, but the team definitely sees room for improvement. Using inverse kinematics, they plan on filtering out some of the joint tracking inaccuracies that occur when the shoulders are moved in a certain way. They also plan on using a robotic arm with even more degrees of freedom to see just how well their software can perform.

Be sure to check out their site to see more details and videos.

Continue reading “Advanced Robotic Arm Control Using Kinect”

Improve Charlieplexing Performance With Interrupts

single_chip_led_matrix

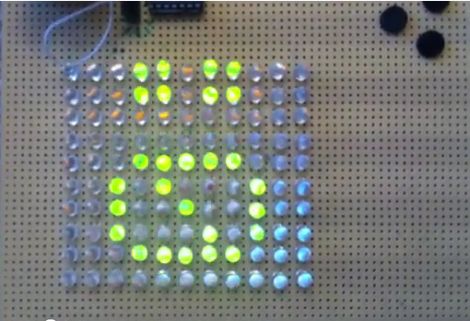
[Dmitry] was shopping for LEDs and accidentally pulled the trigger on the wrong type. Since he didn’t want to be wasteful, he figured he should at least take the time to build something with them.

A LED matrix display was the obvious project choice, but he only had a PIC16F688 at his disposal. Since the micro controller only has 11 output pins, charlieplexing was the only way he would be able to light the entire matrix.

While testing his LED array, he found charlieplexing to be a bit disappointing. The fact that the LEDs can get relatively dim, depending on the number of units lit at any particular time struck him as annoying.

In order to improve the performance of his charlieplexed array, he first decided to scan through all of the LEDs rather than just those that needed to be lit. This ensured that all of his LEDs had the same 1/110 duty cycle and were always as bright as possible. He also chose to use interrupts when lighting the LEDs. This meant that his code does not need to take into consideration any specific timing requirements to maintain persistence of vision. He also double-buffers the display to help reduce flicker.

He says that he ran into certain constraints with the PIC chip he chose, so he used a handful of lookup tables to ensure smooth operation of his display. He was quite satisfied with the results, and we think that the interrupt-driven display looks like it works just fine from where we’re standing as well.

Be sure to stick around for a quick video explaining and demonstrating his single-chip LED matrix.

Continue reading “Improve Charlieplexing Performance With Interrupts”

USB Minecraft Portal

[Sprite_tm] had heard some time ago that middle of the road Nokia phones had some really interesting LCDs, they are 2.4 inch TFT’s with 320×240 resolution. He immediately got 3 beccause they are pretty low cost as well, and started working with them. Apparently these LCDs are self contained, meaning they have all the driver chips and memory on board, you just need to know the pins and commands. This too is fairly easy as they are somewhat standard setups and datasheets for similar models work in a pinch.

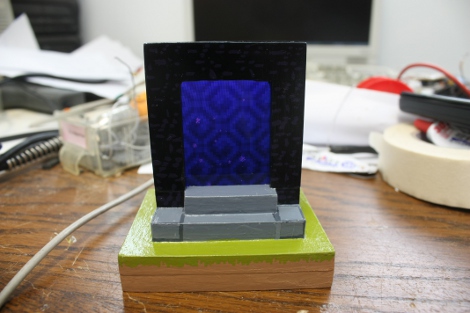
Once the things were working, what do you do with them? [Sprite_tm] decided to make a desktop minecraft portal. Since the animation is a bit complex in micro controller worlds, he grabbed one of the STM32F101CBs for their beefy cpu and got to work. Getting the texture from minecraft proved to be a bit of a bear as they are not static images, but are calculated on startup. A bit of C code on the PC quickly generates an appropriate pattern and is exported to the micro controller for display in its final home.

The case is made out of wood and once finished looks just like the “real” thing giving a presentation any “blockhead” would love to have on their desk.

Digital Audio On The Parallax Propeller

[Beth] had the idea for transmitting digital audio over S/PDIF on a Propeller a few years ago, but only just got around to a writeup. For that, we thank her.

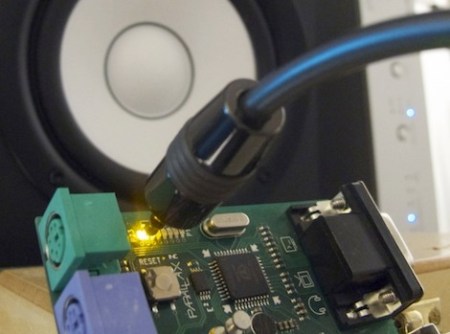
The writeup has a marvelous walkthrough of the S/PDIF protocol and the problems associated with with generating the signal. S/PDIF is a relatively resource-intensive protocol – the signal is clocked at 64x the audio sample rate. That signal is doubled for biphase mark code, keeping everything in sync. [Beth] says the microcontroller would neet at least 24 MIPS of processing power just to generate the S/PDIF signal – processing audio would be another task altogether. Because of the processing power needed, and the weird clock rates needed, [Beth] decided to go with the Propeller. The implementation uses only one core of the Propeller, leaving another seven cores available for sound synthesis or even a visualization over VGA.

[Beth] admits this could be done with just about any microcontroller (although it would need to be clocked at a multiple of 4.096 MHz for a 32kHz audio stream), but we really appreciate the work that went into bit-banging this signal.

Video of [Nick] at Gadget Gangster playing around with digital audio on a Propeller after the break.

Continue reading “Digital Audio On The Parallax Propeller”

Mini Light Table Fits Inside A Briefcase

portable_light_box

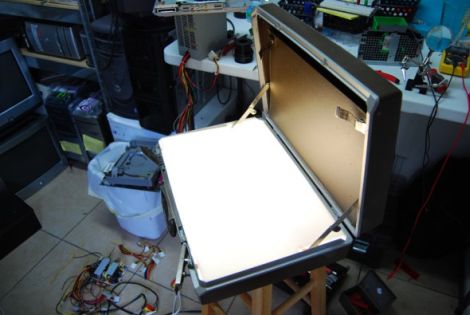
Hackaday forum member [Mike] was looking for project ideas when his girlfriend, an art major, suggested that he build her a light table to help with her various assignments. Having seen a few of these projects pop up from time to time, he figured he was up to the task. He started hunting around at his local thrift stores and finally came across what he was looking for – a hard-sided Samsonite briefcase.

He ripped out the bottom lining of the briefcase and proceeded to paint the inside white in order to properly reflect the lighting he would be adding shortly. A pair of under-cabinet lights were installed, and wired to be easily toggled on the outside of the case. He located some white acrylic to serve as the top of the table, trimming it to fit snugly in the case without any need for fasteners.

His girlfriend loved the table, though we would be interested in seeing a more portable version – it is built into a briefcase after all. We would love to hear your suggestions on how he might make this more portable, so let us know in the comments.

Modular Security System Is Portable Too

diy_security_system

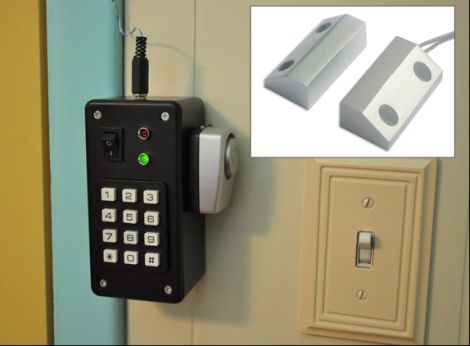
Hackaday reader [Oneironaut] wrote in to share a modular, portable security system he built for himself.

He likes visiting the Caribbean, but his favorite vacation spot is apparently rife with cat burglars. He enjoys sleeping with the windows open and wanted to find a way to scare off ne’er do wells. At home, there are a few different buildings on the property he owns, and he was looking to keep curious trespassers away.

The alarm system was built using a matrix keypad that interfaces with an ATMega88 micro controller. The micro controller handles all the logic for the system, triggering an attached “pocket alarm” when ever the sensor is tripped. Like most household alarms, it is armed and disarmed via the keypad, giving the user 60 seconds to enter the disarm code if the alarm has been mistakenly tripped. A wide array of trigger methods can be used, from mercury switches to motion detectors, since his alarm uses a simple plug interface that accepts any two-wire sensor.

Now, no one is claiming that this is high security by any means – the alarm addresses a couple of specific scenarios that apply to [Oneironaut], which may also be applicable to others out there. At the end of the day, the alarm is more meant to scare an intruder into fleeing than anything else, and in that respect, it works perfectly.

Continue reading to see a quick video demonstration of his alarm system in action.

Continue reading “Modular Security System Is Portable Too”

Tiny Atari 810 Disk Drive Upgrade

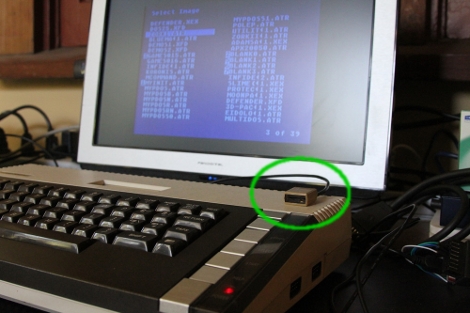
Everything gets smaller as technology improves. [Rossum] reduced the space needed for an Atari 810 disk drive by building this tiny replacement. Of course it doesn’t use floppy disks, but takes a microSD card instead. And it doesn’t stand in the place of one floppy drive, but can emulate up to eight different drives. The best part is that [Rossum] went to the trouble of designing an enclosure and having it fabricated via 3D printing in order to look just like a doll house version of the original hardware. It uses an LPC1114 ARM Cortex-M0 microprocessor to translate data transmissions to and from the Atari hardware, storing it on the 8 GB card.

As usual, you’ll soon find the schematic, board artwork, and code up on his git repository soon.