Arduino Weather-station To Internet Bridge

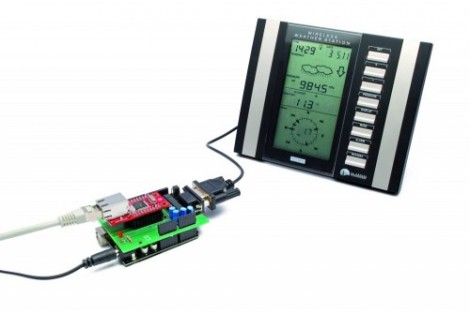
Here’s a project that looks to eliminate the PC necessary for pushing weather station data to the Internet. When you think about it, getting data from your own weather sensing hardware to a site like Weather Underground doesn’t require very much processing at all. The largest chunk of the puzzle is a window to the Internet, and that can be easily accomplished with a microcontroller rather than an always-on computer.

In this case, [Boris Landoni] is using an Arduino along with an RS232 shield and an Ethernet shield. The weather station, a La Crosse WS23xx series, already has an RS232 serial port for grabbing the data. The shield is necessary to step the voltage down to levels that will play nicely with Arduino. It also gives you a D-Sub connector for easy hook up. From there he hit up the documentation for Weather Undeground API, writing code to build the necessary string which is pushed over the Ethernet connection at regular intervals.

If your weather station only offers a USB port you’re not out of luck. Using an embedded platform with USB host functionality you can achieve the same results as we see here.

Graphical Programming With The Arduino IDE

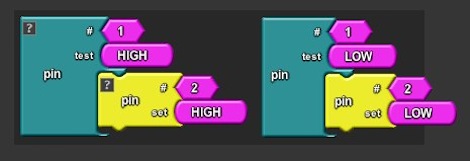
The Arduino is an excellent first embedded development kit, provides a great introduction to electronics, and has the potential to get children into programming. [David] thinks throwing C at non-programmers isn’t the best way to learn programming, so he developed ArduBlock , a graphical programming language for the Arduino.

We’ve seen a number of graphical, block-based programming languages in our time, most notably Scratch. [David] found a project called OpenBlocks that serves as the basis for Android App Inventor.

[David] forked the OpenBlocks project and started working on his new graphical programming language. ArduBlocks uses the Arduino IDE, so everything possible in C with an Arduino should be possible with ArduBlocks. There’s a lot of thought put into the design of the blocks – the first iteration was far too ‘busy,’ but [David] cleaned it up and made the projects understandable.

For an absolute beginner, we couldn’t imagine anything better. ArduBlocks would be great for children, and we can’t wait to see a proper implementation of ArduBlocks with a touch screen.

Funtendo Connects All Your Nintendo Controllers To A PC

For those of us who can’t be bothered to dig out or N64 whenever we want to play Ocarina of Time or our NES whenever we get the urge to play Battletoads, emulators are a godsend. There is a problem, though. A keyboard doesn’t provide the right experience as a the classic NES ‘brick’ or the N64 tritopus controllers. Enter the Funtendo, a breakout box that converts all your well-loved controllers to USB.

The Funtendo uses the Gadget Gangster Propeller Platform with a terminal block module. Putting together the electronics is fairly easy; just strip the ends of the controllers and screw them down to the terminal blocks. N64, NES and Wii Classic Controllers are supported by the Funtendo. Going for the Classic Controller over a Super Nintendo controller reduces the complexity of the build. The Classic Controller can play SNES games and uses an I2C bus, making it easier to wire.

For interfacing the controllers to the computer, the Parallax Propeller Tool, Parallax serial terminal, and PPJoy convert button mashing into readable buttons for the emulator. The build may take more time than pulling an NES out of the attic, but even with a large project box it takes up much less space.

Check out the demo of the Funtendo after the break.

Continue reading “Funtendo Connects All Your Nintendo Controllers To A PC”

Researchers Claim That HP Laser Printers Can Be Hijacked To Steal Data And Catch Fire

hp-laserprinter-security-holes

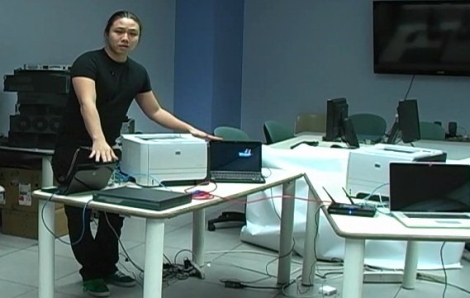
The news was abuzz yesterday with coverage of a study released by Columbia University researchers warning consumers that HP laser printers are wide open to remote tampering and hacking. The researchers claim that the vast majority of printers from HP’s LaserJet line accept firmware updates without checking for any sort of digital authentication, allowing malicious users to abuse the machines remotely. The researchers go so far as to claim that modified firmware can be used to overheat the printer’s fuser, causing fires, to send sensitive documents to criminals, and even force the printers to become part of a botnet.

Officials at HP were quick to counter the claims, stating that all models built in 2009 and beyond require firmware to be digitally signed. Additionally, they say that all of the brand’s laser printers are armed with a thermal cutoff switch which would mitigate the fuser attack vector before any real fire risk would present itself. Despite HP’s statements, the researchers stand by their claims, asserting that vulnerable printers are still available for purchase at major office supply stores.

While most external attacks can easily be prevented with the use of a firewall, the fact that these printers accept unsigned firmware is undoubtedly an interesting one. We are curious to see if these revelations inspire anyone to create their own homebrew LaserJet firmware with advanced capabilities (and low toner warning overrides), or if this all simply fizzles out after a few weeks.

OpenPnP Working To Create An Affordable And Completely Open Pick And Place Machine

open-pick-and-place

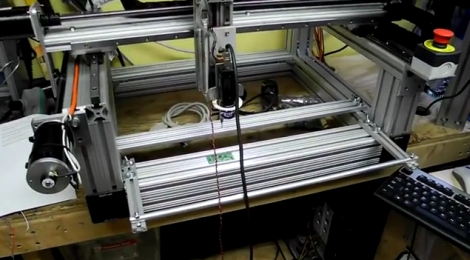
If you happen to do a lot of SMD work, a pick and place machine is an incredible time saver. The problem is that most automated pick and place solutions are well outside of the “small outfit” price range, let alone the budget of a hobbyist.

We have seen some great DIY pick and place implementations around here, though most are lacking professional features or the sort of documentation that would make it easy for others to replicate. The OpenPnP project is looking change things, with a completely open source hardware and software solution with a price target of under $1,000.

Things are already well under way, with plenty of details available in the project’s wiki. According to the development page, a prototype should go into construction in the near future, and development of the pick and place’s control software is coming along nicely.

While things are looking great for the OpenPnP project, they can always use some help to keep things moving. Be sure to check out the project page if you are interested in lending a hand.

To see some of the progress being made, stick around to see a short demo video of the control software and camera in action.

[via Make]

Continue reading “OpenPnP Working To Create An Affordable And Completely Open Pick And Place Machine”

Network Monitoring Panel Built From The IT Department Junk Heap

network-monitoring-panel

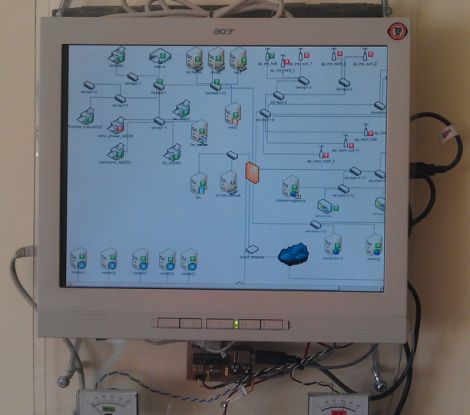
One of the benefits of working in IT is that there is typically a healthy supply of miscellaneous, half-functioning equipment to mess around with. [Vittore] had an old laptop with a busted LCD sitting around (Google Translation), so he figured he might as well get it to do something useful. With a spare desktop LCD panel and some software tweaking, he built himself a slick network monitoring panel that hangs in his office.

He stripped the laptop down to the bare essentials, and mounted it along with an LCD screen in a plexiglass enclosure. He has Nagios running a server in his office, and with the help of a few plugins, he created a simple web interface that show him the topology of his entire network. The panel itself runs a live version of Debian, which he configured to load up his Nagios web page each time it is started.

While having the ability to view the status of every network-connected device in an instant is great, he didn’t stop there. While browsing around online, he found diagram for a simple USB-based performance monitor that uses a PIC to drive a pair of VU meters. He hooked the meters up to a router monitored by Nagios, so he can watch office’s bandwidth usage in real time.

If you’re interested in seeing how it was built, be sure to check out the Flickr photo set put together by [Vittore’s] co-worker [Matthew].

Pros And Cons Of Replacing Tool Batteries With Lithium Polymer

[HammyDude] was tired of buying replacement batteries for his power tools. He had some Lithium Polymer batteries on hand and decided to take one of his dead drills and swap out the dead power pack.

The orange battery pack you see above has a deans connector on it for use with RC vehicles. By opening up the drill housing, [HammyDude] was able to add the mating deans connector. Now the replacement easily plugs into the drill, and it even fits inside the handle body.

This battery is made up of several cells, and an inexpensive charger is capable of topping off each individually for a balanced charge. In the video after the break [HammyDude] points out that the Makita charger applies voltage to all of the cells in series. It’s incapable of balance charging so when one cell dies the battery is toast. We’ve encountered this problem with Makita tools before.

One drawback to take note of in the end of the video: this replacement doesn’t have any low voltage cut-off. Running this battery pack down too low will permanently damage it. There must be a simple circuit that could be added as a safety measure. If you know of one, drop us a tip.

Continue reading “Pros And Cons Of Replacing Tool Batteries With Lithium Polymer”