Wireless Solar Water Heater Controller Ensures Hot Water Every Time

water-heater-controller

[Peter Sobey] had a solar hot water heater installed in his home, which worked great until he relocated his kitchen to a neighboring room. Now a good bit further from the tank, the hot water reaching his sink was tepid at best due to the increased distance and temperature limiting mixer valve in the new heater.

He installed a salvaged solar panel and water tank solely for use in his kitchen, but as the panel was located above the tank, he had to find a way to actively monitor and control the water temperature. His pump and valve system was originally driven with an off the shelf PICAXE-based controller, but he eventually got the urge to add a wireless display and control panel to the mix.

A pair of Arduino Nanos run the show now, one of which resides in the pump controller box, while the other is used in the temperature display box in his kitchen. He uses a set of Bluetooth modules to link the Arduinos together, relaying temperature data and allowing him to send the pump controller manual commands if needed.

He says the system works a treat, and he’s much happier with his homebrew controller than the one he used originally.

Installing Military Hardware In A Home Flight Simulator

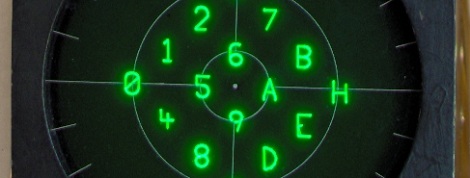
The cockpit of an F-16 Fighting Falcon features a small 3-inch display that monitors and tracks hostile aircraft and missiles, friendlies, and the current target. This Radar Warning Receiver is vitally important to pilots in combat, so [Mike] decided to add one to his homebuilt F-16 simulator that runs Falcon 4.0.

The RWR displays threats as symbols that are usually generated by tens of thousands of dollars worth of military hardware. [Mike] figured a $7 PIC microcontroller would work just as well and set about designing vector graphics that would fit on a single chip.

[Mike] had the graphics displaying correctly on an oscilloscope, but that’s a far cry from the from the surplus RWR display he picked up. Although the display is a simple CRT, the original designers of the radar warning receiver thought it necessary to put the deflection amplifiers in another part of the airplane. After building a pair of 30 Watt amplifiers, [Mike] could finally display more than a single dot on the display.

After all was said and done, [Mike] has a wonderful radar warning display that fits into his F-16 cockpit perfectly. While it’s not quite a 737 in a garage, we’ve got to respect someone who takes surplus avionics and makes them work. Check out [Mike]’s display in action after the break.

Continue reading “Installing Military Hardware In A Home Flight Simulator”

Going Old School With An 8051

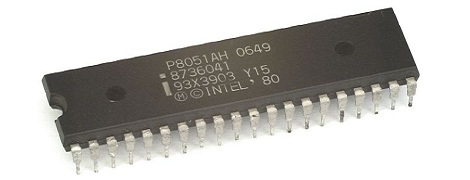
A while back, [Matt] bought a few 8051 MCUs and tucked them away for a future project. He just found these fabulous little chips in a component drawer and decided it was time to figure these guys out. Eventually, [Matt] stumbled across this awesome resource for 8051 programming.

The 8051 featured a still reasonably respectable 4k of ROM and 128 bytes of RAM – not too dissimilar from an ATtiny of today until you realize this 30-year-old chip has 32 IO pins. This microcontroller, along with its bigger brother the 8052, served as the de facto microcontroller standard for 20 years. You’ve no doubt taken a ride in a car that used one, and was even put to use doing low-level grunt work in early PCs.

[Matt] says he couldn’t find a Hackaday project featuring this 30-year-old microcontroller (not true, here’s one of those tilty mazes and an electronic toll booth), but even we have to admit we don’t feature much outside of the usual AVRs and PICs. Even though it’s 32 years old, the 8051 family still has some tricks up its sleeve like playing audio CDs. If you’ve got an 8051 project lying around, send it in on the tip line and we’ll probably throw it up.

PushingBox Alerts You Of Your Cat’s Roaming Habits

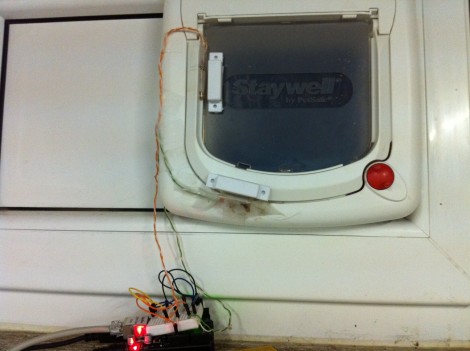
Dogs may be man’s best friend, but cats are certainly a hacker’s best muse. They provide so many ‘reasons’ for projects, like this cat door which [Clement] augmented to monitor the comings and goings of his feline friend (translated). He’s using a web service we hadn’t heard of before called PushingBox to send notifications like Tweets and Emails from the Arduino monitoring that door.

The two white rectangles attached to the cat door in the image above are magnets commonly used for entry door monitoring. Using a pair of them along with reed switches lets the system differentiate between an incoming or outgoing cat. The Arduino is web-connected and running the PushingBox API to manage the notification messages. See a demo of the system in the clip after the break.

This would be a nice addition to the cat door we saw [Dino] build. Of course, if you really want to go all out with the cat hacks the next project should be a GPS tracking collar. Continue reading “PushingBox Alerts You Of Your Cat’s Roaming Habits”

Old Radio + Old Phone = Android Media Station

[Bjørn] combined some aging electronics he had around the house to create this Android media center. The enclosure is an FM-radio, but since he only listens to online media it wasn’t of much use to him. After sizing it up he realized it was a perfect candidate to receive his old HTC Hero Android phone.

The upper portion of the stock radio used to host controls for tuning the FM dial, adjusting volume, and switching the unit on and off. He cracked open the case, ditching the radio receiver and patching in to the amplifier. The volume knob was moved to the right side of the case, and a hole cut to receive the phone. Audio is pulled from the phone with the jack sticking out the left side. We’d love to see a future improvement using a right-angle jack (kind of like this charging hack) or patched directly into the phone’s circuit board. This way everything would fit inside the box.

Now he can listen to Internet radio, or stream some video like in the clip after the break.

Continue reading “Old Radio + Old Phone = Android Media Station”

Workout Timer Has Its Own Fight Bell

This workout timer turned out great. We think [Douglas] managed to end up with a professional look and a full range of features even though he was doing a lot of learning along the way.

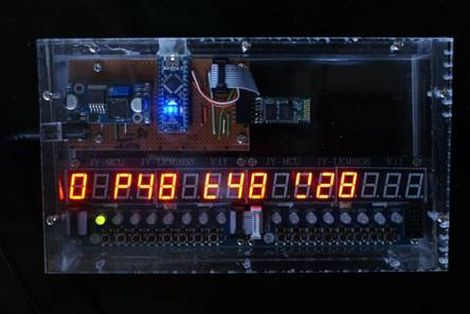
He wanted a clock that was capable of counting up or down to time different segments of his workout. In order to be really useful it needed to have a remote control and a way to signal when time had run out. He grabbed an Arduino and started prototyping with an LED marquee at first, but after adding a second Arduino to deal with the display scanning issues he finally switched over to these LED segment displays.

The timer includes an IR receiver so that it can be controlled with a handheld remote. The large red bell to the side has a heck of a ding and is used to signal the start and end of timing. Perhaps the driver for that bell could be incorporated into the home automation project from Wednesday. Once the hardware decisions were finalized [Douglas] set out to build an enclosure that he could be proud of (mission accomplished!). Don’t miss the video after the break where he walks through all various aspects of the user interface. Continue reading “Workout Timer Has Its Own Fight Bell”

LED Tutorial Demystifies Several Control Techniques

Controlling LEDs is really quite simple. As you know, they need to be current limited which is as easy as applying Ohm’s law to your given set of values. To make things even more even there’s a slew of constant current LED driver chips out there that can be had for a song. But do you have any idea how those constant current circuits work? If not, then [Giorgos Lazaridis’] guide on LED driving and controlling methods will bring you up to speed in no time.

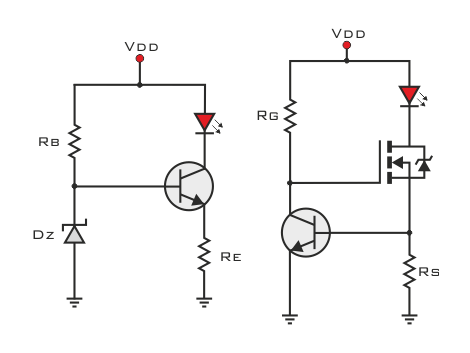
He starts out with the most basic concept, how to light an LED using proper current limiting resistors. But from there he moves on to the juicy bits. He builds a transistor-based constant current driver, then adds voltage regulation for the circuit as seen in the schematic on the left. He moves on to the more robust and efficient method on the right which pairs a MOSFET with that transistor circuit. This is the technique found on each pin of many of those constant current drivers and functions well regardless of the voltage input level.

He’s been producing videos to go along with these articles. After the break you can watch the episode that accompanies the schematic on the left. Continue reading “LED Tutorial Demystifies Several Control Techniques”