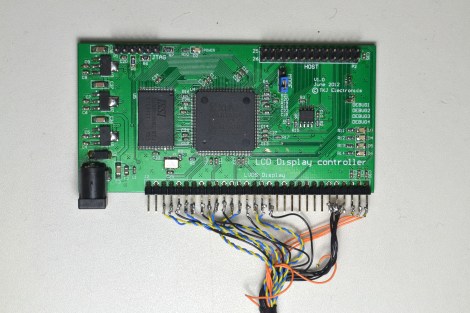
LVDS On An FPGA Could Make It Possible To Reuse Laptops LCDs And The Like

Search around the Internet and you’ll find a landfill of forum threads asking how to drive the LCD screen from a dead laptop. The answer is always that there is just no way to do it. That’s because most of them use a Low-Voltage Differential Signalling protocol that just isn’t available through the hardware used in hobby projects. But the appearance of this board could signal that things are about to change. We don’t want to get your hopes up too much. This isn’t an open source project, but it is a piece of hardware that can make LVDS available for the 8, 16, and 32-bit microcontrollers you’re used to working with.

It’s a derivative of a project [Thomas Jespersen] worked on for a customer. It uses an FPGA to implement the LVDS standard used by high-pixel-count LCD displays. It contains enough memory for a full frame-buffer, and includes a Motorola-8080 communication standard. [Thomas] gives a full description of how the setup works in the video after the break. Demonstrations start about 7:30 into the video with an STM32 F4 Discovery board driving the display.

Continue reading “LVDS On An FPGA Could Make It Possible To Reuse Laptops LCDs And The Like”

Breadboarding With A 144-core Processor

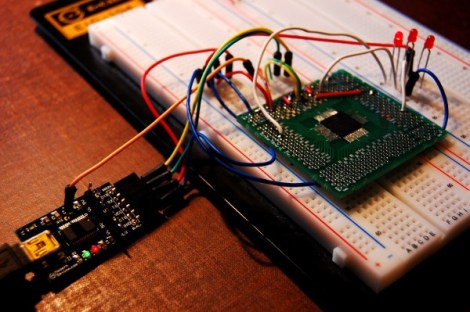
At the center of that green PCB is a tiny little processor with way too many cores. It’s the GA144 which was taken for a test-drive on a breadboard by [Andrew Back]. We saw a multi-core Kickstarter project last month. This will cost a lot less and get you more than twice the number of cores. But as was mentioned in the comments on that post, the drawback is the programming language. This chip’s IDE uses Forth.

There is a dev board available, but [Andrew] went instead with a QFN-to-Through-Hole adapter board which he hand soldered. Once he has access to the pins the chip can be programmed with an FTDI adapter which is compatible with the 1.8V logic levels. The provided Forth IDE (arrayForth) is a Windows only program but it does run under Wine. We followed the project through to see him twiddling I/O pins. But we still have trouble thinking of applications for it. In a world of complex and inexpensive FPGA chips, what would you use this type of processor for?

Hackaday Links: October 3, 2012

Cheap ergonomic mouse

If your had keeps cramping while using the computer mouse why not grab a hunk of wood and a couple of buttons to make your own ergonomic input device?

C# GUI for Arduino testing

Here’s a Windows GUI for controlling Arduino. [Rohit] put it together using C#. It should make development very simple as you have control of almost everything before you need to worry about writing your own server-side software.

Networked strip lighting replaces the office overheads

[Jeremy] got tired of replacing the halogen bulbs in his office. He upgraded to ten meters of RGB LED strips. We can’t think they do as well at lighting up the room. But he did add network control so they can flash or change colors depending on what type of alert they’re signalling.

Woven QR codes

Now that [Andrew Kieran] proved you can weave a working QR code into textiles do you think we’ll see garments that have a QR code leading to care instructions? We could never figure out what all those strange icons stood for.

World’s largest QR code in a corn maze

The world’s largest QR code was cut out of this field of corn. It’s at the Kraay Family Farm in Alberta, Canada. Gizomodo called it “Stupidly Pointless”. But we figure if it got them a world record and put their website on the front page of Giz and Hackaday they’re doing okay. Plus, we whipped out our Android and it read the QR code quite easily.

How TO Dim EL Wire: Current Limiting The Oscillator!

[Ch00f] finally made a breakthrough with his efforts dimming EL wire.  He’s been at it for months and the last we heard his TRIAC idea had sputtered out. Not to be discouraged and with an determination we have to admire he has been hard at work reverse engineering others’ and developing his own methods. He put all of this knowledge to task helping a friend of his with a sleeping disorder, and made a dream-catcher that pulses at the approximate rate of an average person’s breathing (as determined by Apple for their pulsing power button lights).

Essentially the whole thing boils down to simply using a transistor to limit the current to the oscillator. A 555 timer is used to pass a triangle wave to the current limiting transistor at approximately the same rate as the Apple button (1/5 Hz). [Ch00f] notes that this isn’t the sinusoidal wave that apple uses, but it’s good enough. Finally a timeout power off is built in to the night light using a decade counter to monitor the number of triangles from the 555. This should keep the EL wire from wearing down faster, though we are hard pressed to  think of a project we used EL on that has lasted anywhere near the 7 year service life of the wire.

Check out [Ch00f]’s page as he walks us through the process, or just watch his circuit in action after the jump!

Continue reading “How TO Dim EL Wire: Current Limiting The Oscillator!”

Finally, An ARM-powered Arduino

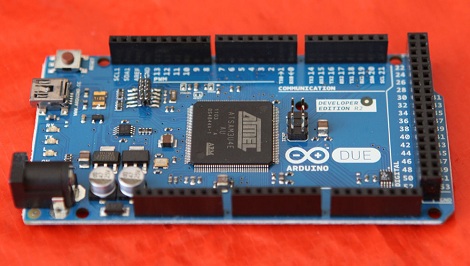
Far removed from the legions of 3D printers featured at this year’s Maker Faire in New York was a much smaller, but far more impressive announcement: The ARM-powered Arduino DUE is going to be released later this month.

Instead of the 8-bit AVR microcontrollers usually found in Arduinos, the DUE is powered by an ATSAM3X8E microcontroller, itself based on the ARM Cortex-M3 platform. There are a few very neat features in the DUE, namely a USB On The Go port to allow makers and tinkerers to connect keyboards, mice, smartphones (hey, someone should port IOIO firmware to this thing), and maybe even standard desktop inkjet or laser printers.

The board looks strikingly similar to the already common Arduino Mega. That’s no mistake; the DUE is compatible with existing shields, so connecting a RAMPS board for your 3D printer should be a snap.

Here’s a PDF the Arduino and Atmel guys were handing out at their booth. A few DUE boards have already made it into the hands of important people in the Arduino community, including 3D printer guru [Josef Prusa]. Sadly, the folks at Arduino didn’t think media personalities needed a DUE before its release, so you’ll have to wait until we get our hands on one later this month for a review.

Through-hole Electroplating In Your Home Lab

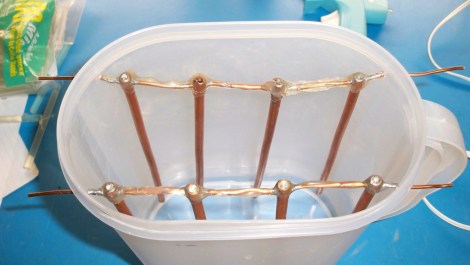
For the few double-sided PCBs we’ve actually etched at home we simply soldered a piece of wire to either side of a via and clipped off the excess. But if you want to go the extra mile you can’t beat electroplated through holes. The setup seen above is an electroplating tank build from simple materials which [Bearmos] has been working on.

The two sets of copper structures are both used as anodes. Some copper water pipe (like you’d use for a refrigerator ice maker) was cut into short rods and soldered onto pieces of bus wire. The portion of the metal which will stick above the chemical bath was coated with a generous layer of hot glue. This will protect it from corrosion cause by the off-gassing during the plating process. The traces of the etched PCB act as the anodes, but the holes themselves must be conductive in order for the plating process to work. A water proof glue with powdered graphite mixed in is applied to all of the holes in the substrate. This technique is based on the huge electroplating guide published by Think & Tinker.

Intelligent Autonomous Vehicle Makes It To Maker Faire

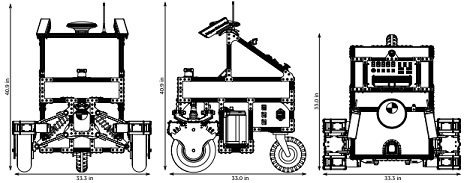
A few guys from Rutgers showed up at Maker Faire with Navi, their vehicle for the 2012 Intelligent Ground Vehicle Competition. Powered by two huge lead acid batteries, Navi features enough high-end hardware to hopefully make it through or around just about any terrain.

Loaded up with a laser range finder, a stereo camera setup, compass, GPS receiver, and a pair of motors capable of pulling 40A, Navi has the all the hardware sensors required to make it around a track with no human intervention. Everything is controlled by a small netbook underneath the control panel, itself loaded up with enough switches and an 8×32 LED matrix to be utterly incomprehensible.

In the videos after the break, the guys from Rutgers show off the systems that went into Navi. There’s also a video showing off Navi’s suspension, an impressive custom-built wishbone setup that will hopefully keep Navi on an even keel throughout the competition.

Also of note: A PDF design report for Navi and Navi’s own blog.

Continue reading “Intelligent Autonomous Vehicle Makes It To Maker Faire”