Extremely Detailed Light Painting Bar

[Matt Pandina] has been documenting his build of a very nice light painting bar on his G+ page. His light painting bar has 64 RGB LEDs being driven by an ATmega328P and four TLC5940 chips. He wrote his own libraries to talk to the TLC5940 as well as his own libraries to pull images off of a MicroSD card. He also wrote a cross-platform program that automatically converts a directory  of pngs to something the TLC5940s expect. He says the secret to getting his24-bit color correction looking right is gamma correction. It seems that when the LEDs were run too bright, he couldn’t get the colors quite right.  In case you’re curious, those images are 15 inches tall!

You can follow along through his posts as he starts with just a few LEDs and slowly updates and grows it to the impressive state it is at currently.

A Much Easier Take On An Android Garage Door Opener

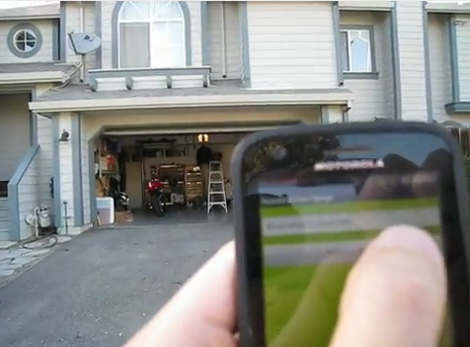
[Andy] is taking the complexity of a smartphone-controlled garage door down a notch with this project. He’s not interested in checking on the state of the door (open or closed) using a video feed, or in controlling the thing from anywhere in the world. He just wants to use his Android as the remote control and we say amen to that.

The circuitry in the garage is pretty simple. A relay is used to simulate a button press on the in-garage wired opener. This relay is driven by an Arduino which uses a Bluetooth shield for connectivity. Since his Android phone has a Bluetooth modem the rest of the project is just app development. As you can see in the video, the app automatically connects to the Arduino when it is launched, then waits for the button press to send the electronic equivalent of ‘Open Sesame”.

The project covers a series of posts so if you want to see how he got the app up and running make sure to browse through his archives. The next iteration for this app needs to be a background widget that enables Bluetooth, connects to the Arduino, and send s the open command all with one press.

Continue reading “A Much Easier Take On An Android Garage Door Opener”

Fuzzy Time Used To Keep The Kids In Bed

Like many parents, [Mike Tsao] is plagued by his kids’ urge to rise like the dead long before he’s ready to wake up. In an effort to preserve sanity, he built this clock to let the young ones know when it’s okay to get out of bed. Fittingly, he calls it the OK-Wake.

You may notice that the clock doesn’t have a display. That’s because his children are still too young to tell time (this is the foundation for needing a custom clock). Instead, that LED acts as the feedback. At night it will be off. Starting ninety minutes before it’s time to wake the LED will begin to pulse red, increasing in frequency as the target time approaches. When it’s okay to get out of bed the LED turns green and exhibits a pleasant “breathing” behaviour.

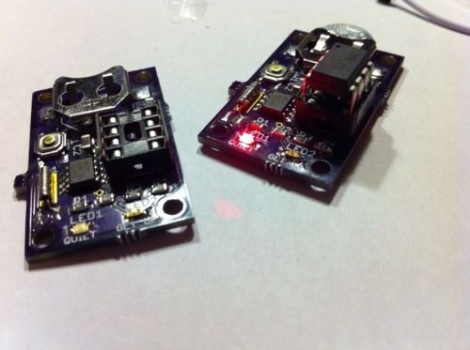
An ATtiny25 drives the device, along with an RTC chip. The single button is used to set the alarm. Actual time doesn’t really matter at all. Instead, the button just sets the alarm for twelve hours from when it’s pressed.

Building A Bigger Bar Graph

Take a gander at the Giant LED bar graph which [Chunky Hampton] recently completed (from this image we don’t think the nick name suits him). It’s simple both mechanically and electrically, but we love the look and think it would be a nice addition to your home, hackerspace, or as a children’s museum exhibit (we’re looking at you [Mr. Porter]).

The enclosure is a hunk of PVC electrical conduit. It’s got to be one of the largest sizes, but still should be found at most home stores. The base mounts easily and the cover snaps into place. [Chunky] used a hole saw to create the openings for the LED modules. They’re circular boards with multiple single-color LEDs on them. A common power bus feeds the high side of each bit, while a couple of transistor ICs controlled by 595 shift registers address them on the low side. From there just use any controller you wish, but in this case it’s an Arduino.

[Chunky] uses the meter to display power output from his stationary bicycle generator. But he also put together a little Larson Scanner demo which you can see after the break.

Continue reading “Building A Bigger Bar Graph”

What The Flux: Buy It Or Brew It Yourself

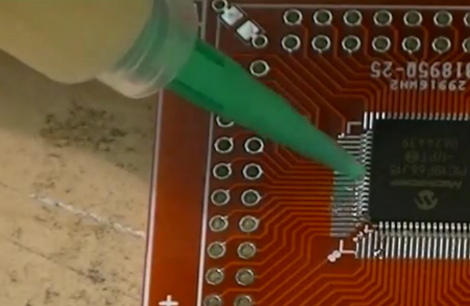
Flux generally makes our lives easier. It’s the best bet when trying to prevent solder bridges with fine-pitch components like you see here. But it is also indispensable when it comes to desoldering components from a board (we’re talking just one component without disturbing all of the others). But have you ever looked at what it costs to pick up a syringe of liquid flux from an online retailer? In addition to the cost of the product itself there’s usually a hazardous material handling fee that is rolled into the shipping cost. So we were happy that [Christopher] sent in a link to the DIY flux page over at Dangerous Prototypes.

The concept is simple enough. Mix some rosin with some solvent. Turns out these items are really easy to source. The solvent can be acetone (which you may have on hand for removing toner transfer from freshly etched PCBs) or plain old rubbing alcohol. And an easy source for rosin is your local music store. They sell it to use on bow hair for String players. Grind it up, throw it in a bottle and you’re good to go. Now does anyone know where we can source needle-tipped bottles locally?

For those that still just want to buy flux we highly recommend watching part one and part two of [Ian’s] flux review series.

Wireless IPod Charger Built From Scratch

Despite the obvious use of a lot of wire, this project is actually a wireless charging system. [Jared] built it as a way to explore the concepts behind transferring power inductively. Alternating current on one of the white coils induces current on the other. This is then rectified, and regulated for use as a 5V charger. In this case it powers his iPod, but any USB device should work with the setup.

The transmitter uses the power supply from an old laptop as a source. Some filtering and a couple of MOSFETS are responsible for generating the AC current on the transmitting coil. The receiving coil feeds the bridge rectifier. In the writeup that voltage is fed to a 7805 regulator to provide a stable 5V output. However, in the video demo after the break [Jared] shows off the boost converter that he uses on his improved circuit. This way if the voltage drops due to poor alignment of the coils it will still be able to provide a steady output.

We’ve seen the same coil concept used to add wireless charging to cellphones too.

Continue reading “Wireless IPod Charger Built From Scratch”

Reverse Engineering An RGB LED Remote

In the quest to add some mood lighting in his basement, [Mohonri] found an infrared wireless remote that is able to control several RGB LED strips. The only problem with this remote is the inability to control it via a wall-mount panel or even a computer. Obviously this would not stand for such a swank basement, so [Mohonri] did the reasonable thing and reverse engineered one of these remotes.

The build started with ripping the remote apart and figuring out how it ticks. [Mohonri] found the small IR LED transmitter and hooked up an oscilloscope to capture some data. After a bunch of trial and error and a big help from relevant documentation he had the entire button matrix – and thus the functions available to the LED strip – available to output via wall panel or computer.

[Mohonri] hasn’t completed his build yet; this was just the reverse engineering and documentation stage. Now, though, it shouldn’t be hard to control the RGB LED strips through an Arduino, a computer, or even an Android/iOS device with a small IR LED plugged into the headphone jack.