Atari 2600 Has A Raspberry Pi Hiding Under The Hood

raspberry-pi-2600

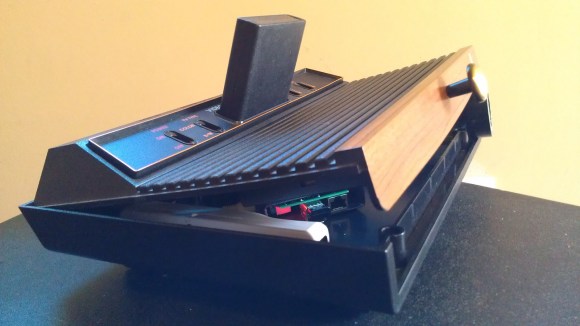
Seriously, the drawer pull on this Atari 2600 is not stock. Don’t they know this voids the warranty? The thing is, you won’t actually find any of the original internals anyway. When building this portable emulator housed in a 2600 case [Linear Nova] was careful to ensure that everything could be restored to its original condition (except for two hinges mounted on the back) sometime down the road. That’s a good goal to set for yourself. We think the build is the fun part of most projects and often wonder what to do with them when they’re done and our interest has waned.

A seven-inch LCD screen was attached to the underside of the lid using Velcro. When tilted up it’s at a nice viewing angle for the player. [Linear] prefers to use a Wii remote as the control this portable video game emulator. It connects to the Raspberry Pi over Bluetooth using a USB dongle. The advantage of this is that you just throw the remote inside the case too. For now there are two power cords, one for the RPi and the other for the LCD screen but he plans to add a power hub in the future to narrow this down to one. We wonder it that would also be a good time to add his own rechargeable battery pack option? There should be enough room for an RC style pack.



Building An IR Mouse Interface For The Disabled

[Chris Young] has a physical disability that means he can’t use a mouse very well. He typically uses Dragon Naturally Speaking for moving his mouse using voice commands but has found that it lacks some features he needs and can crash at times.

His solution to this problem was to create a device that will translate IR signals from a simple remote into mouse actions and movements. He is using an Arduino micro for this task, and as you can see in the video it seems to have worked out well for him. He has code and schematics available on his site if you would like to recreate this yourself.

[Chris] has actually built several accessibility devices for himself and others. You should check out his blog for more, including his thoughts on the cost of commercial accessibility equipment vs DIY. If you think you would like to try making a device to help someone with a physical disability access a computer, hop on over to thecontrollerproject.com and join up on the forums.


via thecontrollerproject.com

ShapeOko Build Log — It’s A CNC Mill In A Box

shapeoko-build-log

We’re not blatantly trying to promo this product. It’s just that the build log covering a ShapeOko assembly process taken on by [Anool] is like crack for those of us who have yet to acquire our own desktop CNC mills.

Like the title says, this thing is basically a mill in a box. But [Anool] decided to order the version of the kit that doesn’t come with any motors or control electronics. He also planned for future upgrades by ordering additional extruded rail to increase the size of the ShapeOko. After assembling the frame his decision to source stepper motors locally bit him as they were out of stock. But there was still plenty to do preparing control electronics during the wait. He based his system on a Raspberry Pi which talks to an Arduino to address the motors and monitor the sensors.

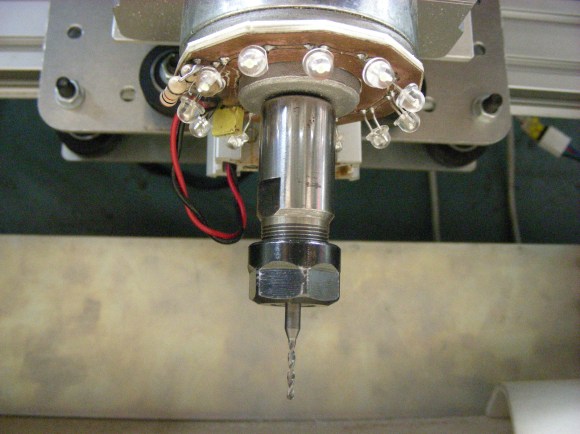
Once all the parts were finally accounted for he tested the rig as a pen plotter. The pen was eventually replaced with the router motor and that ring light PCB seen above was the first thing he milled with it.

[Thanks Justin]

WALL-O-TRON, The Interactive Rock Climbing Wall

Last April, hackerspaces around the country received a gift from RedBull for their creation challenge. The hackerspace teams were charged with creating, ‘something with LEDs’ and let loose in their workshop for a chance to win a trip to NYC and build some cool stuff. Of course, RedBull couldn’t bring all the teams to the big apple and a few incredible projects were left by the wayside in their home hackerspace.

One such project was the WALL-O-TRON from Team Rabbit-Hole and home base for the Tymkrs. It’s a huge wall embedded with LEDs that turn an ordinary rock climbing wall into a game called WallSweeper – climb a path to the illuminated hold, but don’t touch the ‘hot rock’ or your game is over.

The hand holds are illuminated by over 300 of LEDs connected to a Linux PC. The sign above the wall is controlled by RedBull’s TurBULL Encabulator, and the giant ‘WALL-O-TRON’ letters are huge pieces of foam with five meters of RGB LEDs embedded inside.

A great project with the possibility of being upgraded in the future with more games. Perfect for the rock climbing playground it’s situated in.

Continue reading “WALL-O-TRON, The Interactive Rock Climbing Wall”

Thundercats, HO!

sword

[Tony Swatton], blacksmith, armorer, and prop maker, has built hundreds of custom swords for hundreds of movies and TV shows. He’s also the maker behind Man at Arms, the YouTube series where weapons from your favorite shows and movies are recreated, be they improbable weapons from a James Bond movie or a sword from a cartoon. This time, he recreated the Sword of Omens from Thundercats. It’s a work of art in its own right, and amazingly practical for a cartoon sword.

The Sword of Omens is one of [Tony]’s more complex sword making endeavors he’s done. The grip is made of seven different pieces cast in bronze, while the hilt of the sword is over a dozen of different pieces of steel welded together. The jewel in the sword was cut from a piece of glass, carefully ground on a lapidary wheel to a perfect dome.

Of course, this isn’t the only weapon from popular media that [Tony] has crafted. He’s also done Oddjob’s hat from James Bond and Finn’s golden sword of battle from Adventure Time.


Prototyping A Maglev Train Using LEGO

lego-maglev

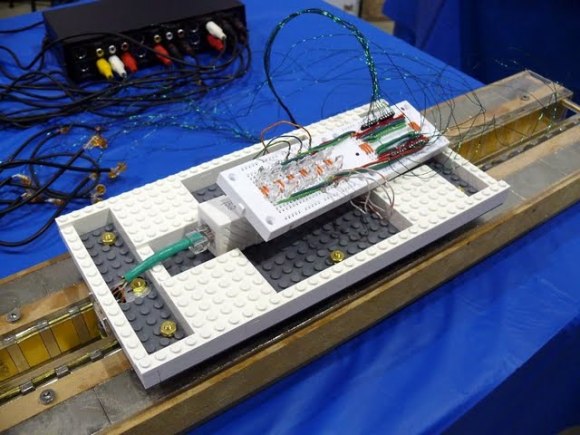
Serious research using not-so-serious equipment? We don’t know about that. What’s wrong with using LEGO as a research platform for a Maglev? This team has been doing so for quite some time and with great results.

A Maglev is a vehicle based on the principles of magnetic levitation. Similar poles of magnets repel each other and this concept can be used to create a friction-less track system. But this raises the problems of braking and locomotion. The build log linked above covers the conception in what is the eighth iteration of the research project. But the video below offers the most concise explanation of their approach to these issues.

The researchers are using magnets positioned in trench of the track as a kind of magnetic gear to push against. A series of electromagnets on the Lego vehicle ride in that track. The can be energized, working as a linear motor to push against those permanent magnets. But how do you know which direction of travel this will cause? That problem was solved by adding a hall effect sensor between each electromagnet. Before switching on the coil the hall effect sensors are polled and a timing scheme is selected based on their value. This is used to push the train up to speed, as well as slow it down for braking.

Continue reading “Prototyping A Maglev Train Using LEGO”