Embedded DMX Controller For Burning Man

embedded-dmx-controller

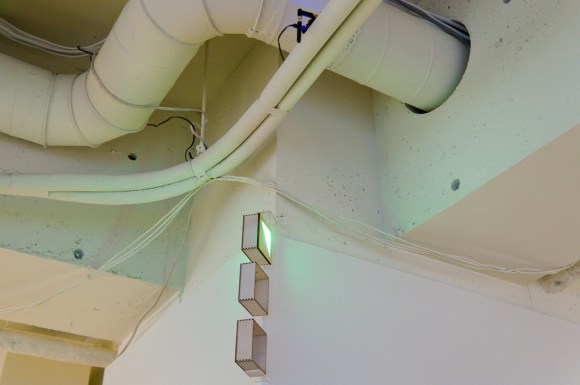
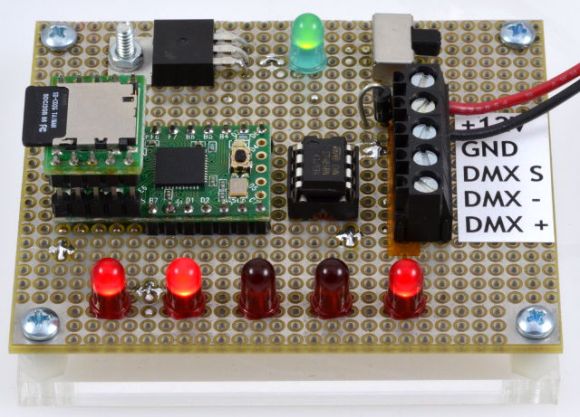
This is the lighting controller [Paul Stoffregen] built for Burning Man. They wanted to go with DMX controlled lighting this year but that most often includes a computer to run the lighting sequences. This board runs the preprogrammed DMX sequence using a hacked lighting design file.

The choreography for the lighting was planned out using a program called Vixen 2. There is one newer version of the software, but [Paul] needed to translate the output file for use with a microcontroller and version 2 makes this a bit easier than version 3. Speaking of conversion, he didn’t want to start from square one and a bit of searching led to a tutorial which [Bill Porter] posted last year on converting Vixen files for use with Arduino. It wasn’t exactly what he had in mind, but most of the ground work was there.

A few code tweaks bent the script to [Paul’s] will. He changed the XML parsing function to ignore all but the main channels in the file. He also had it output a text file which can be stored on the SD card. Because the output is not being flashed to a chip this greatly increases the storage available paving the way for much longer and more complex shows.

Want to learn more about the protocol used by DMX equipment? Check out this primer.

PixelBrite Is An LED Wall/coffee Table Done Right

pixelbrite

The scope of this project is almost as jaw-dropping as the cost of the parts. [LeoneLabs] calls the project PixelBrite. It’s a highly-polished modular RGB LED panel system, and he’s not keeping it a secret. We think it’s reasonable to call the build documentation mammoth. If you’re a fan of fast-motion assembly videos he’s got you covered there as well.

It’s interesting to compare this build to some of the Daft Punk tables from years back. It shows how economies of scale in the hobby electronics industry have helped new and affordable products to emerge. For instance, this offering is a 10×10 grid which is outside of the normal 8 pixel wide orientation dictated by 8-bit microcontrollers. The reason for the change is that this doesn’t use a matrix built with point-to-point soldering. It uses a string of RGB pixels (WS2801).

The enclosure is also a thing of beauty. The dividers that make up each cell are laser cut foam board. This makes the joints very tight to prevent light from leaking into the next cell. The housing is acrylic held in place by an aluminum rail system. Need more than one panel? No problem, a single connector chains one panel to the next. But we did mentioned the cost of materials. Unassembled you can expect to drop over five hundred bones for the pleasure of seeing this thing blink.

Continue reading “PixelBrite Is An LED Wall/coffee Table Done Right”

NPR Science Friday Roundup

npr-science-friday-roundup

UPDATE: Listen to the segment here.

Did you know I’m going to be a guest on NPR Science Friday today? If this is the first you’re hearing about it you need to sign up for the mailing list (there’s a sign-up form in the right hand column of this page).

If you’ve already listened to the show and found your way here for the goods on the projects, don’t worry. We’ve got you covered. Join us after the break for project links and details.

Continue reading “NPR Science Friday Roundup”

Goal Zero Bolt Hack Lets Your Flashlight Use Non-proprietary Batteries

goal-zero-bolt-modification

[Harrson] was really excited to get a deal on this Goal Zero Bolt flashlight. It’s and LED flashlight that uses Lithium batteries that are recharged via USB. That’s really handy. But when he cracked it open, like any good hacker does with new toys, he found that it won’t charge standard 18650 Lithium cells. That’s the form factor it’s using, but the proprietary cell that comes with it has both conductors at the top.

So where did [Harrson] start with the project? He called the company to ask about the setup. They were able to confirm that the proprietary cells just have a conductor which brings the bottom contact of the cell up to the top. We’d bet this is to make the flashlight itself easier to manufacture.

He got to work by scavenging a flat Kapton covered conductor from an old laptop battery. This thin strip is manufactured for connecting the cells of a battery, and it’s quite flat so it will be able to bypass the 18650 cell housing inside of the battery compartment. He made a solder connection for the strip inside the recharging compartment, leaving a tail which makes contact with the base of a standard cell.

If you’ve ever cracked open a dead laptop battery you probably found round Lithium cells. These are most commonly the 18650 variant we’ve been talking about. The battery dies when just one cell goes bad, so [Harrson] has a supplies of the good cells which he’ll be able to substitute into his flashlight as needed.

Magnetic Panning Time-lapse Camera Mount Couldn’t Be Easier

magnetic-gopro-egg-timer

[Jeremy Cook] is getting in on the panning time-lapse craze with his offering for a camera mount that pans automatically. In this case he’s using a GoPro camera, but since the camera connects using a 1/2 1/4 – 20 bolt it will work with any camera that has a standard threaded tripod mounting bracket.

The base of the rig is an egg timer he picked up for about eight dollars. It’s magnetic so that you can stick it to your refrigerator, but has enough gripping power to hold the camera upside down. The image above shows it stuck to his garage door opener housing. A PVC cap makes up the black part. Before painting it (with truck bed liner so that it’s a bit grippy) he used his lathe to remove the flat areas from the sides, and to cut it in half. He then drilled and threaded a hole in the center to accept the bold for the camera. The cap was super glued to the egg timer, which happens to have a window on the side so that you know how long you’re setting it for.

This is an easy alternative for those that don’t have the resources to make a 3D printed egg timer mount. The lathe step is not necessary, but since [Jeremy] had one he used it. It does make the final product look quite a bit nicer.

Continue reading “Magnetic Panning Time-lapse Camera Mount Couldn’t Be Easier”

Is A LEGO 3D Printer By Definition Self-replicating?

lego-3d-printer

LEGO parts are plastic. 3D printers make parts out of plastic. So the transitive property tells us that a LEGO 3D printer should be able to recreate itself. This one’s not quite there yet, mostly because it doesn’t use plastic filament as a printing medium. Look close and you’ll probably recognize that extruder as the tip of a hot glue gun. If all else fails you can use the machine as a precision hot glue applicator.

The instructions to make your own version include the design reference and a few ideas for getting the most out of the glue dispenser. For the design phase [Matstermind] used LEGO Digital Designer. It’s basically CAD with the entire library of LEGO parts available as building blocks. from there he assembled the machine which is controlled by an NXT brick. He goes on to link to a few different printing mediums. There’s instructions for using crayons to make colored glue sticks, as well as a method of printing in sugar using the hot glue extruder.

We remember seeing one other LEGO 3D printer. That one didn’t use an extruder either. It placed blocks based on the design to be printed.

Continue reading “Is A LEGO 3D Printer By Definition Self-replicating?”

Wireless Toilet Occupancy Sensor

toilet-occupancy-sensor

It’s a bit awkward for all parties involved if someone is waiting right outside the bathroom door. This system helps to alleviate that issue by letting the next user know when the loo is available. [Akiba] has been working with the folks at Loftworks, a design company in Tokyo, to get the status beacons seen above up and running.

The staff is mostly women and there is just one single stall women’s toilet on each of the three floors. The boxes above represent the three stalls, using colored light to indicate if a bathroom is available or in use. Detection is based on a PIR motion sensor in each stall. They communicate back with the display units wirelessly, which initially presented quite a problem. The doors on the bathroom are steel, and when closed they effectively block communications. The 900 MHz radios used in the system are on the 802.15.4 protocol. But they can be set a couple of different ways by moving resistors. Each came configured for the fasted data throughput, but that’s not really necessary. By changing to a slower configuration [Akiba] was able to fix the communications problems.

We remember seeing a similar bathroom indicator in a links post some time ago.