A DiskVaccuum For Obsolete Disk Formats

drive

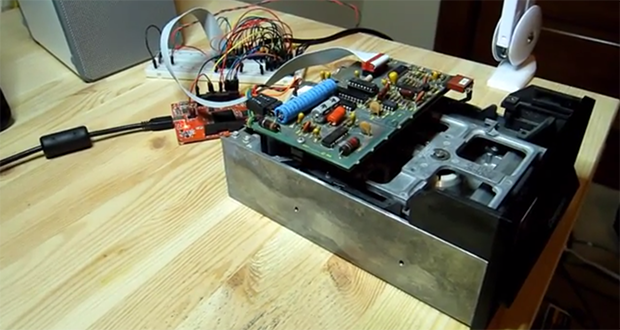
[Jim] has a box of disks for a very old Compucolor II computer, and with bit rot slowly setting in he figured it might be time to dump all those disks to a more permanent format. After reviewing the existing tools to read these disks, he decided to build his own floppy disk interface that he calls the DiskVaccuum.

The DiskVaccuum is based on a Papilio Pro FPGA board and a few chips worth of level conversion. The FPGA is able to read bits and move the head of the disk with ease, saving everything to the drive of a much more modern computer.

On the USB side of the Papilio board, [Jim] wrote a shell of sorts in Python to capture tracks on the disk, read out the track listing, save an image file, and do all the things a proper DOS should. Right now the project is only for the Compucolor II disk drive, but [Jim] played around with KiCAD enough to create a Papilio-to-disk-drive interface board with connectors for most of the disk drives of this particular vintage. The hope is to generalize the hardware and software to read disks for other systems, including those with 8-inch drives.

[Jim] put up a video describing the hardware and demoing his Python capture utility. You can check that out below.

Continue reading “A DiskVaccuum For Obsolete Disk Formats”

Teaching Mario To Play Pong And Snake Through Innumerable Exploits

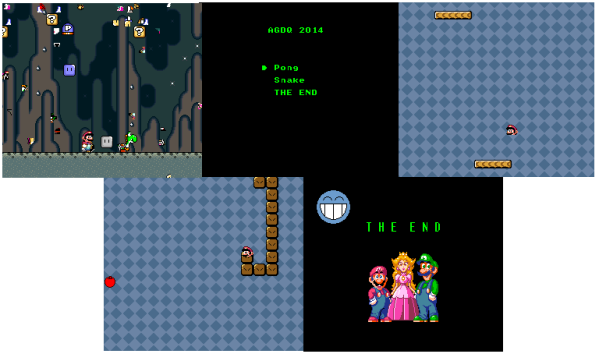
This is the coolest classic Super Nintendo Entertainment System (SNES) hack we’ve seen in quite a while. What you’re seeing is called “Super Mario World (Total Control)” by [Masterjun]. Our first recommendation is that you watch the video, then come back here for an explanation. Similar to what we saw for Pokemon Yellow on Gameboy, [Masterjun] created entire Pong and Snake clones within Super Mario World. He also created a menu and ending screen, along with his trademark smiley face graphic. Even more amazing is that this was unveiled live on a real SNES running an unmodified game cartridge. [Masterjun] actually used dual multitap cables, effectively connecting 8 controllers to a SNES. This gave him enough bandwidth to quickly download his new binary through the controller ports alone.

Welcome to the world of Tool Assisted Speedruns (TAS), where emulators and scripts are used to create high-speed runs through video games. The runners often work frame by frame, painstakingly inputting commands to create the perfect run. Game bugs and glitches are often exploited in these speed runs. In fact, in runs such as this one, the speed run takes second place to showing off the exploit. The output of speed run creation is a script file of control inputs which can be executed on an emulator to “re-run” the TAS at any time. This script can also be saved to a PC or Raspberry Pi and played back into the controller port of a real game system. A PIC based hardware translator is used to convert the data to NES or SNES controller format. As one might expect, these scripts run open loop. With no feedback from the running game, they can and do become desynchronized due to differences in console hardware, such as the tolerance of the oscillator crystal. When everything is in sync and does work , the results are awesome.

Continue reading “Teaching Mario To Play Pong And Snake Through Innumerable Exploits”

A Business Card That Plays Simon Says

BusinessCard_01_08

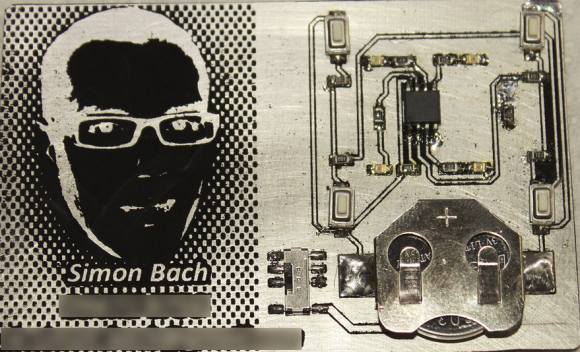
When your name is Simon and you want to build your own circuit board business card, it makes perfect sense to incorporate a game of Simon Says, and that’s exactly what [Simon] did with his Business Card.

You may see a resemblance to the Engineer’s Emergency Business Card; that’s because [Simon] took inspiration from that card to build his own.  The game of Simon Says is played via 4 low-profile pushbuttons and 4 0805 LEDs.  The microcontroller of choice to run the game is an ATtiny45 set up to work with the Arduino IDE.  But with only 5 pins available for I/O, [Simon] had to give up 4 pins to the LEDs and configure the remaining pin as an analog input.  The buttons are tied into a voltage divider that feeds the analog input, so depending which button is pressed, a different voltage is read in, thus a value from 0 to 1023 determines which button was pressed.

One of the great things about this write-up is that it goes through the process of etching PCBs at home using the toner-transfer method.  We’re not sure how many home-etched business cards he’s willing to pass out, but surely whoever does get the card, will never forget his name.

Continue reading “A Business Card That Plays Simon Says”

A Vibrating Timepiece

vibratingWatch

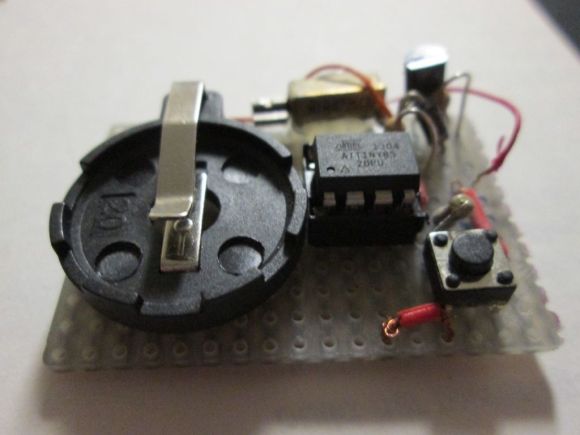
It may not look like much, but the above pictured device is [qquuiinn’s] handy little watch that indicates time through pulsed vibrations. Perhaps we should refrain from labeling it as a “watch,” however, considering it’s [qquuiinn’s] intention to remove the need to actually look at the thing. Vibrations occur in grandfather clock format, with one long vibration for each hour, accompanied by one, two, or three short pulses for the quarter-hour increments.

The design is straightforward, using an ATTiny85 for the brains along with a few analog components. The vibration motor sticks to the protoboard with some glue, joining the microcontroller, a coin cell battery, and a pushbutton on a small protoboard. The button allows for manual time requests; one press responds with the current time (approximated, probably) in vibrations. The build is a work in progress, and [qquuiinn] acknowledges the lack of an RTC (real-time clock) causes some drift in the timepiece’s accuracy. We suspect, however, that you’d address that problem—twice daily—when you replace the battery: it only lasts ten hours.

Drawing With Legos

WritingMachineFrontLarge

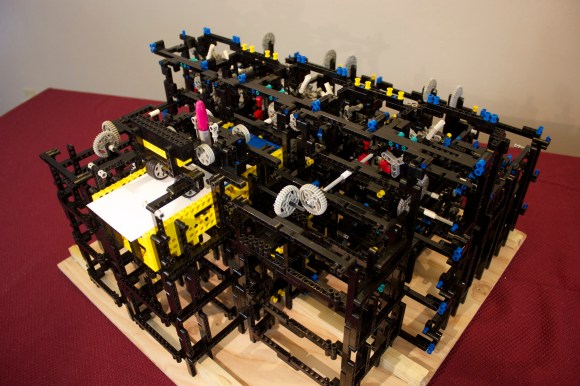
There are a number of elaborate Lego creations out there, but you probably haven’t seen something quite like [Andrew Carol’s] Lego drawing machine. He drew inspiration from the film Hugo and from automata of the 1800’s, specifically [Jaquet-Droz]’s Draughtsman, which we featured in a Retrotechtacular article not too long ago.

[Andrew’s] hand-cranked creation is divided into three components: a plotter, an “encoded pen stroke program”—which stores messages in links of pieces—and a reader that translates the links into pen strokes. The plotter moves the pen in the Y axis and moves the paper in the X to mark on the page, and also has a simple lift mechanism that temporarily raises the pen on the Z axis to interrupt pen strokes between letters (or drawings).

[Andrew] describes the chain reader by comparing it to a film projector, feeding the message through the mechanism. Although you won’t find a detailed how-to guide explaining the devices’ inner-workings on his site, there are some clues describing basic components and a couple of videos, both of which are embedded below.

Continue reading “Drawing With Legos”

Christmas Tweetball

photo

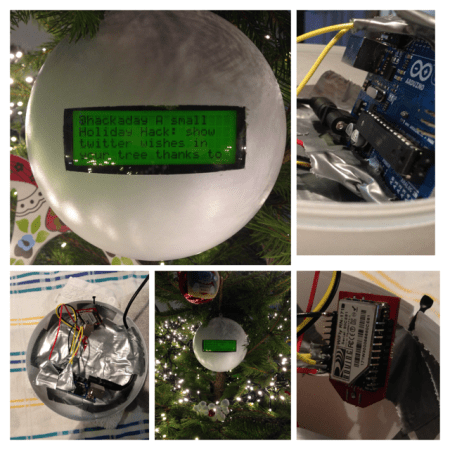
The holidays are long over, but we’re still getting a smattering of holiday themed hacks. For this one, the [Han’s] family decided to make a Christmas bauble that relays their tweets to them!

They call it the Tweetbal which is Dutch for — well — Tweetball! Whenever someone tweets with the hashtag #tweetbal it gets displayed on the 20×4 serial LCD display. They’re using an Arduino Uno with an RN-XV WiFly module to receive and send the tweets to the display. A large white plastic ornament ball houses it all secured very firmly with our favorite adhesion method — duct tape. It’s a pretty simple project, but a great holiday hack if we do say so ourselves — plus it could be easily used for non-holiday purposes — like a desktop trinket twitter feed!

Stick around after the break to see its tweeting capabilities in action.

Continue reading “Christmas Tweetball”

Arduino Ball Throwing Game

arduinogame01_07

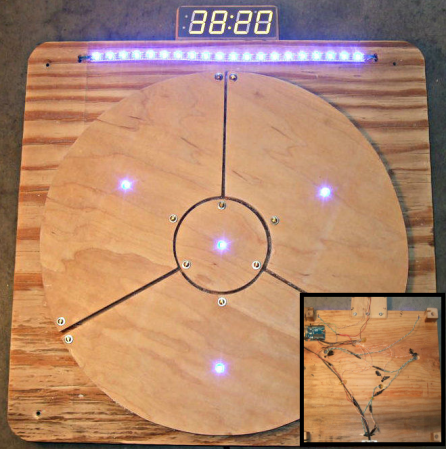
Building your own gaming platform is pretty cool on its own, but when the game actually looks like fun to play, well that’s on a different level of cool. [Zippy314] designed an Arduino based game platform as a Christmas present to his son called the Das Blinken Bonken!

Like all highly addicting games, the gameplay is simple; the player throws a ball at the target board while aiming to hit a specific ‘pad’. As shown in the video after the break, there are many game possibilities with this platform, like trying to hit the illuminated target each time, or just trying to hit all of the pads on the board as fast as possible.

A pad is registered as a ‘hit’ with the help of home-made pressure sensors, which are each constructed in a ‘sandwich’ of pressure-sensitive conductive sheets. This is the same material used in these LED Sneakers. Since the resistance through the sheet lowers as pressure is applied, a simple voltage divider circuit is used to feed the analog inputs on the Arduino, thus making it very easy to detect a ‘hit’. An I2C 4-Digit 7 Segment display keeps score and displays the game title, while a strip of addressable RGB LEDs give player feedback and other vital gameplay information.

Continue reading “Arduino Ball Throwing Game”