Hackaday Prize Entry: An Urban Kitchen Garden

[Eric] is used to growing his own food, and looked at the commercial options for growing veggies and herbs year round. It turns out the commercial options are terrible, with proprietary lighting, proprietary ‘seed pods,’ and no climate control.

Unsatisfied with the commercial options, [Eric] looked for a DIY solution. His entry for The Hackaday Prize is just that: an Urban Kitchen Garden.

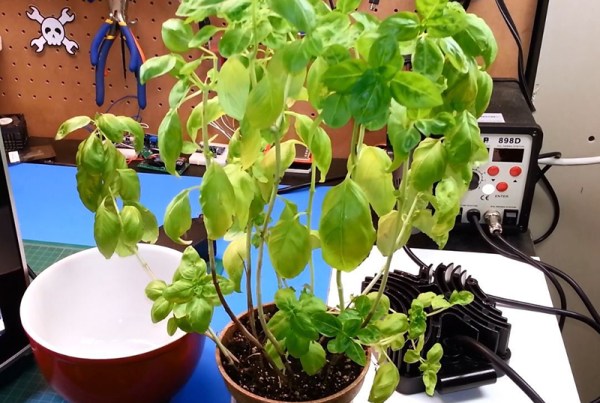
The Urban Kitchen Garden was a peltier wide cooler in its former life, turned into a grow chamber with LED grow lights, an Arduino, a DHT11 temperature and humidity sensor, a soil moisture sensor, and an old Nokia LCD to keep track of everything. He’s been growing basil in it over the winter, and it just won’t die.

[Eric] won’t be growing tomatoes or beans in his tiny, desktop-sized garden, but it’s not really designed for that. It’s meant for herbs and seedlings, mostly, with larger plants moved outside when [Eric]’s Canadian winters finally subside.

There’s a video of the build, you can check that out below.


The 2015 Hackaday Prize is sponsored by:

Continue reading “Hackaday Prize Entry: An Urban Kitchen Garden”

DIY Rotary Tool

DIY Rotary Tool

[Shashank] has a modest tool collection but is missing a rotary tool. He needed one for a project he was working on but didn’t think that it would get much use after the current project was completed. So instead of buying a rotary tool, he decided to make one to get the job done.

The project started out with a 40mm PVC pipe that would serve a the main body of the tool. Two MDF disks were cut to fit inside the pipe. One was used for mounting an RC vehicle brushless motor and the other was bored out to accept a pair of bearings. The bearings supported a modified pin vise that acts as the chuck for securing rotary tool bits. A 20-amp ESC and a servo tester control the motor’s speed and can get the motor up to 18,000 rpm.

Although this worked for a while, [Shashank] admits it did fall apart after about 20 hours of use. The MDF bearing mounts crumbled, thought to be a result of vibration due to mis-assignment between the motor and pin vise. He suggests using aluminum for the bearing mounts and a flexible coupling to connect the motor to the pin vise. If you’re interested in making your own rotary tool but don’t have any spare motors kicking around,  this 3D printed vacuum-powered rotary tool may be for you.

Hackaday Links Column Banner

Hackaday Links: Summer, 2015

[Elia] was experimenting with LNAs and RTL-SDR dongles. If you’re receiving very weak signals with one of these software defined radio dongles, you generally need an LNA to boost the signal. You can power an LNA though one of these dongles. You’ll need to remove a few diodes, and that means no ESD protection, and you might push the current consumption above the 500mA a USB port provides. It does, however, work.

We’ve seen people open up ICs with nitric acid, and look inside them with x-rays. How about a simpler approach? [steelcityelectronics] opened up a big power transistor with nothing but a file. The die is actually very small – just 1.8×1.8mm, and the emitter bond wire doesn’t even look like it’ll handle 10A.

Gigantic Connect Four. That’s what the Lansing Makers Network built for a Ann Arbor Maker Faire this year. It’s your standard Connect Four game, scaled up to eight feet tall and eight feet wide. The disks are foam insulation with magnets; an extension rod (with a magnet at the end) allows anyone to push the disks down the slots.

[Richard Sloan] of esp8266.com fame has a buddy running a Kickstarter right now. It’s a lanyard with a phone charger cable inside.

Facebook is well-known for the scientific literacy of its members. Here’s a perpetual motion machine. Comment gold here, people.

Here’s some Hackaday Prize business: We’re giving away stuff to people who use Atmel, Freescale, Microchip, and TI parts in their projects. This means we need to know you’re using these parts in your projects. Here’s how you let us know. Also, participate in the community voting rounds. Here are the video instructions on how to do that.

USB2Serial Adapter As An I/O Device

There was a time when computers had parallel ports. For the hacker types, this meant an eight bit data port, and nine additional pins which could be interfaced with the real world via the 25 pin connector. This is no longer the case, although USB does help with suitable hardware. [Jabi] was working on a project that required controlling one relay to switch a strip of LED’s. His solution was to use a USB to Serial Adapter as an I/O device (Spanish, translated here).

He wrote a short C program, SioFus (Simple Input Output from USB2SERIAL), that converts a simple USB to Serial Port Adapter into an I/O device with 4 inputs and 2 outputs. It’s simple and gets the job done. The code uses ioctl and allows DCD, DSR, CTS and RI to act as inputs while DTR and RTS act as outputs. These pins then likely control transistors that switch the relays. The SioFus code is available on github and there are a couple of to-do’s on [Jabi]’s list if you would like to chip in.

The video after the break supposedly shows the hack in action. Seems like some kind of photo booth which then spits out a QR code, possibly a URL to the picture (post in the comments if you figure out what it does).

If you are looking for a more dedicated hardware, check out the Tiny Bit Dingus – a microcontroller stuffed into a USB plug with a few controllable pins.

Continue reading “USB2Serial Adapter As An I/O Device”

Visualizing Magnetic Fields In 3D Space

[John] is working on his PhD in experimental earthquake physics, and with that comes all the trials of becoming a PhD; tuning students into the cool stuff in the field, and demonstrating tech created after 1970 to his advisers. One of the biggest advancements in his line of work in the last 30 or 40 years is all those sensors you can find in your cell phone. The three-axis magnetometer in your phone is easily capable of measuring the Earth’s magnetic field, and this chip only costs a few dollars. To demonstrate this, [John] built a 3D compass to show off the capability of these sensors, and have a pretty light show for the undergrads.

The magnetometer [John] is using is just a simple I2C magnetometer that can be found on Adafruit or Sparkfun. It’s not really anything special, but with a little bit of code, [John] can read the magnetic field strength in the x, y, and z axes.

Having a microcontroller spit out a bunch of numbers related to the local magnetic field just doesn’t seem fun, so [John] picked up two neopixel rings – one inside the other, and set 90 degrees out of plane with each other. This turns his magnetometer and Arduino setup into a real 3D compass. With this device, the local magnetic field can be visualized in the x, y, and z axes. It looks cool, which is great for undergrads, and it’s a great demonstration of what you can do with small, cheap electronic sensors.

[John] put up a screencast of a talk he gave at the American Geophysical Union meeting last year. You can check that out below.

Continue reading “Visualizing Magnetic Fields In 3D Space”

Plywood Camera Dolly

DIY Plywood Camera Dolly Looks Professional

While [Ted] was poking around the ‘net, he came across a neat little product called a camera dolly. These are used to add an artistic flair to filming. They are similar to a camera slider but can roll around on the floor or a table and do not need to follow a track. [Ted] wanted a camera dolly but the cost of a professional product seemed too expensive for what he’d actually be getting, so he set off to make his own.

[Ted] first designed the dolly in a CAD software and printed out templates for the parts. Those templates were then transferred to plywood and cut out with a jig saw. Three inline skate wheels support the frame and allow the unit to roll around. Mounted in the center of the frame is a pan and tilt camera mount.

The extraordinary part of the build is that the angle of each wheel can be adjusted independently.  This allows the dolly to do anything from rolling in a straight line to gradually traveling around a curve or even just spinning the camera in place. Each wheel mount has degree indications so that they can be adjusted very precisely as well as be returned to a previously recorded position.

New Part Day: Nordic’s New Bluetooth SoC

You don’t need to look very hard to find Nordic’s nRF51 wireless module; it’s found in hundreds of products and dozens of projects over on hackaday.io. The nRF51 is a SoC that includes an ARM Cortex M0 processor and a variety of radios for Bluetooth and other protocols. Useful, if a bit limited in processing power.

Now, Nordic has a new SoC. It’s the nRF52, a Cortex M4F processor, a Bluetooth radio, NFC, and a bunch of Flash and RAM to make just about anything you can think of possible. Yes, it’s an upgrade to the nRF51 – a better processor and NFC, and all the possibilities that come with that. Currently there’s only one part and two package options: a 6x6mm QFN48, or a wafer chip that will be covered with impregnable goo.

Already there are SDKs for IAR Workbench, Keil4 and 5, and gcc. The SDKs won’t help you quite yet; it’s not available through the usual distributors yet, but the nRF52 Preview develoment kit is. That’s a single board development kit for the nRF52, with Arduino pinouts and Mbed support.

Thanks [Alvin] for sending this in from Trondheim.