Arduino Laser Pinball Is On Target

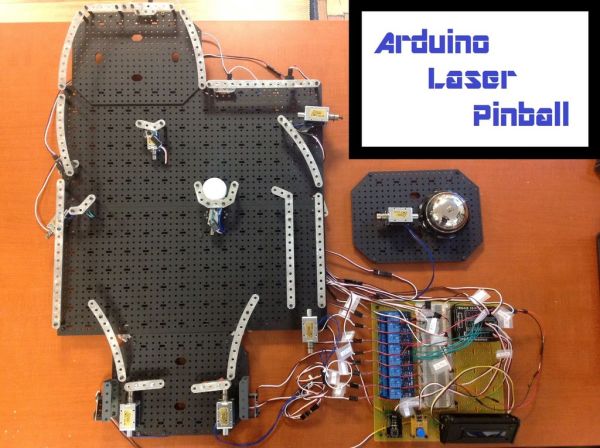
Have you ever wanted to roll your own pinball machine? It’s one of those kinds of builds where it’s easy to go off the deep end. But if you’re just getting your feet wet and want to mess around with different playfield configurations, start with something like [joesinstructables]’ Arduino Laser Pinball.

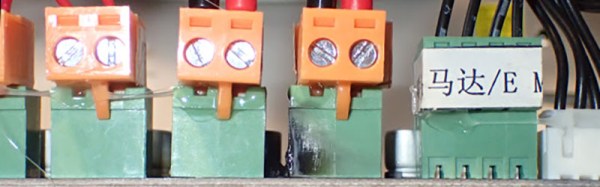
It’s made from meccano pieces attached with standoffs, so the targets are easy to rearrange on the playfield. [joesinstructables] wanted to use rollover switches in the targets, but found that ping pong balls are much too light to actuate them. Instead, each of the targets uses a tripwire made from a laser pointing at a photocell. When the ping pong ball enters the target, it breaks the beam. This triggers a solenoid to eject the ball and put it back into play. It also triggers an off-field solenoid to ring a standard front-desk-type bell one to three times depending on the target’s difficulty setting.

The flippers use solenoids to pull the outside ends of levers made from meccano, which causes the inside ends to push the ball up and away from the drain. Once in a while a flipper will get stuck, which you can see in the demo video after the break. An earlier version featured an LCD screen to show the score, but [joesinstructables] can’t get it to work for this version. Can you help? And do you think a bouncy ball would actuate a rollover switch?

This isn’t the first pinball machine we’ve covered. It’s not even the first one we’ve covered that’s made out of meccano. Here’s an entire Hacklet devoted to ’em. And remember when an Arduino made an old table great again?

Continue reading “Arduino Laser Pinball Is On Target”

You Can Have My LM386s When You Pry Them From My Cold Dead Hands

Everyone has a chip-of-shame: it’s the part that you know is suboptimal but you keep using it anyway because it just works well enough. Maybe it’s not what you would put into a design that you’re building more than a couple of, but for a quick and dirty lashup, it’s just the ticket. For Hackaday’s [Adam Fabio], that chip is the TIP120 transistor. Truth be told, we have more than one chip of shame, but for audio amplification purposes, it’s the LM386.

The LM386 is an old design, and requires a few supporting passive components to get its best performance, but it’s fundamentally solid. It’s not noise-free and doesn’t run on 3.3 V, but if you can fit a 9 V battery into your project and you need to push a moderate amount of sound out of a speaker, we’ll show you how to get the job done with an LM386.

Continue reading “You Can Have My LM386s When You Pry Them From My Cold Dead Hands”

Turn Cheap USB Soldering Irons In To Tweezers

This is 2016, and almost every hacker dabbles with SMD parts now, unlike back in the day. This means investing in at least some specialized tools and equipment to make the job easier. One handy tool is the SMD soldering tweezers – useful not only for manual soldering of parts, but also for de-soldering them quickly and without causing damage to the part or the board. Often, especially when repairing stuff, using a hot air gun can get tricky if you want to remove just one tiny part.

smd_tweezer_04
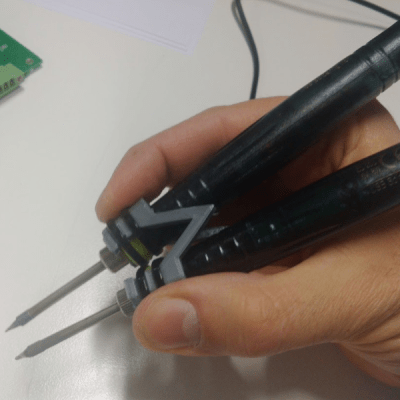
[adria.junyent-ferre] took a pair of cheap £5 USB soldering irons and turned them into a nifty pair of SMD soldering tweezers. The two irons are coupled together using a simple, 3D printed part. [adria]’s been through a couple of iterations, so the final version ought to work quite well. The video after the break shows him quickly de-soldering a bunch of 0805 SMD resistors in quick succession.

Earlier this year, we had posted [BigClive]’s tear down of these 8 watt USB soldering irons which turned out to be surprisingly capable and this spurred [adria] to order a couple to try them out.

The 3D printed part is modeled in SolveSpace – a parametric 2D and 3D CAD software that we blogged about a while ago. Continue reading “Turn Cheap USB Soldering Irons In To Tweezers”

Don’t Leave 3D Printers Unattended – They Can Catch Fire

The holidays are almost here, and with that comes the traditional Mass Consumption of Consumer Goods and Gift Exchange. 3D printers are getting really good and really cheap, and it’s inevitable that a lot of 3D printers will be given as gifts this year. Be careful if you’re giving or receiving one of these printers: they can cause fires as [Ben Hencke] found out when diagnosing a problem with a printer he bought this year.

The printer in question is the Monoprice Maker Select V2, a Prusa i3 clone with impressive specs for a $300 printer. This printer is a rebranded Wanhao Duplicator i3, and we’ve reviewed it favorably. It’s a capable printer that beats the pants off of any Kickstarter printer in quality (and for the fact that you can buy it right now). We’re pretty sure there are going to be more than a few of these printers under the Saturnalia tree this year.

After a few weeks, [Ben] noticed a bit of smoke coming from the printer while the bed was preheating. This wasn’t blue pixie smoke, like you’d find from an exploded capacitor. There was a lot of smoke.

After a closer inspection and help from [Elecia White] from embedded.fm, the problem was traced to the power connector for the heated bed. The green, bromine-infused plastic for this connector was charred and there’s little doubt this could have caused a fire.

3D printing is a fantastic tool, and has enabled more hacks and builds over the last few years than we could have ever imagined. 3D printers are getting very good, and very cheap, and of course this will eventually mean someone losing their workshop to a printer fire. Until someone figures out how to build a ‘thermal fuse’ or something of that nature, 3D printers — from the high-end ones to the still very good Monoprice and Wanhao units — have the potential to start a fire.

Continue reading “Don’t Leave 3D Printers Unattended – They Can Catch Fire”