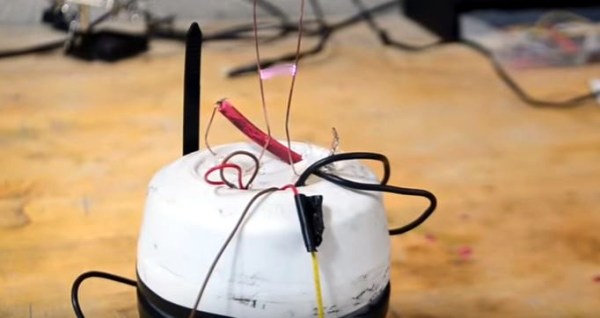
A Jacob´s ladder is a favorite project of high voltage enthusiasts. It makes a visually attractive and fun display of a high voltage electrical arc climbing a pair of electrodes. [Keystone Science] shows us how to make a Jacob´s ladder that runs on 9 V batteries.
The ladder itself is pretty easy to make. It is nothing more than a pair of stiff wires in a V shape, connected to a high voltage power supply. The more difficult part is the HV power supply. [Keystone Science] explains how to build one using a flyback transformer from an old CRT tv and a few other components. It is a pretty simple circuit and can be powered by a 9 V battery. The ladder works because, when HV is applied to the electrodes, an arc is established at the bottom, where they are nearest each other. The arc is at high temperature so the air rises, and the arc starts to climb the ladder. Since the electrodes are further away from each other as the arc rises, at a certain point the distance is too large to sustain the arc and the process repeats.
This is a nice weekend project if you want to try it. In case you don´t want to make your own HV power supply, you can try another ladder project that uses a commercial one.
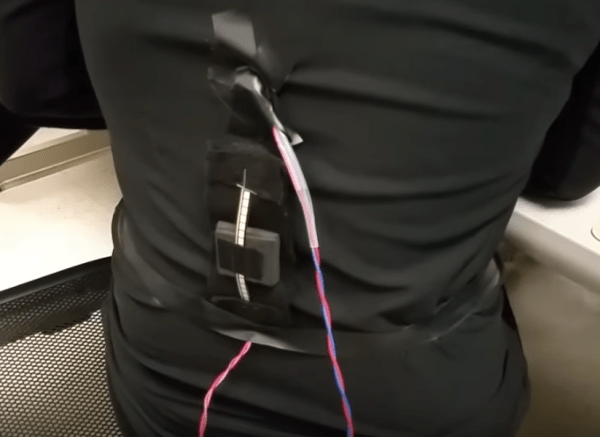
Back problems are some of the most common injuries among office workers and other jobs of a white-collar nature. These are injuries that develop over a long period of time and are often caused by poor posture or bad ergonomics. Some of the electrical engineering students at Cornell recognized this problem and used their senior design project to address this issue. [Rohit Jha], [Amanda Pustis], and [Erissa Irani] designed and built a posture correcting device that alerts the wearer whenever their spine isn’t in the ideal position.
The device fits into a tight-fitting shirt. The sensor itself is a flex sensor from Sparkfun which can detect deflections. This data is then read by a PIC32 microcontroller. Feedback for the wearer is done by a vibration motor and a TFT display with a push button. Of course, they didn’t just wire everything up and call it a day; there was a lot of biology research that went into this. The students worked to determine the most ideal posture for a typical person, the best place to put the sensor, and the best type of feedback to send out for a comfortable user experience.
We’re always excited to see the senior design projects from university students. They often push the boundaries of conventional thinking, and that’s exactly the skill that next generation of engineers will need. Be sure to check out the video of the project below, and if you want to see more of this semester’s other projects, we have you covered there too. Continue reading “Cornell Students Have Your Back”→
What do you get when mindless automatons with no capacity for reason or logic converse? While you discuss that in the comments, here are two chatbots on Twitch. The highlights? A few hours ago they were doing the cutesy couple, “‘I love you more!’, ‘No, I love you more!'” thing. This was ended by, “Error, cannot connect to server.” Even robot love is not eternal.
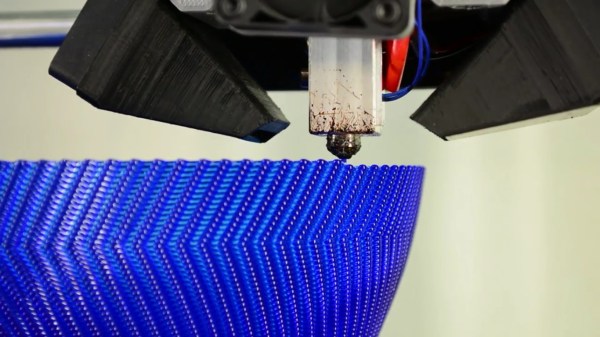
3D printer nozzles wear out. Put a few hundred hours on a brass nozzle, and you’re not going to get the same print quality as when you started. This has led to stainless and silly-con carbide nozzles. Now there’s a ruby nozzle. It’s designed by [Anders Olsson], the same guy who’s using an Ultimaker to print neutron shielding. This guy is a nuclear engineer, and he knows his stuff. This is a nozzle designed to not grind contaminants into extruded plastic, and it looks cool, too.
This is the eighth day of the year, but the guild of independent badge makers of DEF CON are already hard at work. AND!XOR is working on the DC25 badge, that promises to be bigger, badder, and more Bender. I’m loving the Hunter S. Bender theme.
Anyone can design a PCB, but how do you panelize multiple PCBs? There’s a lot to consider – routing, mouse bites, and traces for programming the board while still panelized. This is the best solution we’ve seen. It’s a GUI that allows you to organize Gerbers on a panel, rotate them, add routes and cutouts, and generally do everything a board house does. It’s all Open Source and everything is available on GitHub.
[ducksauz] found a very old ‘computer trainer’ on eBay. It’s a DEC H-500, built to explain the basics of digital electronics and semiconductors to a room full of engineering students. It is an exceptionally beautiful piece of equipment with lovely hand-drawn traces and ‘surface mounted’ 7400 chips mounted on the back side.
Last October, Next Thing Co., makers of the popular C.H.I.P. platform unleashed the C.H.I.P. Pro, a very capable Linux system on a tiny board. The goal of the C.H.I.P. Pro is to be the brains of a project or product, similar to the Gumstix boards from an ancient era long before the Raspberry Pi.
Introduced alongside the C.H.I.P. Pro was a fantastic little device. The GR8 module is a complete Linux system on a chip, with an ARM Cortex-A8 processor and 256 MB of RAM, all on a relatively small BGA chip. This is a drop-in part that gives any piece of hardware a Linux brain.
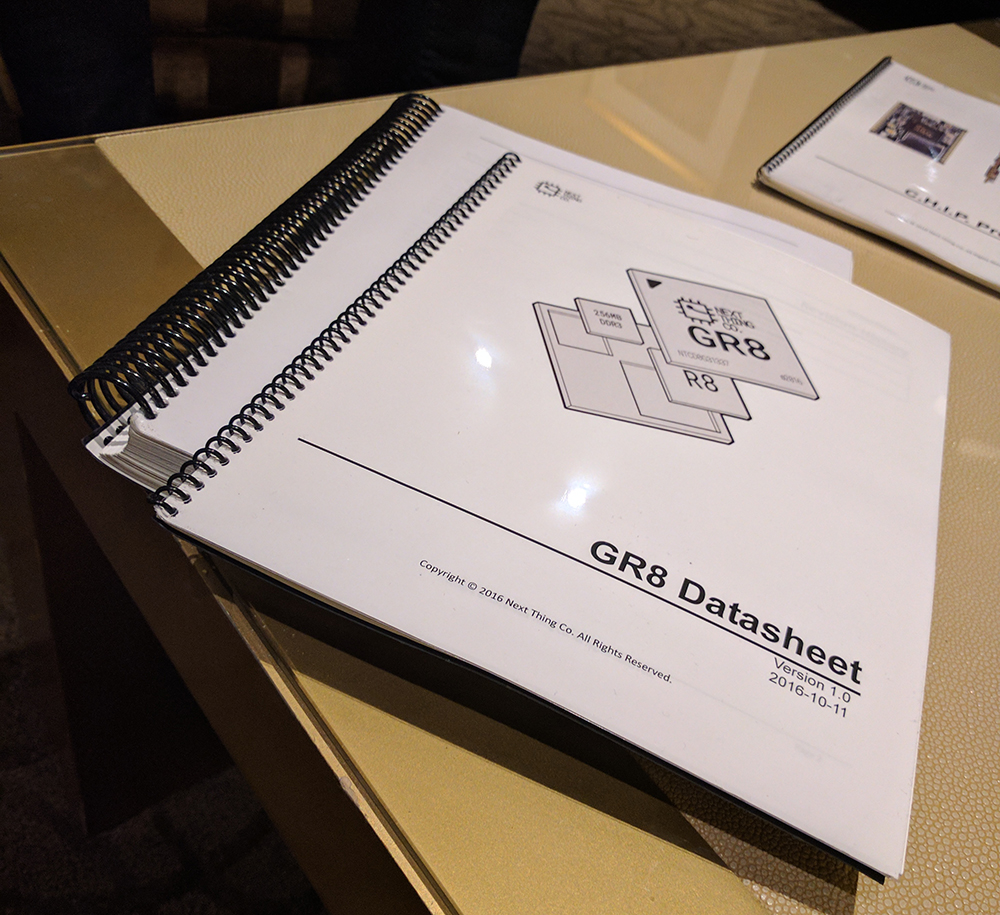
There was a datasheet at the time the C.H.I.P. Pro and GR8 module were released, but a datasheet can only go so far. What you really need to use a Linux system on a module is a massive tome filled with descriptions of registers and all the hardware nooks and crannies needed to get the part working. At CES this week, Next Thing Co. brought what everyone has been asking for: an NDA-free complete register documentation for the core they’re using on the GR8 module. This is 400 pages of spiral-bound goodness that will tell you how to do everything with this chip.
The GR8 datasheet and register documentation
A selection from the table of contents
Using the C.H.I.P. for products
When the C.H.I.P. was first released, it was easy to write it off as a board glomming on to the popularity of the Raspberry Pi. However, Next Thing Co. didn’t start with the C.H.I.P. – they started with Otto, an animated gif camera built around the Raspberry Pi compute module. The Otto was successful, but the compute module is a little expensive, so Next Thing Co. turned their attention to building a modern, inexpensive version of the old Gumstix boards.
The C.H.I.P. Pro and GR8 is the culmination of this work, and already a few companies have used it in production. At the Next Thing Co. suite, they showed off a new version of the Outernet base station powered by the C.H.I.P. Pro, and the TRNTBL, a wireless, Bluetooth, Airplay, and Spotify-connected turntable.
A new version of the Outernet base station will use the C.H.I.P. Pro
Trntbl is a wireless turntable, powered by the C.H.I.P. Pro
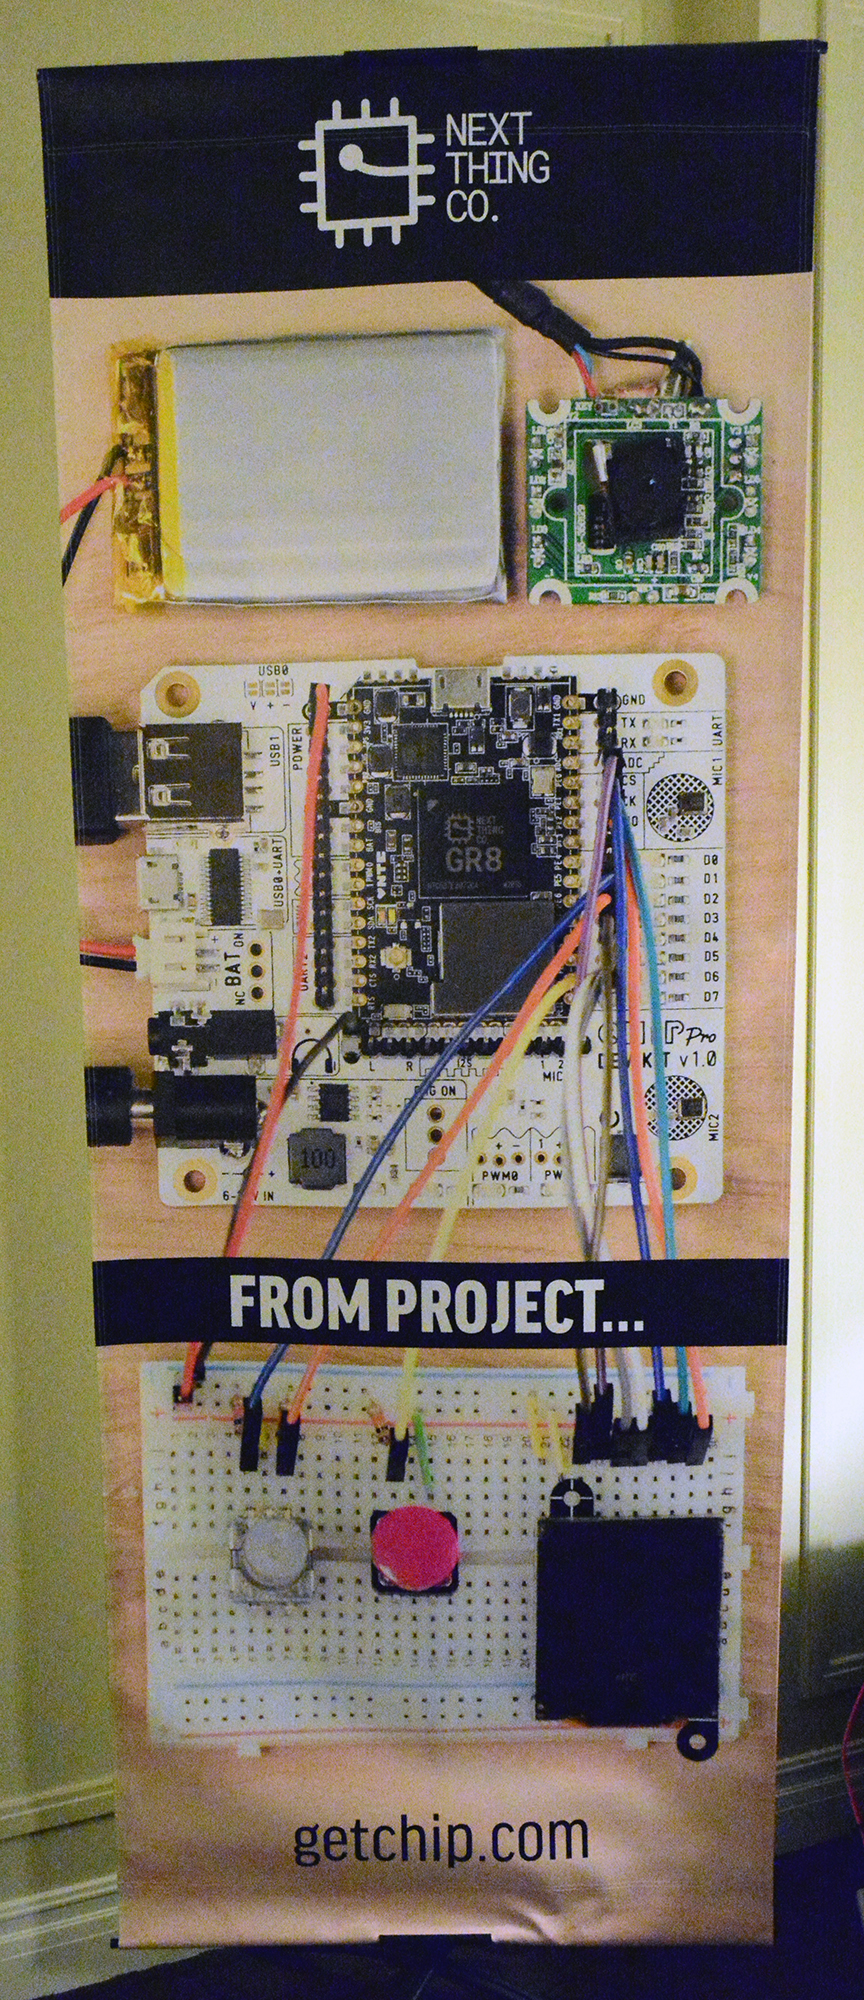
This is all you need to build Otto with the C.H.I.P. Pro
The Otto camera, redesigned to use the C.H.I.P. Pro
To illustrate how easy using the C.H.I.P. Pro in a product is, the guys at Next Thing Co. removed the Pi-powered guts of an Otto and replaced it with a C.H.I.P. Pro. There wasn’t much inside – just a battery, camera module, and a few bits and bobs. That’s great for anyone who wants to build a product that needs a relatively fast chip running Linux, and the stuff from Next Thing Co. makes it easy.
Lots of people set out to build appliance monitors, whether it be for the fridge, the garage door, or the washing machine. Often, it’s nicer not to cut into an appliance to make direct electrical connections, especially when mains power or water is involved. But how else can we know what the appliance is doing?
[Drew Dormann] wanted to smarten up his old washing machine, so designed a system that uses a vibration sensor to monitor appliances. It’s a simple build, pairing the 801s vibration sensor with a Raspberry Pi Zero. Naturally, adapter boards are readily available to make hooking things up easy. Then it’s just a matter of tying it all together with a simple Python script which sends notifications using Twitter & PushBullet.
It’s important to note that this approach isn’t just limited to washing machines – there’s a whole laundry list of home appliances that vibrate enough to be monitored in this way! It’s likely you could even spy on a communal microwave in this way, though you might struggle with WiFi dropouts due to interference. Build it and let us know.
[Drew]’s build is a great example of what you can put together in a few hours with parts off the shelf. For those that consider the Pi Zero overkill for this application, consider this vibration-based laundry monitor based on the ESP8266. Think you can do better? Show us what you’ve got on Hackaday.io!
Lulzbot is the poster child of the RepRap project. Everything they do is big-O Open. At CES, Lulzbot launched the MOARstruder, a tool head with a 1.2mm nozzle diameter. That pushes a lot of plastic out, allowing for faster print times. This is the same nozzle diameter as the largest E3D Volcano, and from the big prints sitting around the booth, the results are similar: you get faster prints at larger layer heights, and the layer lines become a design feature.
We will all at some point have forgotten to water a plant. If we’re lucky then the limp vegetation we return to will magically revive when we rush to water it, if not then we have the shame of an empty plant pot to remind us of our folly.
No matter, you might be thinking, we can bring technology to bear on the problem, and automate it with a microcontroller! [Bonnie] has done just that, with a capacitive soil sensor feeding an ESP8266-based Adafruit Feather HUZZAH, which in turn logs soil humidity data with the Adafruit IO online service. An IFTTT applet monitors the data, and triggers a notification when moisture falls to the point at which watering is required.
The Instructables write-up gives a comprehensive step-by-step guide to the whole process, including the code, so it’s a project that almost anyone could try as well as a basic introduction to using an online service with a piece of hardware. We can’t help asking, though, whether it might have been better to have had the system do the watering rather than merely administer a prod to its fleshy horticulturist creator. Perhaps that’s left to anyone else building one to add as an enhancement.