Video Streaming Like Your Raspberry Pi Depended On It

The Raspberry Pi is an incredibly versatile computing platform, particularly when it comes to embedded applications. They’re used in all kinds of security and monitoring projects to take still shots over time, or record video footage for later review. It’s remarkably easy to do, and there’s a wide variety of tools available to get the job done.

However, if you need live video with as little latency as possible, things get more difficult. I was building a remotely controlled vehicle that uses the cellular data network for communication. Minimizing latency was key to making the vehicle easy to drive. Thus I set sail for the nearest search engine and begun researching my problem.

My first approach to the challenge was the venerable VLC Media Player. Initial experiments were sadly fraught with issues. Getting the software to recognize the webcam plugged into my Pi Zero took forever, and when I did get eventually get the stream up and running, it was far too laggy to be useful. Streaming over WiFi and waving my hands in front of the camera showed I had a delay of at least two or three seconds. While I could have possibly optimized it further, I decided to move on and try to find something a little more lightweight.

Continue reading “Video Streaming Like Your Raspberry Pi Depended On It”

LEGO Prototyping With Tinkercad’s Brick Mode

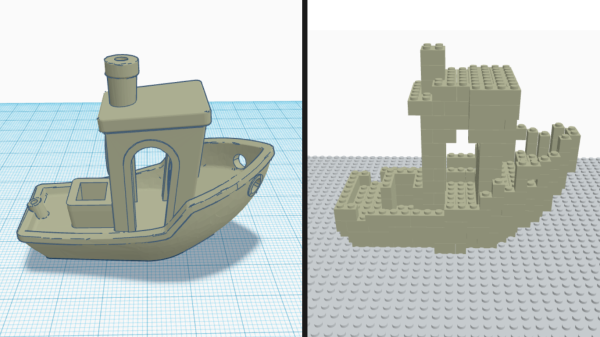
[Andrew Sink] made a brief video demonstrating how he imported an STL of the well-known 3D Benchy tugboat model, and instead of sending it to a 3D printer used the Brick Mode feature to make a physical copy out of LEGO bricks in an eye-aching kaleidoscope of colors.

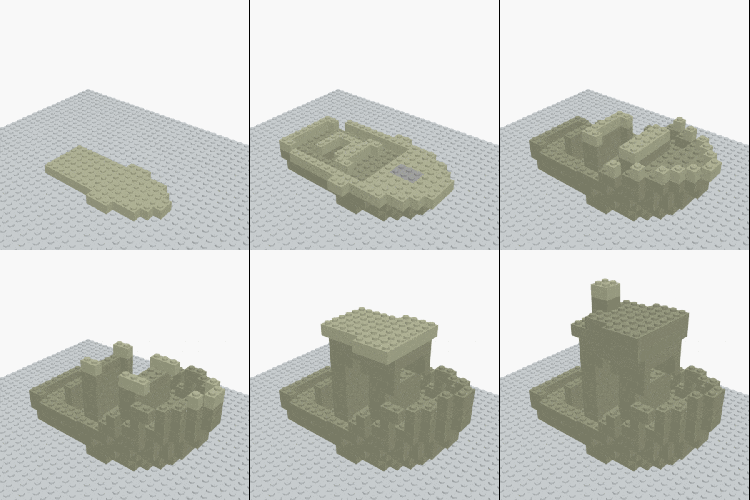
For those of you who haven’t used Tinkercad lately, Brick Mode allows you to represent a model as LEGO bricks at various scales. You model something as usual (or import a model) and by pushing a single button, render it in LEGO as accurately as can be done with standard bricks.

In addition, [Andrew] shows how the “Layers” feature can be used as a makeshift assembly guide for the model, albeit with a couple of quirks that he explains in the video embedded below.

Continue reading “LEGO Prototyping With Tinkercad’s Brick Mode”

Pedal-Pi, Simple Programmable Guitar Pedal

For several years, [Ray] and [Anna], the team behind ElectroSmash, have been smashing audio electronics and churning out some sweet DIY audio gear. This time around, they’ve built Pedal-Pi — a simple programmable guitar pedal based around the Raspberry-Pi Zero. It is aimed at hackers, programmers and musicians who want to experiment with sounds and learn about digital audio. A lot of effort has gone in to documenting the whole project. Circuit analysis, a detailed BoM, programming, assembly and background information on related topics are all covered on their Forum.

The hardware is split in to three parts. On the input, a MCP6002 rail-to-rail op-amp amplifies and filters the analog waveform and then a MCP3202 ADC digitizes it to a 12-bit signal. The Pi-Zero then does all of the DSP, creating effects such as distortion, fuzz, delay, echo and tremolo among others. The Pi-Zero generates a dual PWM signal, which is combined and filtered before being presented at the output. The design is all through hole and the handy assembly guide can be useful for novices during assembly.  The code examples include a large number of pedal effects, and if you are familiar with C, then there’s enough information available to help you write your own effects.

Even if you don’t plan on building one, technical background such as the Basics of Audio DSP in C for Raspberry Pi Zero, Using MCP3202 ADC with Raspberry Pi Zero and PWM Audio on Raspberry Pi Zero ought to make for interesting reading. Check out the video after the break detailing the build.

If you’d like to check out some of their earlier work, check out 1WAMP, an Open Hardware Guitar Amplifier and pedalSHIELD, an opensource Arduino Guitar Pedal.

Continue reading “Pedal-Pi, Simple Programmable Guitar Pedal”