No Inductors Needed For This Simple, Clean Twin-Tee Oscillator

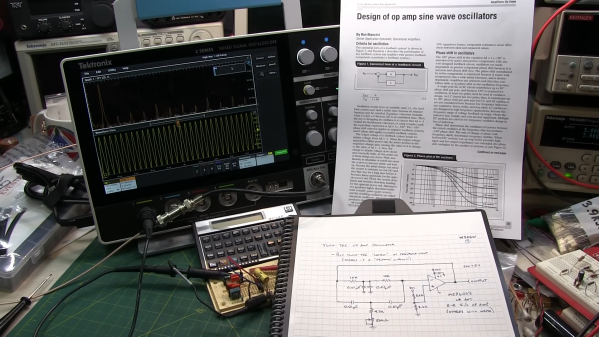
If there’s one thing that amateur radio operators are passionate about, it’s the search for the perfect sine wave. Oscillators without any harmonics are an important part of spectrum hygiene, and while building a perfect oscillator with no distortion is a practical impossibility, this twin-tee audio frequency oscillator gets pretty close.

As [Alan Wolke (W2AEW)] explains, a twin-tee oscillator is quite simple in concept, and pretty simple to build too. It uses a twin-tee filter, which is just a low-pass RC filter in parallel with a high-pass RC filter. No inductors are required, which helps with low-frequency designs like this, which would call for bulky coils. His component value selections form an impressively sharp 1.6-kHz notch filter about 40 dB deep. He then plugs the notch filter into the feedback loop of an MCP6002 op-amp, which creates a high-impedance path at anything other than the notch filter frequency. The resulting sine wave is a thing of beauty, showing very little distortion on an FFT plot. Even on the total harmonic distortion meter, the oscillator performs, with a THD of only 0.125%.

This video is part of [Alan]’s “Circuit Fun” series, which we’ve really been enjoying. The way he breaks complex topics into simple steps that are easy to understand and then strings them all together has been quite valuable. We’ve covered tons of his stuff, everything from the basics of diodes to time-domain reflectometry.

Continue reading “No Inductors Needed For This Simple, Clean Twin-Tee Oscillator”

What Does The Bat Say? Tune In With This Heterodyne Detector

Bats are fascinating animals, and despite all the myth and creepiness surrounding them, they really remind one more of a drunk bird lost in the night sky than the blood-sucking creature they’re often made out to be. Of course, some really fall into that category, and unlike actual birds, bats don’t tend to grace us with their singsong — at least not in ways audible for us humans. But thanks to bat detectors, we can still pick up on it, and [Marcel] recently built a heterodyne bat detector himself.

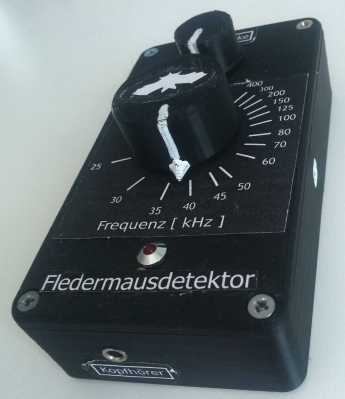
Bat Detector in its enclosure
The bat detector (and an insight to the beauty of German language, where a bat is a flutter mouse)

The detector is made with a 555, an MCP6004 op amp, and a 4066 analog switch — along with a bunch of passives — and is neatly packed into a 3D-printed case with a potentiometer to set the volume and center frequency for the detection. The bat signal itself is picked up by a MEMS microphone with a frequency range [Marcel] found suitable for the task. His write-up also goes in all the mathematics details regarding heterodyning, and how each component plays into that. The resulting audio can be listened to through a headphone output, and after putting together an adapter, can also be recorded from his smartphone. A sample of how that sounds is added in his write-up, which you can also check out after the break.

In case you want to give it a try yourself, [Marcel] put all the design files and some LTSpice simulations on the project’s GitHub page. If you are curious about bat detectors in general and want to read more about them, follow [Pat Whetman] down that rabbit hole, or have a look at this one made in Python for something more software-focused.

Continue reading “What Does The Bat Say? Tune In With This Heterodyne Detector”

A Hard Rocking Arduino Visualization Shield

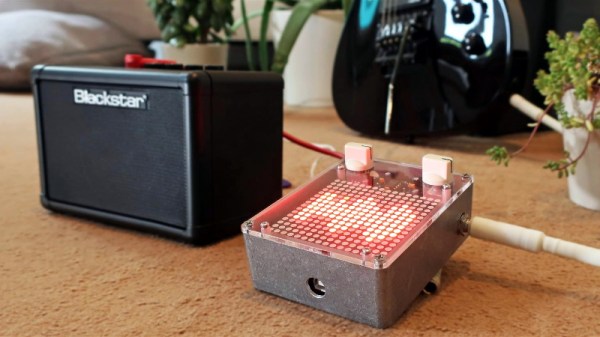
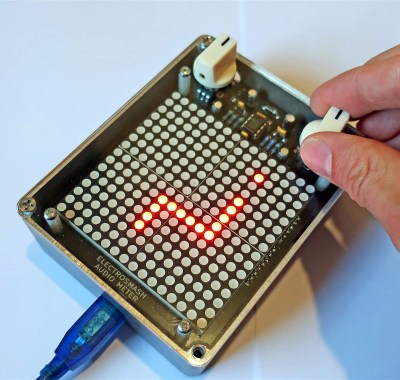
Over the summer [ElectroSmash] put the finishing touches on the Arduino Audio Meter, a shield for the Arduino Uno that visualizes various aspects of an incoming audio signal on a set of four 8×8 LED dot matrices. Obsentisibly it’s for use on a guitar pedalboard, but thanks to the incredible documentation and collection of example code provided by the team, the project promises to be an excellent platform for all sorts of audio experimentation.

Incoming audio is amplified with an MCP6002 and fed into the Uno’s Analog to Digital Converter, where it’s processed via whatever Sketch the user has uploaded. User input is provided by a digital encoder with push-button. A set of four MAX7219 chips control the entire 256-pixel matrix with just three pins on the Arduino. The resolution of the display allows the Arduino Audio Meter to show more than just a simple VU meter, it can even do text and basic graphics.

[ElectroSmash] provides various Sketches for use with the Arduino Audio Meter that provide the expected repertoire of audio visualizations, but they also provide a number of interesting Sketches to expand the capabilities of the device in unexpected ways. Some of them could be useful for a stage musician, such a tool to tune your guitar, whereas others are fun uses of the hardware such as a game of “Snake”.

With the entire project released as open source, users are free to run wild with the Arduino Audio Meter. Writing your own custom software is an obvious first step to making the project your own, but adding additional hardware features and functions certainly aren’t out of the question either.

Our very own [Lewin Day] once walked us through the effort involved in building boutique guitar pedals, and while the Audio Audio Meter’s capabilities are somewhat limited as it doesn’t have the ability to change the audio going through it, we’re still interested in seeing what the community will come up with once they have an easy way to bring their ideas to life.

Continue reading “A Hard Rocking Arduino Visualization Shield”

Scrap A Hard Drive, Build A Rotary Encoder

There’s something to be said for the feel of controls. Whether it’s the satisfying snap of a high-quality switch or the buttery touch of the pots on an expensive amplifier, the tactile experience of the controls you interact with says a lot about a device.

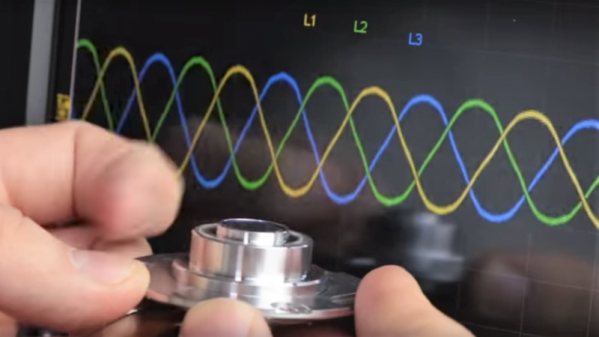
[GreatScott!] knows this, and rather than put up with the bump and grind of a cheap rotary encoder, he decided to find an alternative. He ended up exploring hard drive motors as encoders, and while the results aren’t exactly high resolution, he may be onto something. Starting with a teardown of some old HDDs — save those magnets! — [Scott!] found that the motors fell into either the four-lead or three-lead categories. Knowing that HDD motors are brushless DC motors, he reasoned that the four-lead motors had their three windings in Wye configuration with the neutral point brought out to an external connection. A little oscilloscope work showed the expected three-phase output when the motor hub was turned, with the leading and lagging phases changing as the direction of rotation was switched. Hooked to an Arduino, the motor made a workable encoder, later improved by sending each phase through a comparator and using digital inputs rather than using the Nano’s ADCs.

It looks like [GreatScott!]’s current setup only responds to a full rotation of the makeshift encoder, but we’d bet resolution could be improved. Perhaps this previous post on turning BLDC motors into encoders will help.

Continue reading “Scrap A Hard Drive, Build A Rotary Encoder”

Pedal-Pi, Simple Programmable Guitar Pedal

For several years, [Ray] and [Anna], the team behind ElectroSmash, have been smashing audio electronics and churning out some sweet DIY audio gear. This time around, they’ve built Pedal-Pi — a simple programmable guitar pedal based around the Raspberry-Pi Zero. It is aimed at hackers, programmers and musicians who want to experiment with sounds and learn about digital audio. A lot of effort has gone in to documenting the whole project. Circuit analysis, a detailed BoM, programming, assembly and background information on related topics are all covered on their Forum.

The hardware is split in to three parts. On the input, a MCP6002 rail-to-rail op-amp amplifies and filters the analog waveform and then a MCP3202 ADC digitizes it to a 12-bit signal. The Pi-Zero then does all of the DSP, creating effects such as distortion, fuzz, delay, echo and tremolo among others. The Pi-Zero generates a dual PWM signal, which is combined and filtered before being presented at the output. The design is all through hole and the handy assembly guide can be useful for novices during assembly.  The code examples include a large number of pedal effects, and if you are familiar with C, then there’s enough information available to help you write your own effects.

Even if you don’t plan on building one, technical background such as the Basics of Audio DSP in C for Raspberry Pi Zero, Using MCP3202 ADC with Raspberry Pi Zero and PWM Audio on Raspberry Pi Zero ought to make for interesting reading. Check out the video after the break detailing the build.

If you’d like to check out some of their earlier work, check out 1WAMP, an Open Hardware Guitar Amplifier and pedalSHIELD, an opensource Arduino Guitar Pedal.

Continue reading “Pedal-Pi, Simple Programmable Guitar Pedal”