Texture Trick For 3D Prints From The Stone Age

Arguably one of the most difficult aspects of 3D printing is trying to make the finished product look like it wasn’t 3D printed. It can take a lot of time and work to cover up the telltale layer lines (or striations, if you want to get fancy), especially if your 3D printer isn’t perfectly calibrated. While there aren’t many shortcuts to achieve a glass-like finish on 3D printed parts, if your end goal is to make something that looks like stone, [Wekster] has a tip for you.
He demonstrates the technique by building a gorgeous recreation of the main gate from Jurassic Park. The process gives the relatively smooth plastic the gnarled look of rough-hewn stone with very little in the way of manual work. While it’s true there’s no overabundance of projects this stone-look finish will work for, it’s definitely something we’ll be filing away mentally.

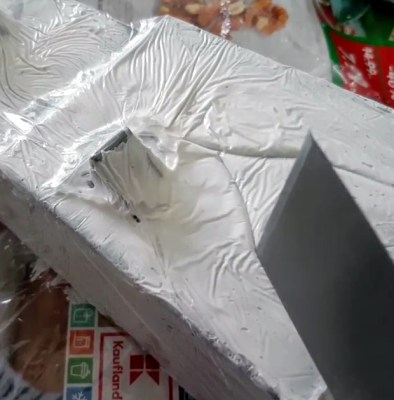
So what’s the secret? [Wekster] first coats the 3D printed parts with common wood filler, the sort of stuff available at any hardware store. He then wraps them in clear plastic wrap, allowing the wrap to bunch up rather than trying to pull it taught. For extra detail, he digs into the plastic wrap here and there to create what will appear to be gaps and cracks on the finished piece. The wood filler is then left to dry; a process which normally only takes a few minutes, but now will take considerably longer as the plastic wrap will be keeping the air from it.

Once its hardened and unwrapped, [Wekster] sprays it with a base coat of color, and follows up with a few washings with watered down black and gray paints. This technique is well known to anyone who’s done miniature or model painting; serving to highlight the surface texture and give the finish more depth. With this method, anything that resembles a layer line in the print is long gone, and the surface looks so complex and detailed that at first glance few would believe it’s plastic.

[Wekster] also used wood filler during the finishing process for his Fallout 4 “Thirst Zapper” replica. In the past we’ve shown how you can smooth out 3D printed parts with epoxy and taken a very scientific look at using UV resin as a conformal coating, but maybe it’s time we give wood filler a shot.

Continue reading “Texture Trick For 3D Prints From The Stone Age”

Kathleen Booth: Assembling Early Computers While Inventing Assembly

Imagine having to program your computer by rewiring it. For a brief period of time around the mid-1940s, the first general-purpose electronic computers worked that way. Computers like ENIAC initially had no internal storage for code. Programming it involved manipulating thousands of switches and cables. The positions of those switches and cables were the program.

Kathleen Booth began working on computers just as the idea of storing the program internally was starting to permeate through the small set of people building computers. As a result, she was one of the first programmers to work on software and is credited with inventing assembly language. But she also got her hands dirty with the hardware, having built a large portion of the computers which she programmed. She also did some early work with natural language processing and neural networks. And this was all before 1962, making her truly a pioneer. This then is her tale.

Continue reading “Kathleen Booth: Assembling Early Computers While Inventing Assembly”

ARM Programming With Bare C

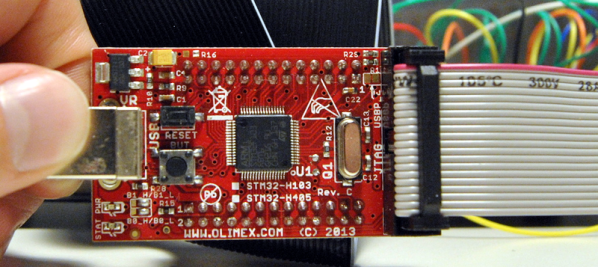
We confess. When starting a microcontroller project, we often start with the last one we did for that environment, copy it, and just make changes. And the first one? It — ahem — might have been found on the Internet. There’s a lot more than just your code that goes into this. If you want  to do (and understand) absolutely everything yourself on an ARM development project, you could use an all-in-one walkthrough. It just so happens [Jacob Mossberg] has a from scratch guide of what you need to do to get your C code running on ARM.

Starting with an ARM Cortex M3, he writes a simple C program and gets the assembly language equivalent. What follows is a detailed analysis of the machine code, exploring what the compiler assumed would be set up. This leads to understanding of what the start up code and linker script needs to look like.

It is a great approach and reminded us of the old saying about “teach someone how to fish.” He even devotes a little time to talking about getting debugging working with OCD. Of course, the exact details are specific to the chip he’s using, but most of it would apply to any ARM chip. Even if you don’t use ARM, though, the thought process and methodology is itself quite interesting.

This post would be just the thing if you are using Blue Pills and ready to move away from the Arduino ecosystem. Of course, if you want to veer away from the Arduino system, but don’t want to go all the way to bare metal, there’s always mBed.

An LED You Can Blow Out, With No Added Sensor

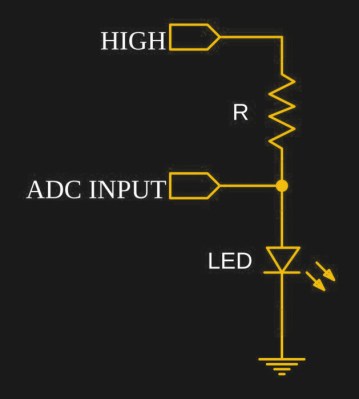
We’d seen it done with buttons, switches, gestures, capacitive touch, and IR remote, but never like this. [electron_plumber] made an LED that can be blown out like a candle, and amazingly it requires no added sensors. The project uses an Arduino to demonstrate turning a tiny LED on and off in response to being blown on, and the only components are the LED and a resistor.

[electron_plumber] used an 0402 LED and thin wires to maximize the temperature responses.
How is this done? [electron_plumber] uses an interesting property of diodes (which are the “D” in LED) to use the LED itself as a temperature sensor. A diode’s voltage drop depends on two things: the current that is being driven through the diode, and the temperature. If the current is held constant, then the forward voltage drop changes reliably in response to temperature. Turning the LED on warms it up and blowing on it cools it off, causing measurable changes in the voltage drop across the device. The change isn’t much — only a handful of millivolts — but the effect is consistent and can be measured. This is a principle [Elliot Williams] recently covered in depth: using diodes as temperature sensors.

It’s a clever demo with a two important details to make it work. The first is the LED itself; [electron_plumber] uses a tiny 0402 LED that is mounted on two wires in order to maximize the temperature change caused by blowing on it. The second is the method for detecting changes of only a few millivolts more reliably. By oversampling the Arduino’s ADC, an effectively higher resolution is obtained without adding any hardware or altering the voltage reference. Instead of reading the ADC once, the code reads the ADC 256 times and sums the readings. By working with the larger number, cumulative changes that would not register reliably on a single read can be captured and acted upon. More details are available from [electron_plumber]’s GitHub repository for LEDs as Sensors.

Embedded below is a video that is as wonderful as it is brief. It demonstrates the project in action, takes a “show, don’t tell” approach, and is no longer than it needs to be.

Continue reading “An LED You Can Blow Out, With No Added Sensor”