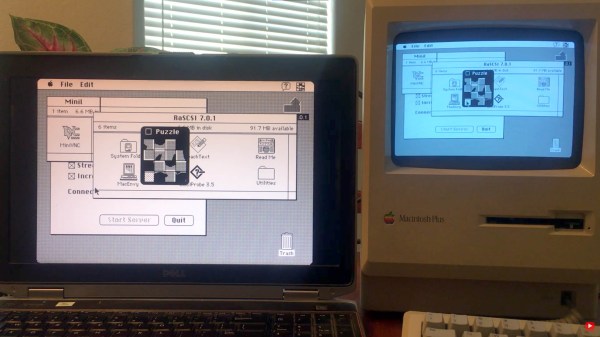
A Macintosh Plus computer next to a modern laptop

Remote Desktop Fun For Your Old Macintosh

Remotely accessing your computer’s desktop, files and network from anywhere has enabled remote working (i.e. ‘work from home’) for the last several decades. Modern PCs have more than enough computational grunt for Virtual Network Computing (VNC), but where does that leave our retro computing community? [Marcio Teixeira] has it covered with MiniVNC, a brand-new remote desktop server for (very) vintage Macintosh computers.

Now before you say anything, it’s true that ChromiVNC has existed for some time, and is a pretty decent remote desktop server for old Macs. However MiniVNC has several significant advantages, most notably, MiniVNC is fully compatible with MacTCP. Apple’s very first TCP/IP networking stack landed on the Macintosh platform with System 6. As such, MiniVNC can serve up a remote desktop on some of the oldest Mac computers, including the Macintosh Plus.

It’s hard to overstate just how cool that is – the iconic Macintosh Plus was released in 1986, runs at a pedestrian 8MHz and supports a maximum of 4MB memory. While much of MiniVNC was written in C++, portions of the software (including TRLE encoding) had to be handwritten in 68K assembly language to ensure decent performance. The entire focus of MiniVNC was on performance and flexibility, with accuracy coming in second, which seems like the right decision. The odd screen artifact and missed update seems to be reasonable trade-off to get this running somewhat smoothly on a Motorola 68000 processor.

Continue reading “Remote Desktop Fun For Your Old Macintosh”

Hack Your Recipes

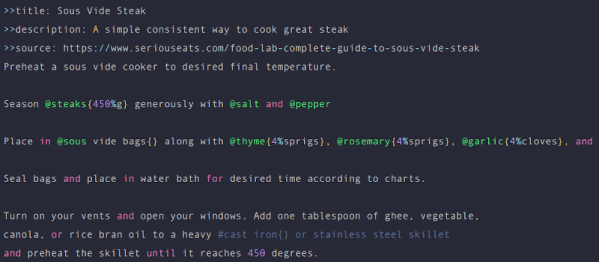
If there is one thing Hackaday readers have in common, they like to make things. Of course, we don’t all make the same things and that’s great. But, unsurprisingly, a lot of people who like to create things include the kitchen as their workspaces. Why not? We all have to eat and there’s something very nice about cooking a meal for your loved ones or even just yourself. Cooklang is a markdown-style language from [Brian Sunte] specifically for capturing recipes. It not only formats the recipe, but it provides an easy way for software to parse the key elements while still being human-readable. This allows you to manipulate recipes just like software, including using Git for version control, for example.

There was a time that cooking meant having big cookbooks, but now you are more likely to search the Internet. There’s only one problem. For some reason, nearly every recipe site follows the same format. Thousands of words about how much the cook’s family loves the dish, how they pick out only the most succulent tomatoes to ensure the dish will have a vibrant scarlet hue, and how much their poor granny would have loved the dish, if only she had survived the 1928 flood which is described in great detail. After 20 minutes you find out that you put the tomatoes in the blender, add a cup of water, and that’s it. Cooklang is a sort of antidote for that. You can easily write something that parses the recipe and generates, say, a shopping list or compares it to your household inventory and places an order for the remaining things from the local grocery delivery.

Continue reading “Hack Your Recipes”

The 3D Printed Car Tire Rim Finally Hits The Road, Sorta

When you think of “car rim” you probably think stamped steel or machined alloy with a sturdy drum to withstand the arduous life of the road, not something 3D printed out of ABS. That would be crazy, right? Not to [Jón Schone] from Proper Printing, who’s recently released an update about his long-term quest to outfit his older sedan with extruded rims.

There were a few initial attempts that didn’t go as well as hoped. The main issue was layer separation as the air pressure would stretch the piece out, forming bubbles. He increased the thickness to the absolute maximum he could. A quick 3D scan of the brake caliper gave him a precise model to make sure he didn’t go too far. He also couldn’t make the rim any bigger to fit a bigger wheel to clear the caliper, as he was already maxing out his impressive 420 mm build volume from his modified Creality printer.

A helpful commenter had suggested using a threaded rod going all the way through the print as a sort of rebar. After initially discounting the idea as the thickness of the rim gets really thin to accommodate the caliper, [Jón] realized that he could bend the rods and attach the two halves that way. Armed with a paper diagram, he cut and bent the rods, inserting them into the new prints. It’s an impressive amount of filament, 2.7 kg of ABS just for one-half of the rim.

It didn’t explode while they inflated the tire and it didn’t explode while they did their best to abuse it in the small alley they had selected for testing. The car was technically no longer road legal, so we appreciate their caution in testing in other locations. In a triumphant but anti-climatic ending, the rim held up to all the abuse they threw at it.

We’ve been following this project for several months now, and are happy to see [Jón] finally bring this one across the finish line. It sounds like there’s still some testing to be done, but on the whole, we’d call the experiment a resounding success.

Continue reading “The 3D Printed Car Tire Rim Finally Hits The Road, Sorta”

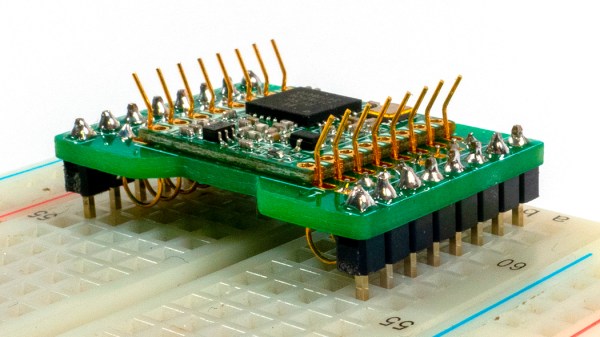
RFM9x module held in an adapter board with flexipins

FlexyPins Might Help With Those Pesky Castellated Modules

[SolderParty] just announced FlexyPins (Twitter, alternative view) – bent springy clips that let you connect modules with castellated pins. With such clips, you can quickly connect and disconnect any castellated module, swapping them without soldering as you’re prototyping, testing things out, or pre-flashing modules before assembly. They’re reportedly gold-plated, and a pack of ~100 will set you back 6EUR, shipping not included.

Of course, this is basically “fancy pieces of wire”, purpose-shaped, gold-plated and, hopefully, made out of material that is springy enough and doesn’t snap easily after bending a few times. We’ve seen this concept used for prototyping before, with random pieces of wire doing a pretty good job of maintaining connectivity, but these clips bring it that much closer to production-grade. It also makes us wonder – just how hard it is to solder 30-40 of them into a circuit? Do they self-align enough with the footprints given, or do you have to hold them with tweezers at a peculiar angle as you solder them? Time will tell, of course.

Continue reading “FlexyPins Might Help With Those Pesky Castellated Modules”

A Variable Capacitor For Not A Lot

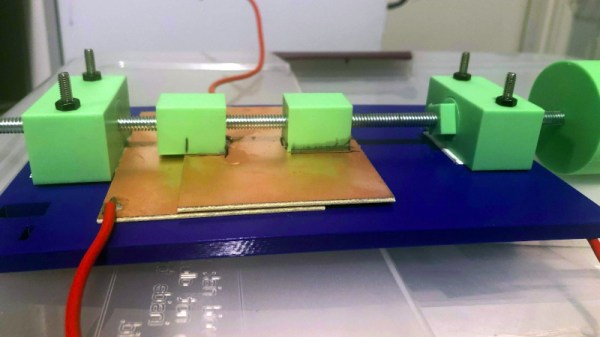
There’s one component which used to be ubiquitous in every experimenter’s junk box, but nowadays unless you happen to be a radio amateur the chances are you may not have seen one in a long time, if ever. We’re talking of course about the air-dielectric variable capacitor, the tuning element for millions of radio receivers back in the day but now long ago replaced by much flimsier polymer-dielectric parts. There’s still a need for variable capacitors though, in particular a high-voltage variant for use in magnetic loop antennas. It’s something that [Ben] had a need for, which he solved with a clever combination of PCB material and 3D printing.

While the variable capacitors of yore invariably used intersecting vanes on a rotor, this one has two large parallel plates that intersect as one is moved over the other with a lead screw. It’s cheap and effective, and best of all, the files to make it can be downloaded from Thingiverse. He claims a 34pF-164pF capacitance range, which, looking at the size of the plates we find to be believable (and which is a useful range for most HF applications). We like this solution, and believe it makes more sense than being scalped for an older example at a radio rally.

This isn’t the first variable capacitor we’ve shown you, though some previous examples have been more conventional.

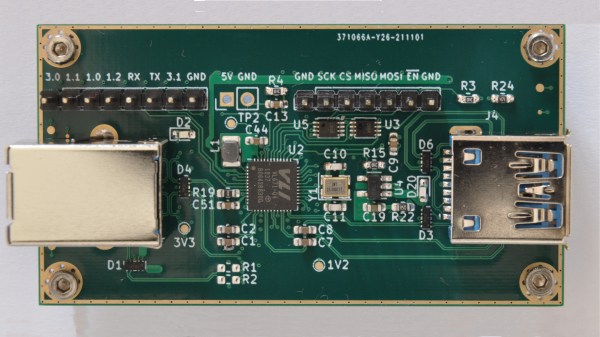
Top side of the VL670 breakout board, with two USB connectors and the VL670 chip in the center.

A Chip To Bridge The USB 2 – USB 3 Divide

On Twitter, [whitequark] has  found and highlighted an intriguing design – a breakout board for the VL670, accompanied by an extensive yet very easy to digest write-up about its usefulness and inner workings. The VL670 is a chip that addresses a surprising problem – converting USB 2.0 signals into USB 3.0.

If you have a USB 2.0 device and a host with only USB 3.0 signals available, this chip is for you. It might be puzzling – why is this even needed? It’s about the little-known dark secret of USB3, that anyone can deduce if they ever have to deal with a 9-pin USB 3.0 connector where one of the three differential pairs doesn’t quite make contact.

When you see a blue “3.0” port, it’s actually USB 2 and USB 3 — two separate interfaces joined into a single connector. USB 3 uses two single-directional differential pairs, akin to PCI-E, whereas USB 2 uses a single bidirectional one, and the two interfaces on a blue connector operate basically independently of each other. There’s many implications to this that are counterintuitive if you simply take “USB 3.0” for “faster backwards-compatible USB”, and they have painful consequences.

For instance, USB 3 hub ICs have two separate hub entities inside – one for USB 3 and one for USB 2. Even if you have a USB 3 hub plugged into a USB 3 port, multiple USB 2 devices plugged into it still cannot break through the USB 2 uplink limit of 480 MBps. If you ever thought that a faster hub with a faster uplink would fix your USB 2 device speed problems – USB-IF engineers, apparently, thought differently; and you might have to find a workaround for your “many cheap SDRs and Pi 4 in a box” setup. Continue reading “A Chip To Bridge The USB 2 – USB 3 Divide”

Metal 3D Printing Hack Chat

Join us on Wednesday, March 9 at noon Pacific for the Metal 3D Printing Hack Chat with Agustin Cruz!

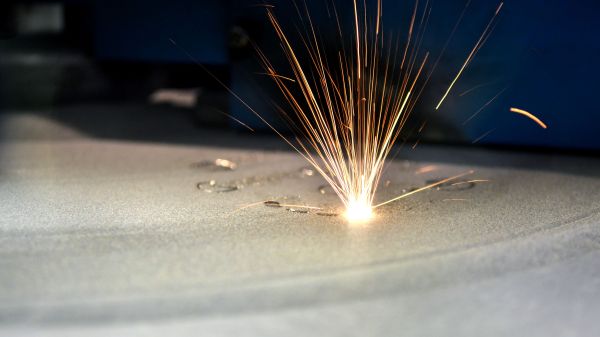
3D printing has been an enabling technology, and the ability to create parts that never existed anywhere before has been a real game-changer. But the cheap and readily accessible FDM and SLA printers we’ve come to depend on are not without their drawbacks, chief among which is that they only make plastic parts. Wouldn’t it be great if we home-gamers had the ability to print metal parts just like they do in industry? Agustin Cruz thinks so, and he’s been hard at work on an electron-beam sintering printer to make that dream come true. Dealing with the technical challenges of such a printer hasn’t been easy, but then again, squeezing out melted plastic wasn’t easy at first either.

join-hack-chatAgustin has agreed to take a little time out of his project to talk to us about his progress, and to share what he has learned about electron-beam printing. Along the way, we’ll talk about metal printing in general, and perhaps even take a look at where the whole field is going and how — and when — it’ll penetrate the hobby printing market.

Our Hack Chats are live community events in the Hackaday.io Hack Chat group messaging. This week we’ll be sitting down on Wednesday, March 9 at 12:00 PM Pacific time. If time zones have you tied up, we have a handy time zone converter.
Continue reading “Metal 3D Printing Hack Chat”