How Does The James Webb Telescope Phone Home?

When it comes to an engineering marvel like the James Webb Space Telescope, the technology involved is so specialized that there’s precious little the average person can truly relate to. We’re talking about an infrared observatory that cost $10 billion to build and operates at a temperature of 50 K (−223 °C; −370 °F), 1.5 million kilometers (930,000 mi) from Earth — you wouldn’t exactly expect it to share any parts with your run-of-the-mill laptop.

But it would be a lot easier for the public to understand if it did. So it’s really no surprise that this week we saw several tech sites running headlines about the “tiny solid state drive” inside the James Webb Space Telescope. They marveled at the observatory’s ability to deliver such incredible images with only 68 gigabytes of onboard storage, a figure below what you’d expect to see on a mid-tier smartphone these days. Focusing on the solid state drive (SSD) and its relatively meager capacity gave these articles a touchstone that was easy to grasp by a mainstream audience. Even if it was a flawed comparison, readers came away with a fun fact for the water cooler — “My computer’s got a bigger drive than the James Webb.”

Of course, we know that NASA didn’t hit up eBay for an outdated Samsung EVO SSD to slap into their next-generation space observatory. The reality is that the solid state drive, known officially as the Solid State Recorder (SSR), was custom built to meet the exact requirements of the JWST’s mission; just like every other component on the spacecraft. Likewise, its somewhat unusual 68 GB capacity isn’t just some arbitrary number, it was precisely calculated given the needs of the scientific instruments onboard.

With so much buzz about the James Webb Space Telescope’s storage capacity, or lack thereof, in the news, it seemed like an excellent time to dive a bit deeper into this particular subsystem of the observatory. How is the SSR utilized, how did engineers land on that specific capacity, and how does its design compare to previous space telescopes such as the Hubble?

Continue reading “How Does The James Webb Telescope Phone Home?”

Custom Raspberry Pi Case Shows The Whole Workflow

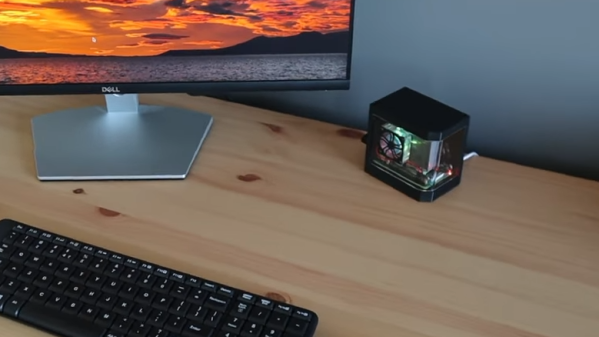
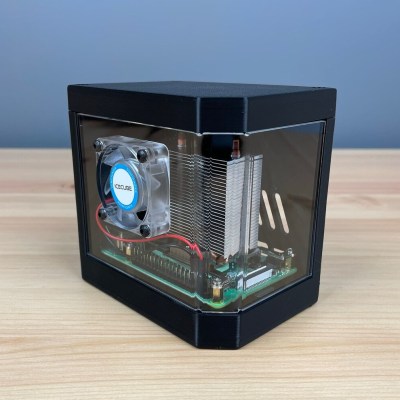
If you are a process junkie and love seeing the end-to-end of how a thing is made and with what tools, then watch [Michael Klements] show off his Raspberry Pi case design. His case has quite a few cool-looking elements to it, and incorporates 3D printing as well as laser-cut and clear bent acrylic for a gorgeous three-quarter view.

[Michael]’s write-up (and accompanying video, embedded below) are partly a review of his Creality 3D printer, and partly a showcase of his Raspberry Pi case design (for which he sells the design files for a small fee on his Etsy store.) But the great part is seeing the creation of every piece that goes into the end product. Not everyone is familiar with the way these tools work, or what they can create, so it’s nice to see attention paid to that side of things.

Both the blog post and the video nicely show off what goes into every part. The video opens with unpacking and setting up the 3D printer (skip ahead to 4:58 if you aren’t interested), followed by printing the parts, laser-cutting the acrylic on a K40 laser cutter, bending the acrylic using a small hand tool, and finally, assembling everything. For the curious, there are also links to the exact parts and equipment he uses.

Like we said, it’s part 3D printer review and part showcase of a design he sells, but it’s great to see each of the parts get created, watch the tools get used, and see the results come together in the final product. And should you wish to go in the opposite direction? A one-piece minimalist case for your Raspberry Pi is only a 3D printer away.

Continue reading “Custom Raspberry Pi Case Shows The Whole Workflow”

A Tiny Forest Of Resistors Makes For Quick And Dirty Adaptive Optics

The term “adaptive optics” sounds like something that should be really complicated and really expensive. And in general, the ability to control the properties of optical elements is sufficiently difficult enough that it’s reserved for big-science stuff like billion-dollar space telescopes.

But that doesn’t mean there aren’t quick and dirty adaptive optics that are suitable for the budget-minded experimenter, like this thermally deformable mirror. As [Zachary Tong] explains, this project, which started quite some time ago, is dead simple — a 4 by 4 array of through-hole resistors stand on end, and these are attached to a glass coverslip that has been aluminized on one side. An Arduino and a couple of shift registers make it possible to individually address each of the 16 resistors in the array. Passing a current through a resistor heats it up a bit, leading to thermal expansion and a slight deflection of the mirror sitting on top of the array. Controlling which resistors heat up and by how much should lead to deformation of the mirror surface in a predictable way.

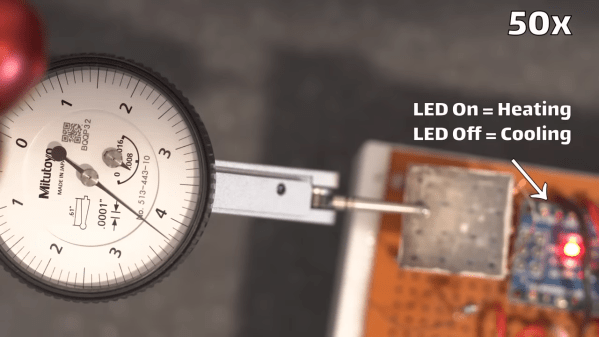
The video below shows some of [Zach]’s experiments with the setup. Unfortunately, he wasn’t able to fully demonstrate its potential — the low-quality mirror didn’t cooperate with his homebrew interferometer. He was, however, able to use a dial indicator to show deflection of the mirror in the 2- to 3-micron range by heating the array. That alone is pretty cool, especially given the dirt cheap nature of the build.

As for practical uses, don’t get too excited. As [Zach] points out, thermal systems like this will probably never be as fast as MEMS or piezoelectric actuators, and many use cases for adaptive optics really don’t react well to added heat. But changing the shape of a mirror with air pressure is another thing.

Continue reading “A Tiny Forest Of Resistors Makes For Quick And Dirty Adaptive Optics”